
How to Hang a Heavy Picture on Plasterboard Securely
Assessing Frame Weight and Plasterboard Wall Types
Hanging a heavy picture securely on plasterboard requires anchoring directly into timber wall studs or installing heavy-duty hollow-wall cavity anchors with dual D-rings to distribute the load across the gypsum board. Standard picture hooks or single nails pull out easily because hollow plasterboard lacks structural tensile strength on its own.
Accurate Frame Weighing and Hardware Selection
Never estimate the weight of a heavy picture by lifting it. Glass, solid wood mouldings, and structural backing add substantial mass that quickly exceeds what standard picture hooks can carry.
To determine the exact weight:
- Step onto a digital bathroom scale without the frame and record your weight.
- Pick up the framed artwork and step back onto the scale.
- Subtract your initial weight from the combined total to find the frame’s net mass.
For heavy frames, the hanging hardware attached to the rear is just as important as the wall anchor. Single picture wires are a common failure point; they stretch, exert concentrated inward tension on the side rails of the frame, and concentrate the entire load on a single pivot point. Following safe frame hanging practices means installing heavy-duty D-rings directly to the left and right stiles of the frame. Two independent D-rings split the load evenly across two separate wall fasteners, preventing the frame from tilting and keeping the artwork flush against the plasterboard.
Identifying Plasterboard vs Masonry and Lath
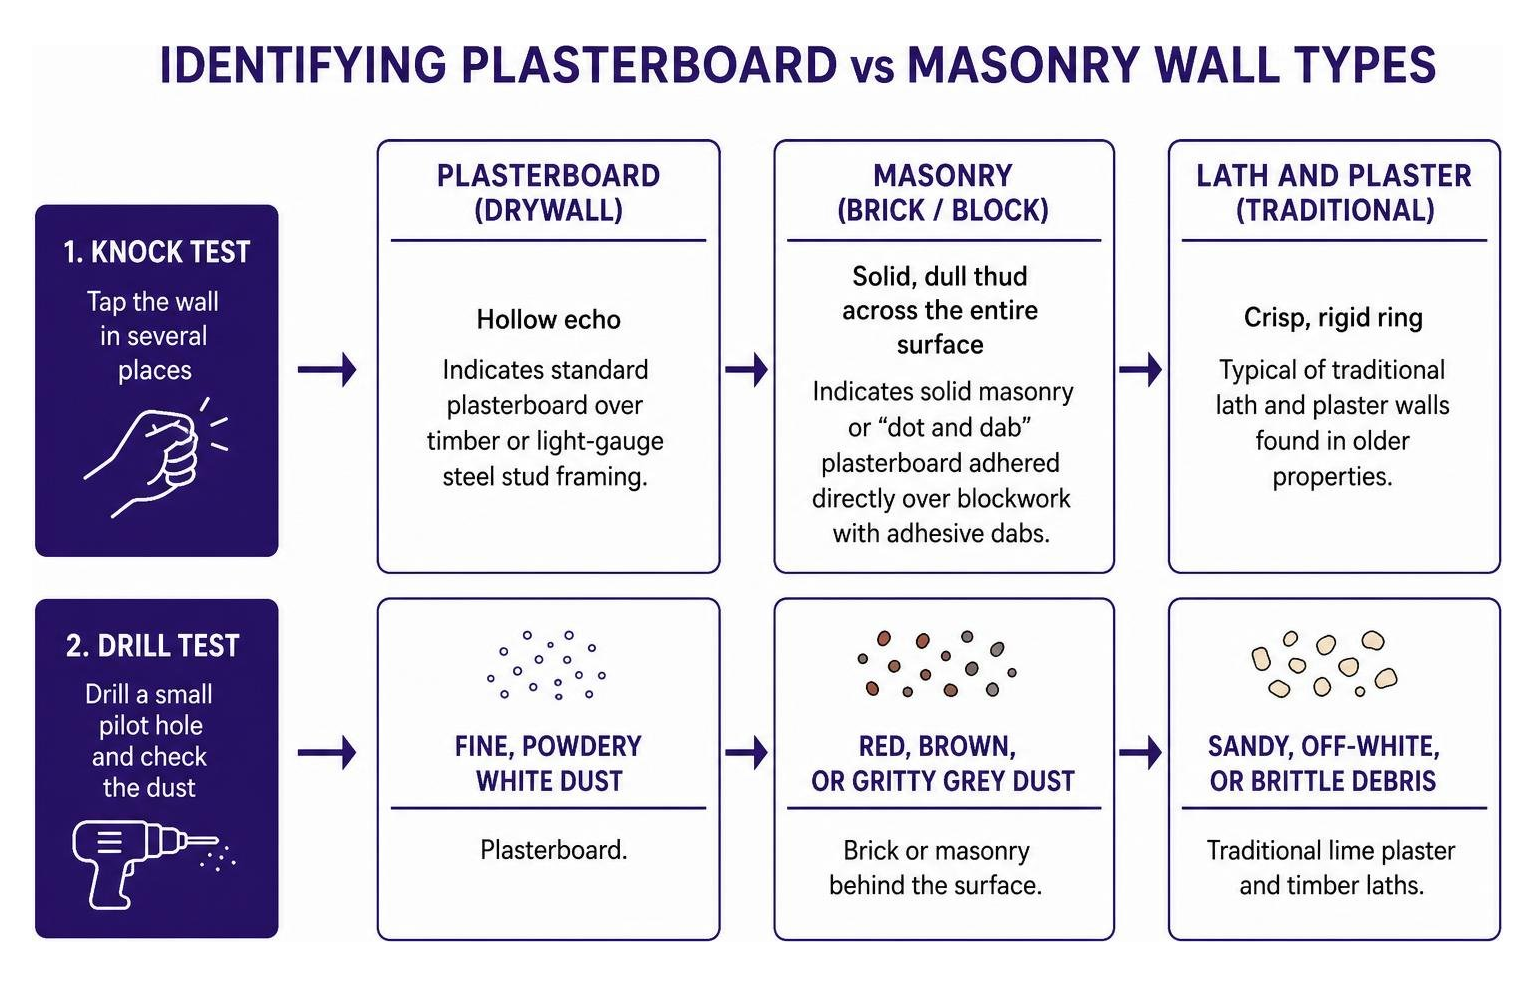
Before selecting fixings, verify your wall substrate. Plasterboard (drywall) consists of a compressed gypsum powder core encased between paper liners.
Perform a simple knock test across the wall:
- Hollow echo: Indicates standard plasterboard over timber or light-gauge steel stud framing.
- Solid, dull thud across the entire surface: Indicates solid masonry (brick or concrete block) or “dot and dab” plasterboard adhered directly over blockwork with adhesive dabs.
- Crisp, rigid ring: Typical of traditional lath and plaster walls found in older properties.
When drilling a small pilot hole, the dust colour provides clear confirmation:
- Fine, powdery white dust: Plasterboard.
- Red, brown, or gritty grey dust: Brick or masonry behind the surface.
- Sandy, off-white, or brittle debris: Traditional lime plaster and timber laths.
Plasterboard Fixings for Heavy Artwork and Their Weight Limits
Choosing the Right Plasterboard Fixing for Heavy Loads
Plasterboard provides very little tensile strength on its own. Driving an ordinary wood screw directly into hollow plasterboard crushes the brittle gypsum core, allowing the screw to pull out under minimal downward force.
| Fixing Type | Safe Working Load (Shear) | Best Application | Wall Substrate |
|---|---|---|---|
| X-Hook / Angled Pin | Up to 5 kg (11 lb) | Small prints, light frames | Plasterboard / Drywall |
| Adhesive Strips | Up to 6.5 kg (14 lb) | Lightweight flat art | Smooth, painted drywall |
| Self-Drilling Nylon Plug | 10 kg – 20 kg (22 – 44 lb) | Medium prints, small mirrors | 1/2 in (12.5mm) Drywall |
| Spring Toggle Bolt | 15 kg – 25 kg (33 – 55 lb) | Medium to heavy frames | Hollow drywall cavities |
| Strap Toggle (Steel Channel) | 20 kg – 45 kg (44 – 100 lb) | Heavy artwork, wide frames | Hollow drywall cavities |
| Wood Screw into Stud | 50 kg – 100+ kg (110 – 220+ lb) | Very heavy art, large mirrors | Timber Stud behind board |
For lightweight decor, an X-hook with downward-angled steel pins is sufficient. For medium items, self-drilling anchors or spring toggles clamp behind the hollow cavity. However, as frames increase in size, the failure mode changes. Fasteners fail when the downward shear force or outward leverage exceeds the crushing strength of the gypsum board around the anchor collar.
Specialty Cavity Fixings for Ultra-Heavy Pictures
When hanging exceptionally heavy artwork where timber studs are unavailable, high-capacity cavity anchors are required.
Downward vertical load (shear) pulls parallel to the wall, whereas a frame projecting outward exerts pull-out tension on the upper fixing point. Standard cavity plugs often fail because their small surface area cuts through the board like a knife under high loads.
We engineer high-capacity solutions for these demanding hollow-wall situations. For ultra-heavy frames on drywall without stud access, Ghostud Drywall Anchors distribute load across a broad footprint behind the wall. The GS1 anchor installs with a 1-inch hole saw and supports up to 250 lb shear in 1/2 in or 5/8 in drywall. For maximum capacity, the GS2 anchor installs using a 2-inch hole saw to provide up to 1,000 lb shear in 1/2 in or 5/8 in drywall. Both models are manufactured in the USA from 100% recycled plastic.
Important note on substrate compatibility: If your wall is lath and plaster, concrete, brick, or dot-and-dab masonry, do not use drywall-specific cavity anchors. Instead, use masonry plugs and long screws driven into the solid substrate behind the finish.
Step-by-Step Guide: How to Hang a Heavy Picture on Plasterboard
Step 1: Finding Timber Studs or Planning Cavity Fixings
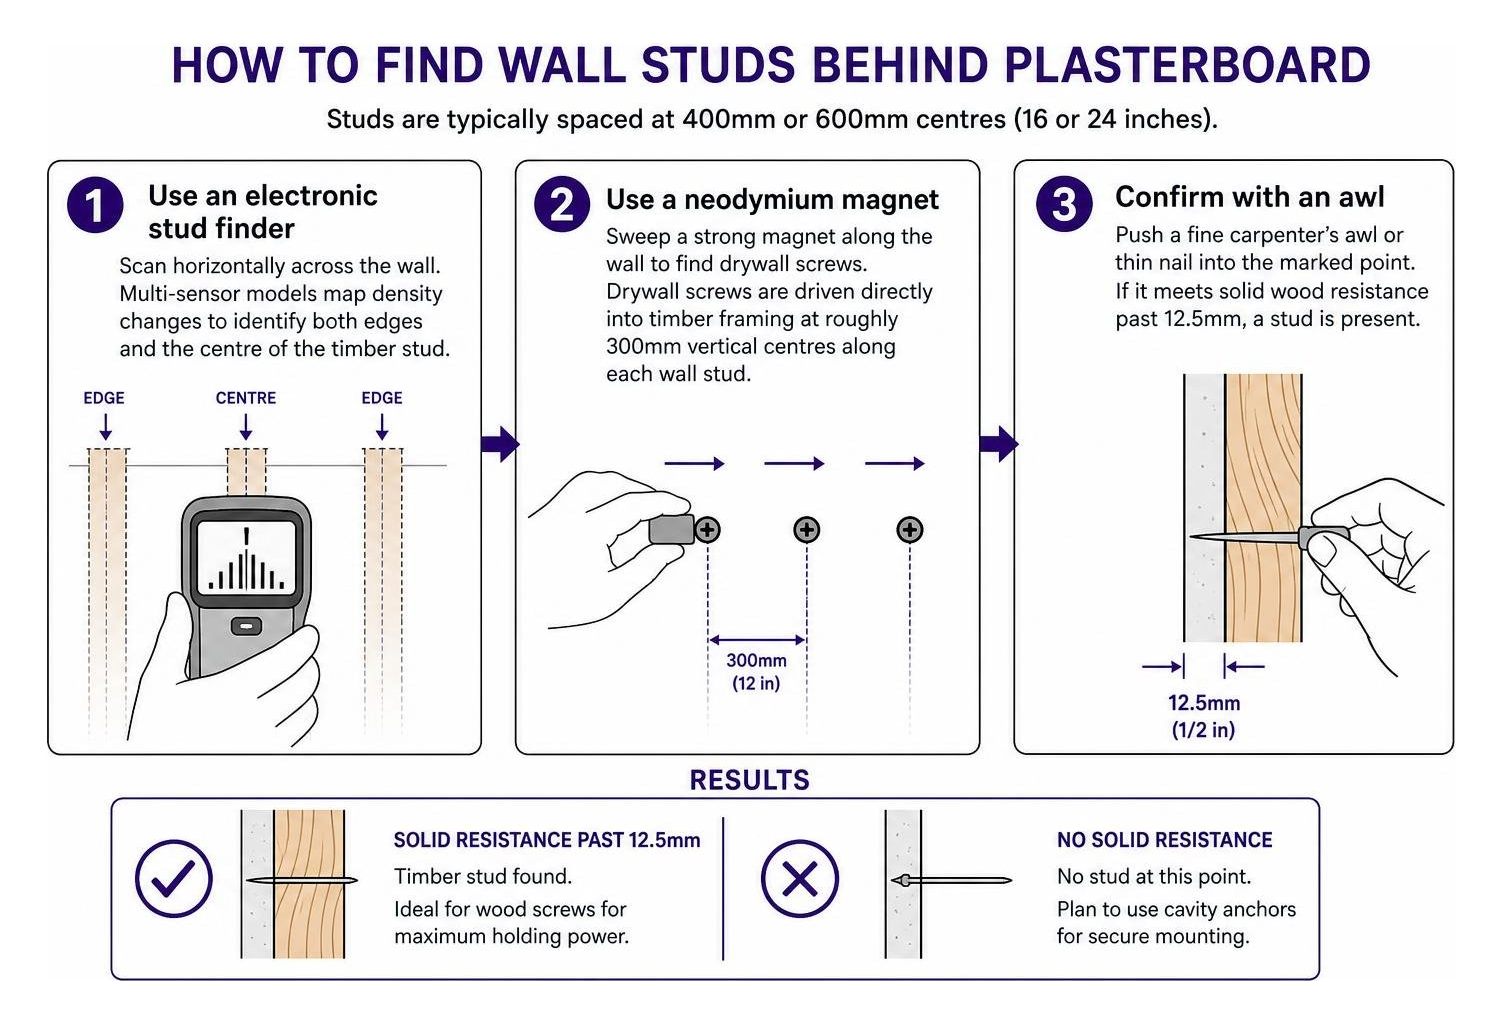
Finding a solid timber stud is the strongest method for hanging heavy items. Studs are typically spaced at 400mm or 600mm centres (16 or 24 inches).
To locate a stud:
- Use an electronic stud finder: Scan horizontally across the wall. Multi-sensor models map density changes to identify both edges and the centre of the timber stud.
- Use a neodymium magnet: Sweep a strong magnet along the wall to find drywall screws. Drywall screws are driven directly into timber framing at roughly 300mm vertical centres along each wall stud.
- Confirm with an awl: Push a fine carpenter’s awl or thin nail into the marked point. If it meets solid wood resistance past 12.5mm, a stud is present.
If your layout requires the picture to hang where no stud exists, mark your positions for hollow-wall cavity anchors. You can review advanced stud finding techniques to ensure your layout scans are accurate.
Step 2: Measuring, Marking, and Planning How to Hang a Heavy Picture on Plasterboard at Eye Level
The standard height for displaying artwork in galleries and residential spaces is eye level, defined as 57 to 60 inches (145 to 152 cm) from the floor to the centre of the artwork.
- Calculate the Centre Line: Measure the full height of your frame and divide by two. Add this number to your target eye-level height (e.g., 58 inches). Mark this overall top-edge height lightly on the wall with a pencil.
- Measure Hardware Drop: Measure the exact vertical distance from the top edge of the frame down to the mounting points of the rear D-rings.
- Transfer Fixing Marks: Measure down from your top wall mark by the hardware drop distance. Use a 600mm (24-inch) spirit level to draw a perfectly level horizontal reference line across the wall.
- Mark Fixing Spacing: Measure the horizontal distance between the two D-rings on your frame. Transfer this distance onto the level line on your wall, keeping the marks equidistant from the centre.
Step 3: Drilling and Installation Sequence for How to Hang a Heavy Picture on Plasterboard
Before drilling, scan the marked points with a digital detector to check for hidden electrical cables or copper pipes.
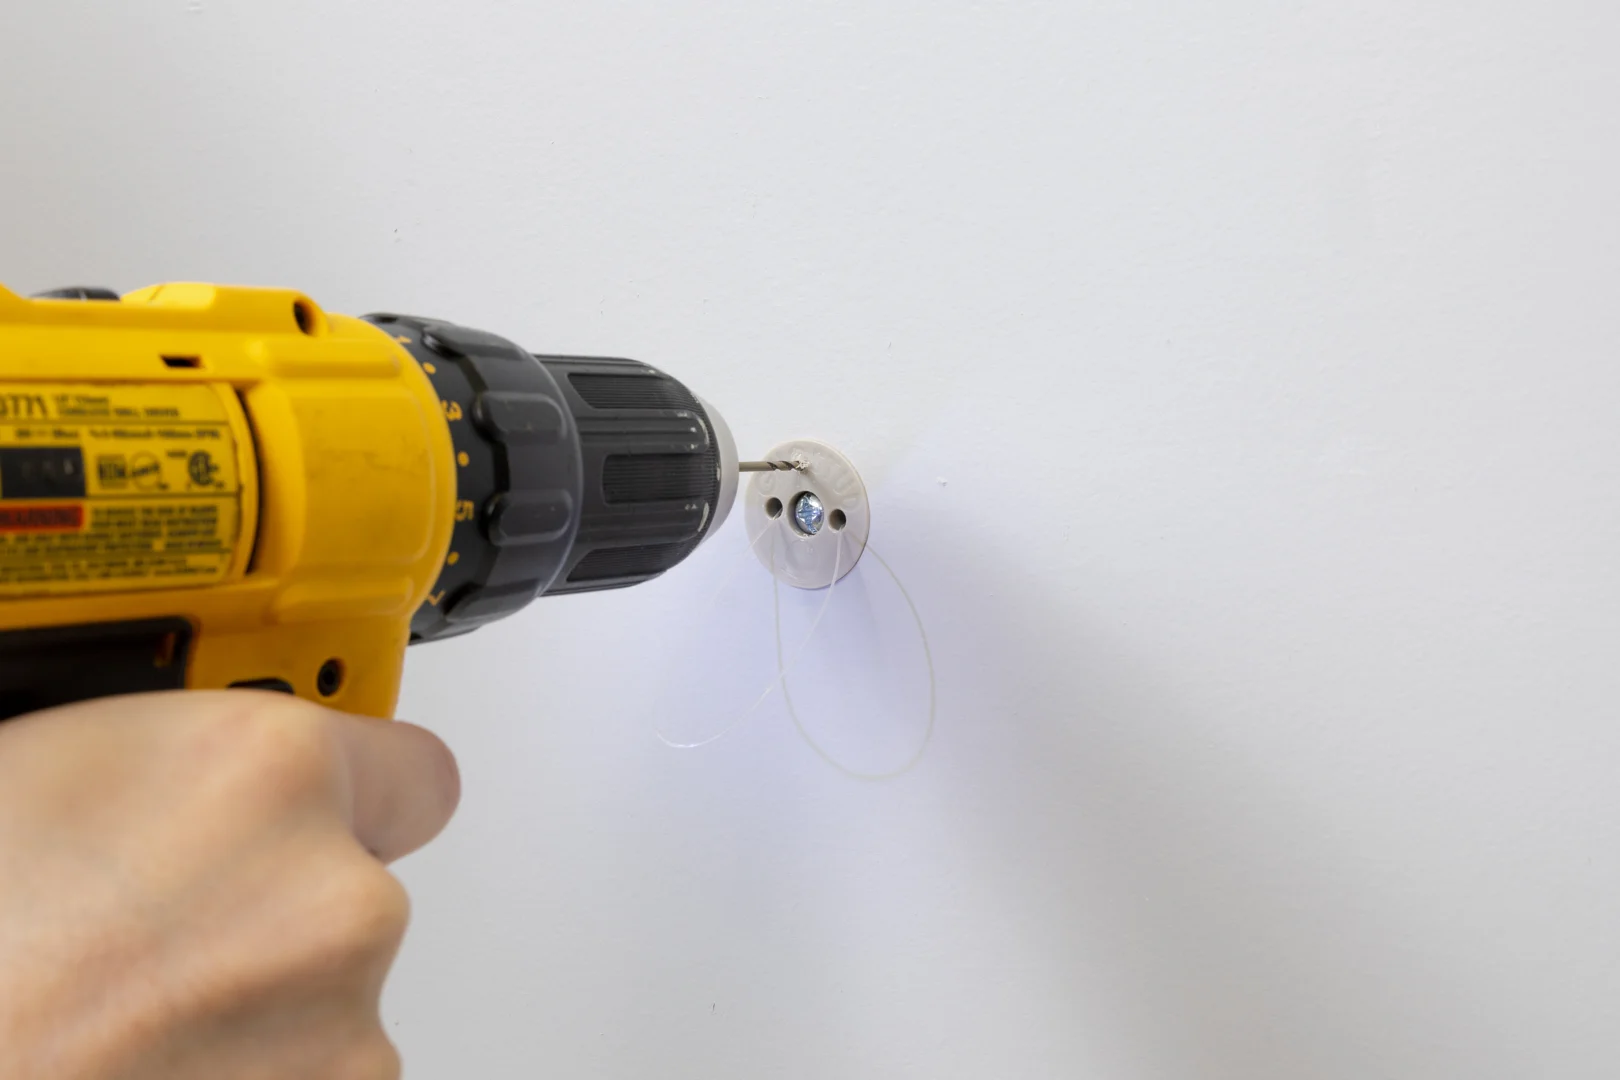
- Drill the Mounting Holes: Use the drill bit or hole saw specified by the anchor manufacturer. Hold a vacuum nozzle directly underneath the drill bit to collect falling gypsum dust.
- Insert the Anchors: Push or drive the anchor flush into the plasterboard. For high-capacity drywall anchors, refer to the step-by-step install guide to ensure the rear locking mechanism fully engages against the back face of the board.
- Drive the Mounting Screws: Insert the screws into the anchors, leaving 5mm to 8mm of the screw head protruding so the D-rings can seat fully.
- Mount and Level the Artwork: With a helper, lift the frame and hook the D-rings over the screws. Place your spirit level on top of the frame to make fine adjustments.
- Apply Protective Pads: Place self-adhesive felt or rubber bumper pads on the bottom corners of the frame. This stops the frame from scuffing the paint and prevents it from shifting off-level.
Frequently Asked Questions About Hanging Heavy Pictures on Plasterboard
How much weight can plasterboard hold without a stud?
A standard screw driven into plasterboard with no anchor holds only 1 to 2 kg before the core strips. Standard nylon self-drill plugs handle 10 kg to 20 kg of shear load. Metal toggle bolts and strap toggles carry between 15 kg and 45 kg per fixing point in sound 1/2-inch (12.5mm) board. When using dual high-capacity anchors, hollow drywall can support significantly heavier loads, provided the weight is split across multiple points and the board is structurally sound.
Why should you use D-rings instead of picture wire for heavy frames?
Picture wire is prone to stretching, metal fatigue, and sudden snapping under heavy loads. Wire also creates a single central suspension point that acts as a pendulum, making the frame tilt forward at the top and slide off-level. Dual D-rings transfer downward force directly into two independent wall fixings, keeping the frame flush and halving the load carried by each anchor.
What tools are essential to hang heavy art on plasterboard?
The essential tools include:
- Digital bathroom scale (for frame weighing)
- Electronic multi-sensor stud finder or magnetic locator
- Multi-purpose digital detector (for cables and pipes)
- Tape measure and sharp pencil
- 600mm (24-inch) box beam spirit level
- Variable-speed power drill with matching drill bits or hole saws
- Heavy-duty hollow wall anchors or 50mm x 5mm wood screws (for studs)
- Manual screwdriver for fine torque control
Conclusion
Hanging heavy pictures securely on plasterboard requires matching your hardware to the actual weight of the frame and the wall structure. Always anchor directly into timber studs whenever your room layout aligns with framing. When studs are unavailable, rely on mechanical cavity fixings that distribute the load across the rear of the drywall rather than friction plugs that crush the gypsum core.
For hanging wide decorative pieces and heavy mirrors without studs, read our complete guide to hanging heavy mirrors to plan safe, flush, and durable wall installations.