
The Cheapest Ways to Install a TV Without Studs
Most Affordable Methods for Hanging a TV on Drywall Without Studs
When you mount a flat-screen television directly to drywall, standard plastic expansion plugs will fail. Plastic anchors rely on friction against the gypsum core, which quickly crushes under downward weight. Instead, safe studless installations rely on mechanical interlock behind the drywall or widespread load distribution across the front face.
| Mounting Method | Hardware Cost | Typical Drywall Shear Rating | Wall Hole Requirement | Best Use Case |
|---|---|---|---|---|
| Angled-Nail Cleats | $15 – $35 | Up to 99–110 lb (system total) | Tiny nail pinholes | Lightweight TVs (under 55″) flush to wall |
| Snap Toggles | $10 – $20 | 80–150 lb per anchor (in 1/2″ drywall) | 1/2-inch drilled holes | Fixed or shallow tilting mounts (32″–65″) |
| Plywood Backer Plate | $15 – $30 | 200+ lb (multi-point distribution) | Varies (toggle or screw holes) | Spanning off-center studs or wide TV mounts |
Let’s examine the three most common budget-friendly hardware options for mounting securely into hollow gypsum board.
Angled-Nail Drywall Cleat Brackets
Picture-hanging style cleat brackets use an array of 20 to 30 hardened steel nails driven through an aluminum or steel wall track at a 45-degree downward angle. This technique—known in carpentry as toenailing—harnesses the gypsum board’s compressive strength.
Because the bracket hugs the wall with a slim 1.1-inch profile, the TV exerts almost pure downward shear force rather than outward tension. These kits are affordable, require only a hammer, and leave minimal damage upon removal. However, they only support fixed installations for displays within their specific manufacturer limits (typically under 100 pounds).
Heavy-Duty Snap Toggles and Steel Channels
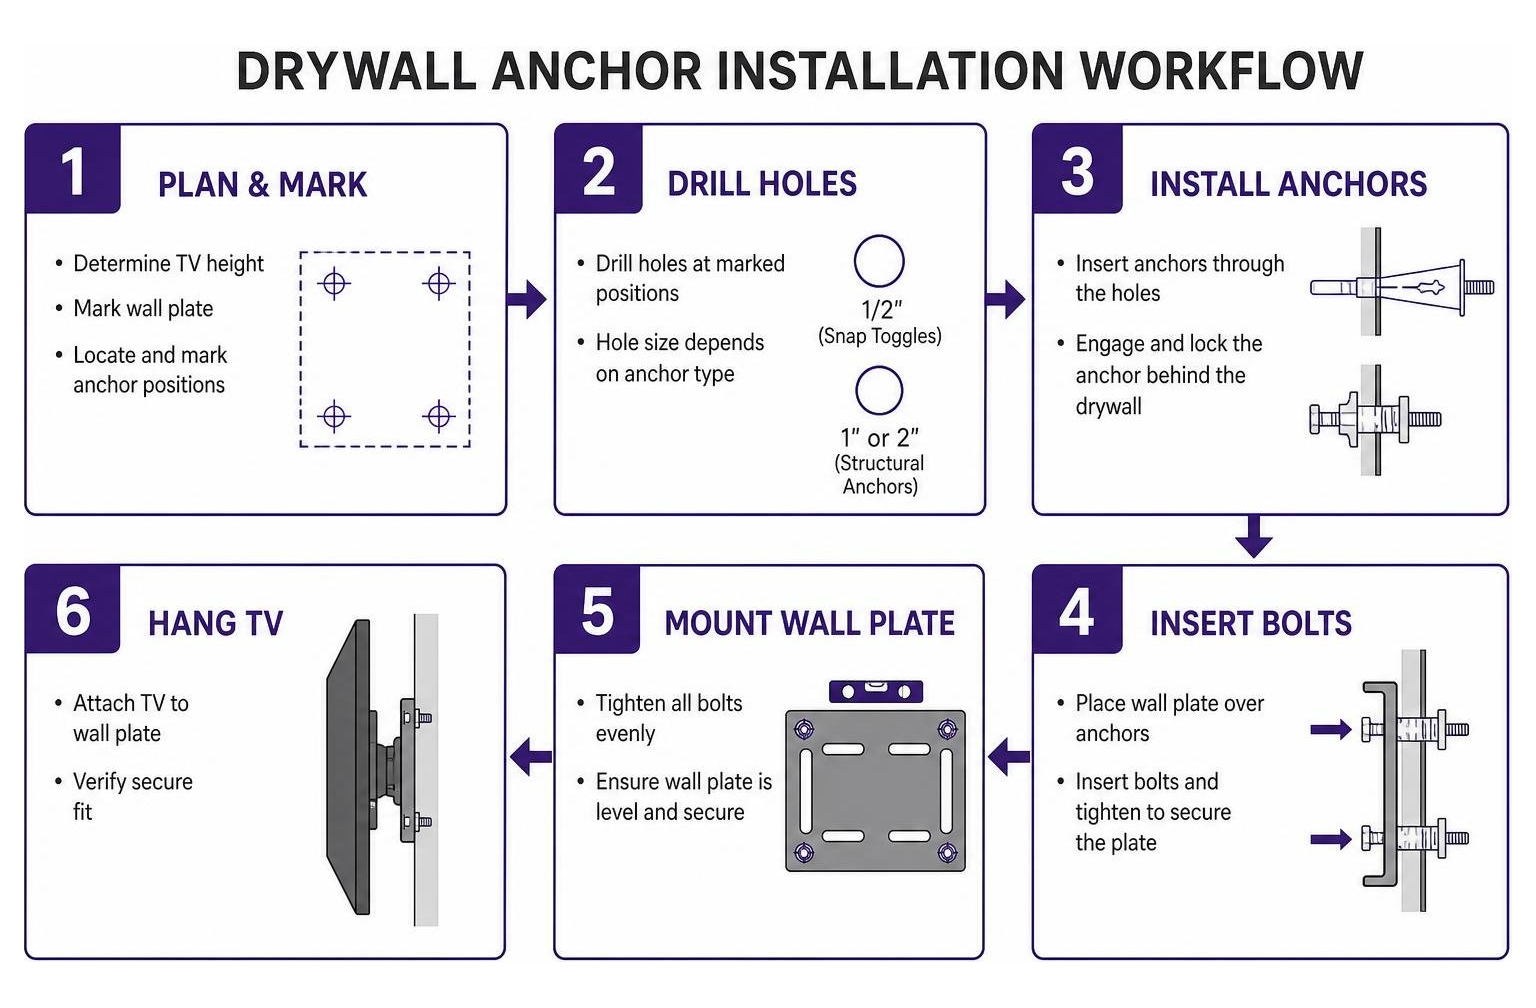
Solid metal strap toggles (such as SNAPTOGGLE fasteners) utilize a solid zinc-plated or stainless steel channel that slides flat through a 1/2-inch pre-drilled hole. Once behind the wall, pulling the plastic guide straps pivots the steel channel flush against the rear paper face of the drywall.
A sliding plastic collar locks the assembly firmly to the front face before you even insert the bolt. This allows you to hand-thread machine screws through your mounting bracket without losing the anchor inside the wall cavity. You can learn more about mechanical toggle limits in this guide on safe studless mounting methods. Strap toggles require at least 1-7/8 inches of hollow cavity clearance behind the gypsum board to rotate freely into place.
Plywood Backer Plates for Wide Spans
If you have an off-center wood stud or an extra-large TV mount, a 1/2-inch or 3/4-inch piece of hardwood plywood makes an effective load spreader. Cut the plywood slightly smaller than the TV perimeter, paint it to match your wall color, and secure it across the wall using multiple toggle bolts or direct screws into whichever framing members are accessible.
Once secured, you bolt the metal TV wall plate directly to the plywood backer using heavy wood screws and flat washers. This spreads the downward load across several square feet of drywall.
Assessing Your Wall Construction and Hardware Limits
Before picking up a drill, you must identify your substrate material. Drywall fasteners are engineered specifically for gypsum wallboard and will fail catastrophically if installed in incompatible materials.
Identifying Drywall Composition and Hidden Obstacles
Standard residential construction in North America uses 1/2-inch drywall on interior partition walls, while fire-rated assemblies and ceilings commonly use 5/8-inch panels. Older homes built before roughly 1940 often feature plaster over wood lath.
To determine your wall type:
- Remove a plastic outlet or switch cover plate (after turning off breaker power).
- Inspect the exposed edge of the wall cutout. A crumbly, white gypsum core wrapped in paper indicates drywall. A dense, sandy, two-layer gray material over wood strips indicates plaster and lath.
- If your wall is plaster over lath, stop: hollow drywall toggles and drywall-specific anchors are the wrong choice. Plaster will crack and crumble under concentrated clamping pressure. For plaster, you must anchor structural screws directly into the underlying wood framing or use dedicated masonry fasteners.
Always run an electronic stud scanner in deep-scan and AC-detection modes to map out plumbing lines, HVAC ducts, and live electrical wiring before drilling. If you encounter clustered electrical warnings, shift your mounting position horizontally.
Calculating TV Weight and Dynamic Cantilever Forces
Check the manufacturer specifications on the back of your screen for its exact static weight and VESA hole spacing (the millimeter distance between the four threaded rear holes, such as 200x200mm or 400x400mm).
Modern flat-screens between 43 and 65 inches generally weigh between 25 and 55 pounds. When selecting hardware, follow the industrial 4x safety factor rule: your combined anchor assembly should have a rated capacity at least four times the combined weight of the TV and metal bracket.
Furthermore, never load an individual anchor beyond 75% of its rated capacity to allow for wall vibrations and minor gypsum inconsistencies. Reviewing a complete TV mounting overview helps ensure your layout accounts for proper viewing height—traditionally 42 to 48 inches from the floor to screen center.
Step-by-Step DIY Guide to Mounting Your TV
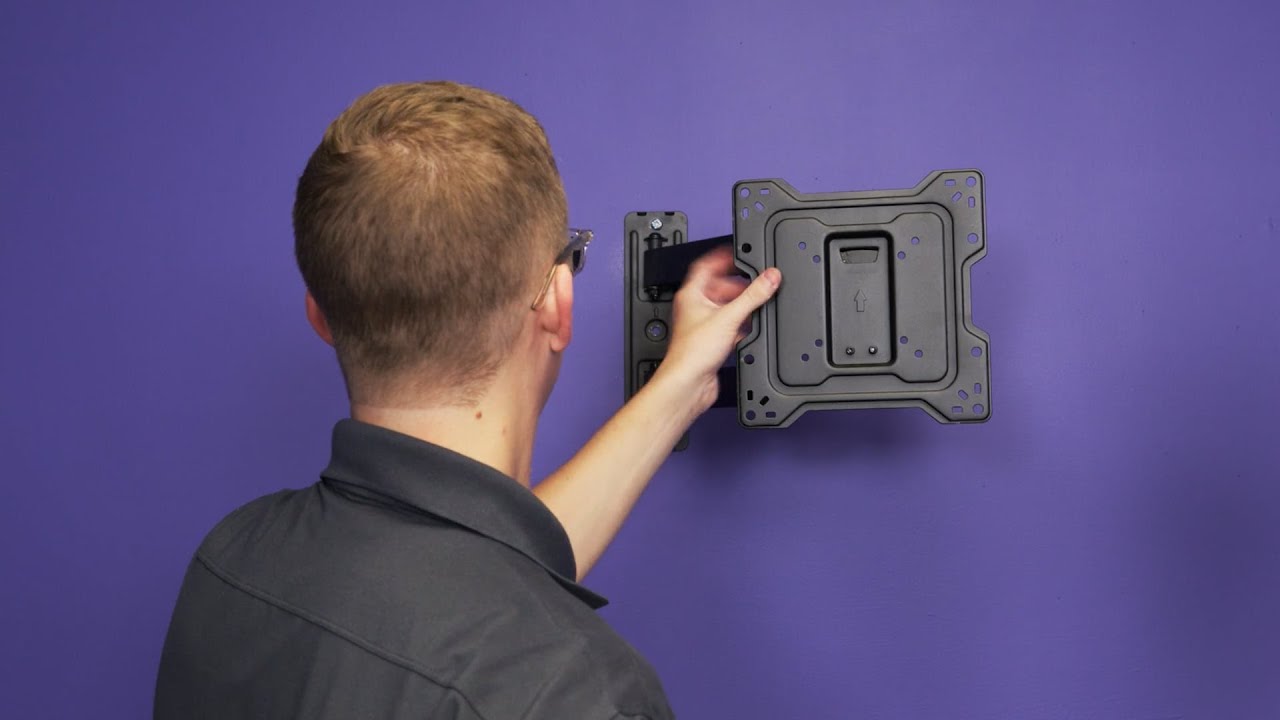
Once you verify that your wall is hollow drywall and your hardware matches your TV’s weight, follow our step-by-step Install Guide principles to secure the wall plate.
Essential Tools and Budget Hardware Preparation
Gather the following basic tools:
- Cordless drill with a 1/8-inch pilot bit and a 1/2-inch brad-point bit
- Torpedo or 24-inch bubble level
- Painter’s tape and pencil
- Heavy-duty flat washers and machine bolts
- Screwdriver or socket wrench
- Shop vacuum to collect gypsum dust
Step-by-Step Process for Hanging a TV on Drywall Without Studs
- Mark the Bracket Position: Hold the TV wall plate against the wall at your calculated height. Place a bubble level across the top edge. Mark the exact hole locations through the bracket slots using a pencil.
- Drill Pilot Test Holes: Drill a tiny 1/8-inch hole at each mark. If the drill bit hits solid wood, you have found a stud; switch to a standard wood lag bolt. If the bit punches into open air, proceed with hollow drywall hardware.
- Drill Anchor Holes: Step up to a 1/2-inch drill bit. Drill perpendicular (at a 90-degree angle) through the drywall. Vacuum away loose gypsum powder around the holes.
- Insert and Seat Toggles: Push the metal channel of your snap toggle through the hole until it clears the rear drywall face. Pull the plastic straps firmly toward you until the metal channel seats flat against the back of the drywall. Slide the front plastic collar flush against the outer wall face, then snap off the excess plastic straps.
- Fasten the Wall Plate: Align your mounting bracket over the holes. Thread the machine bolts with wide washers through the bracket into each toggle channel.
- Tighten in an Alternating Pattern: Snug the bolts down using a hand wrench. Tighten in an alternating diagonal pattern (top-left, bottom-right, top-right, bottom-left) to distribute clamping force evenly. Do not over-torque with an impact driver, which can crush the interior gypsum core.
Cable Management and Pre-Hang Load Testing
Before lifting your television onto the wall bracket, conduct a mandatory physical stress test. Grip the secured metal wall plate with both hands and apply firm, steady downward, outward, and lateral pressure for 30 seconds. If the wall plate flexes, creeks, or compresses into the drywall, remove the plate immediately and inspect the wall for gypsum crushing.
To manage power and HDMI cables cleanly without violating building codes, install paintable surface raceway channels down the wall to your entertainment console. Never route flexible high-voltage television power cords through internal drywall cavities, as standard appliance cords are not fire-rated for in-wall use.
Common Pitfalls and Safety Limitations to Avoid
Hanging heavy electronics on drywall requires strict adherence to physical load limitations. Understanding how gypsum wallboard fails prevents expensive damage.
Why Full-Motion Articulating Mounts Fail on Drywall
The most dangerous mistake in DIY TV mounting is installing a full-motion or articulating swivel mount on hollow drywall without studs.
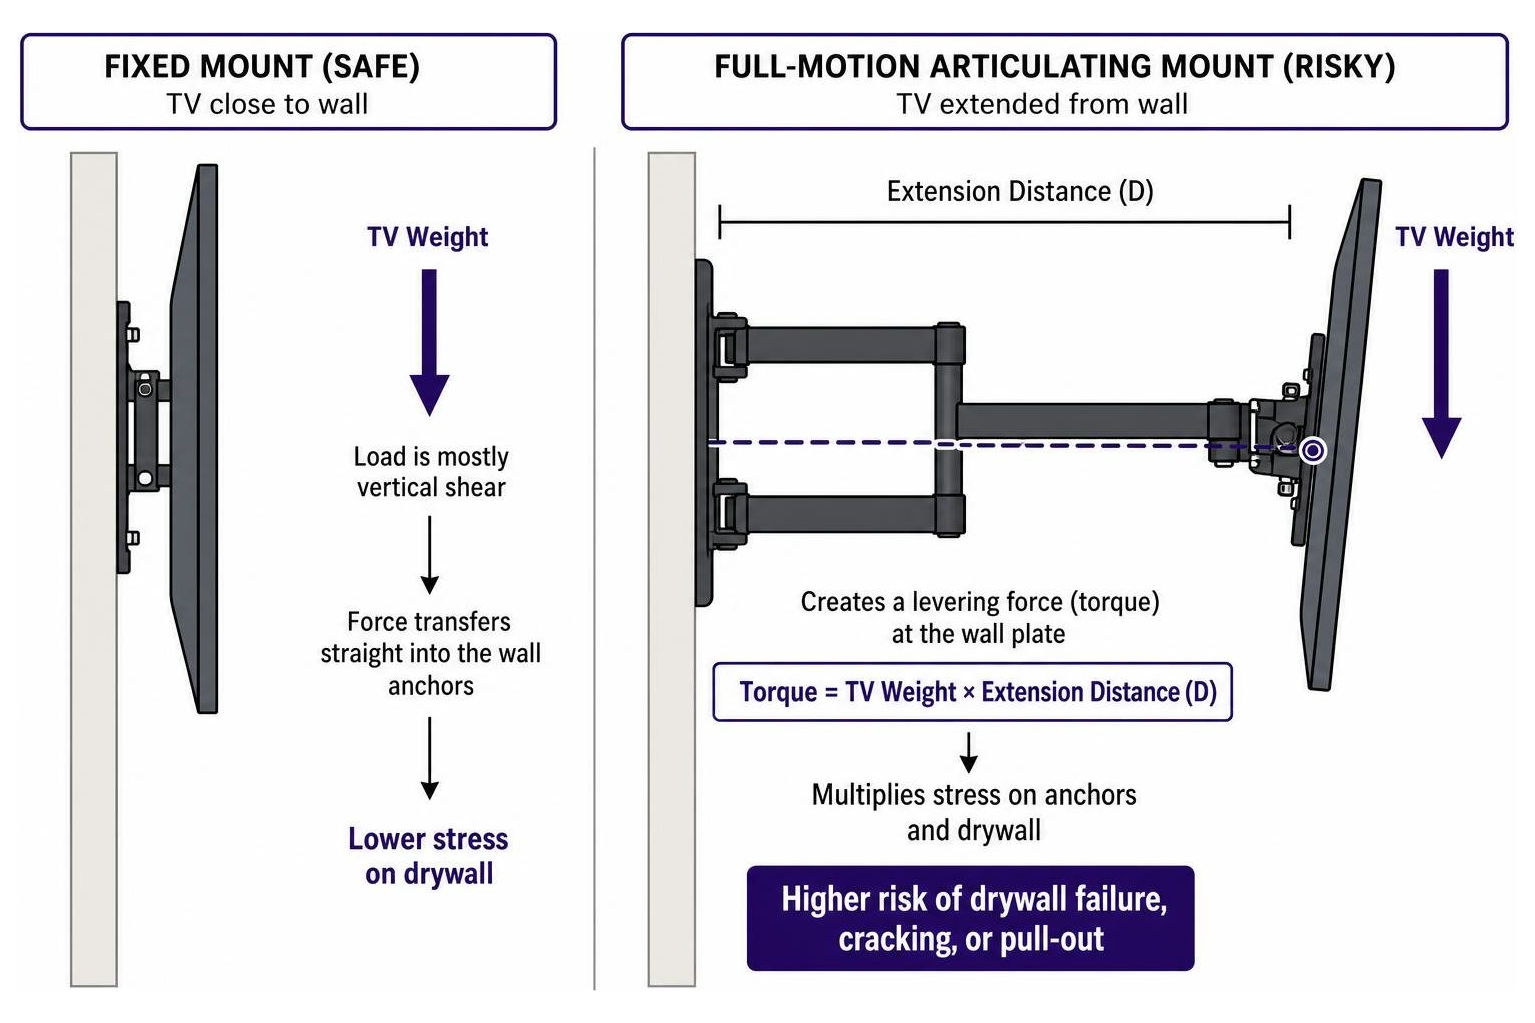
When a 50-pound TV sits flush against the wall on a fixed mount, the hardware experiences almost pure vertical shear load. Gypsum board offers good resistance to shear force when clamped by wide washers.
However, when you pull that same 50-pound TV 14 to 20 inches away from the wall on an articulating arm, the bracket acts as a mechanical lever. The screen creates a rotational moment (torque) that converts static downward weight into aggressive outward pull-out tension on the upper wall anchors.
Because drywall has low internal tensile strength, dynamic movement causes the upper anchors to micro-tear the interior gypsum paper. Over several months of adjusting the screen angle, the anchors will pull clean out of the wallboard.
Critical Safety Rules for Hanging a TV on Drywall Without Studs
- Stick to Fixed or Micro-Tilt Mounts: Keep the display within 1.5 inches of the drywall to eliminate cantilever pull-out leverage.
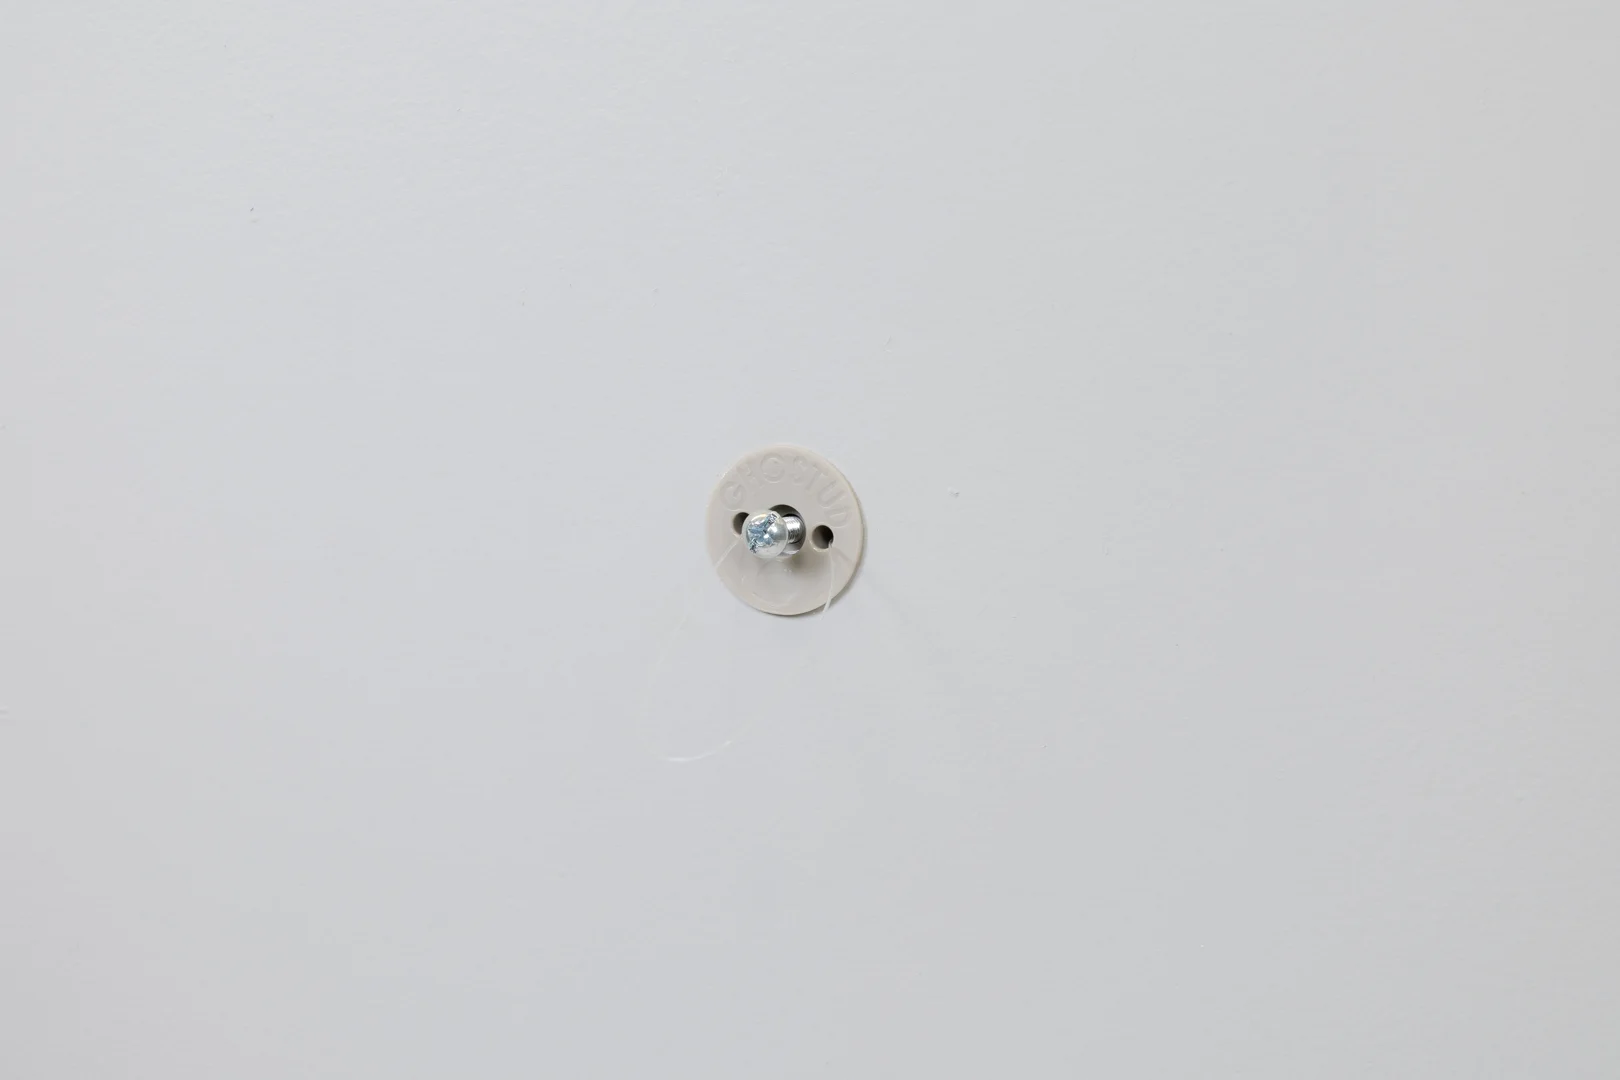
- Never Use GHOSTUD on Incompatible Substrates: Our high-capacity GS1 (up to 250 lb in 1/2 in or 5/8 in drywall) and GS2 (up to 1,000 lb shear in 1/2 in or 5/8 in drywall) anchors are engineered strictly for drywall. Never attempt to install them in plaster, masonry, concrete, brick, tile, or metal studs.
- Observe Application Limits: Never use drywall anchors for grab bars, handrails, ADA safety rails, or any application meant to support human body weight.
- Avoid Over-Tightening: Compressing drywall past its elastic limit pulverizes the gypsum core, reducing holding power to near zero.
- Check Fasteners Biannually: Drywall naturally expands and contracts with seasonal humidity shifts. Check your bracket tightness every six months to confirm the bolts remain snug.
Frequently Asked Questions About Studless TV Mounting
Can drywall alone hold a 65-inch flat-screen TV?
Yes, provided the TV is mounted on a fixed, low-profile bracket and its total static weight stays under the working capacity of your load-distributing anchors. A modern 65-inch LED TV typically weighs between 35 and 55 pounds. Using four heavy-duty snap toggles or dedicated drywall anchor plates easily accommodates this static shear load in standard 1/2-inch drywall.
How do you hide wires without cutting large drywall openings?
The cheapest, safest method is using adhesive-backed, paintable surface cord raceways. These plastic channels mount directly over the drywall, enclosing your power and HDMI cords, and can be painted the exact color of your room.
What should you do if a stud finder gives false readings?
Electronic stud finders often misread textured surfaces, plumbing vents, or double drywall layers. Use a strong neodymium magnetic stud finder to locate the vertical lines of drywall screws driven into the studs during construction. Alternatively, measure outward in 16-inch or 24-inch standard increments from a room corner or electrical outlet box.
Conclusion
Mounting a TV without wood framing is an achievable DIY project when you understand the mechanical properties of gypsum wallboard. By sticking to a low-profile fixed mount, verifying your wall composition, and selecting heavy-duty mechanical toggles with a 4x safety factor, you can achieve a secure, professional setup without professional labor costs.
For projects requiring maximum load capacity in standard 1/2-inch or 5/8-inch drywall, explore our patented, load-distributed mounting a tv without studs solutions to secure your home entertainment hardware with confidence.