
How to Use a Wall Anchor Tool: 3 Simple Methods for Secure Mounting
Understanding Wall Anchor Setting Tools and Compatible Fasteners
To use a wall anchor tool, drill a pilot hole matching the sleeve diameter, push the anchor into the wall until the flange sits flush, back the screw out 3 to 4 turns, slide the slotted nose of the setting tool under the screw head, and squeeze the lever handles until you feel firm mechanical resistance. This linear pull collapses the slotted sleeve into four metal wings clamping against the rear drywall face.
A wall anchor setting tool (often called anchor setting pliers or a molly setter) operates on mandrel retraction, avoiding the friction-related problems of manual screwdriver installation. When driving a molly bolt with a screwdriver, turning force (torque) can cause the entire anchor body to spin. If the anti-rotation teeth slip, the spinning metal grinds away the gypsum core and destroys holding power.
For broader general hardware contexts, trade resources like this How to Use Drywall Anchors: Easy Installation Guide illustrate standard manual fasteners. However, dedicated setting tools work specifically with expandable metal cavity anchors:
- Standard Molly Bolts / Hollow Wall Anchors: Steel sleeves with pre-cut expansion slots and integrated anti-rotation teeth designed for hollow cavities.
- Drive-Type Hollow Wall Anchors: Steel cavity anchors with pointed tips that tap directly into gypsum board without pre-drilling.
- Plastic Toggle Locking Keys: Simple push-in key tools packaged with winged plastic toggle anchors to pop the internal wings open behind the board before driving the screw.

Sizing Anchors by Substrate and Wall Thickness
Hollow wall anchors are engineered around specific grip ranges—the distance between the front flange and the collapsing wings. Standard residential interior drywall is typically 1/2-inch thick, while fire-rated walls and commercial partitions often use 5/8-inch drywall. If you install an anchor meant for 1/8-inch paneling into 5/8-inch drywall, the wings will attempt to expand inside the gypsum core rather than behind it, fracturing the board and failing to hold.
| Anchor Size / Designation | Compatible Wallboard Thickness | Required Drill Bit Diameter | Typical Fastener Shear Capacity (Drywall) |
|---|---|---|---|
| Extra Short (XS / 1/8″ Mini) | 1/8 in to 1/4 in (Panels/Doors) | 1/4 in (6 mm) | Up to 15 lb shear |
| Short (S / 1/8″ Regular) | 3/8 in to 1/2 in Drywall | 5/16 in (8 mm) | Up to 30 lb shear (per pair) |
| Medium (M / 3/16″ Standard) | 1/2 in to 5/8 in Drywall | 3/8 in (10 mm) | Up to 50 lb shear (per pair) |
| Long (L / 1/4″ Heavy-Duty) | 5/8 in to 1-1/4 in (Double Board) | 7/16 in to 1/2 in (12 mm) | Up to 75 lb shear (per pair) |
Make sure the wall cavity behind the drywall provides at least 1.5 to 2 inches of clear depth. If insulation, ducting, or framing blocks the anchor body from extending fully into the wall cavity, the sleeve cannot expand properly.
Step-by-Step Guide: How to Use a Wall Anchor Tool for Hollow Wall Anchors
Getting clean, repeatable results with an anchor setting tool comes down to steady alignment, accurate hole dimensions, and even lever compression.
- Mark the Mounting Position: Hold your fixture or bracket against the wall and use a bubble level to align the points. Mark each hole center with a sharp pencil.
- Scan the Cavity: Run an electronic stud finder over the area. Standard residential studs sit 16 inches or 24 inches on center. Check for electrical wiring and plumbing lines before drilling.
- Drill the Pilot Hole: Select a drill bit that precisely matches the outside diameter of your hollow wall anchor sleeve. Learn proper speed and technique in this guide on how to drill for wall anchors. Drill at a strict 90-degree angle to the wall surface.
- Insert the Anchor Body: Push the anchor sleeve through the hole until the metal flange reaches the wall surface. Tap it gently with a rubber mallet until the sharp anti-rotation prongs bite flush into the paper face of the drywall.
- Back Out the Screw Slightly: If the screw came fully driven into the anchor, back it out counterclockwise 3 to 4 turns, leaving a 1/8-inch to 1/4-inch gap beneath the screw head.
- Engage the Setting Tool: Slide the slotted nose of the setting tool underneath the screw head, keeping the flat front plate pressed squarely against the anchor collar.
- Squeeze the Handles: Squeeze the tool levers smoothly. The internal mechanism pulls the screw forward while holding the flange stationary, bowing the expansion legs outward into an umbrella clamp behind the drywall. Stop as soon as you meet firm mechanical resistance.
- Remove the Screw and Hang the Fixture: Back the machine screw completely out of the expanded anchor. Position your bracket or item over the threaded hole, reinsert the machine screw, and tighten it with a handheld screwdriver until snug.
Preparation and Setup: How to Use a Wall Anchor Tool Correctly
Accurate preparation prevents wall blowouts. Always wrap a piece of painter’s tape around your drill bit 1.5 inches from the tip to act as a physical depth stop. This prevents the bit from punching aggressively through the back of the drywall and snagging concealed utility lines.
If you are working in an area where power tools are inconvenient, review our guide on how to install anchors into drywall without a drill for alternative prep techniques. When drilling through brittle plaster or tile-backed drywall, run the drill bit slowly without hammer mode to avoid cracking the surrounding surface before setting the anchor.
Compressing the Anchor Wings and Securing the Fixture
The mechanical advantage of a setting tool delivers smooth, balanced force. When the tool jaws pull the screw, the four pre-cut slots on the steel body collapse symmetrically.
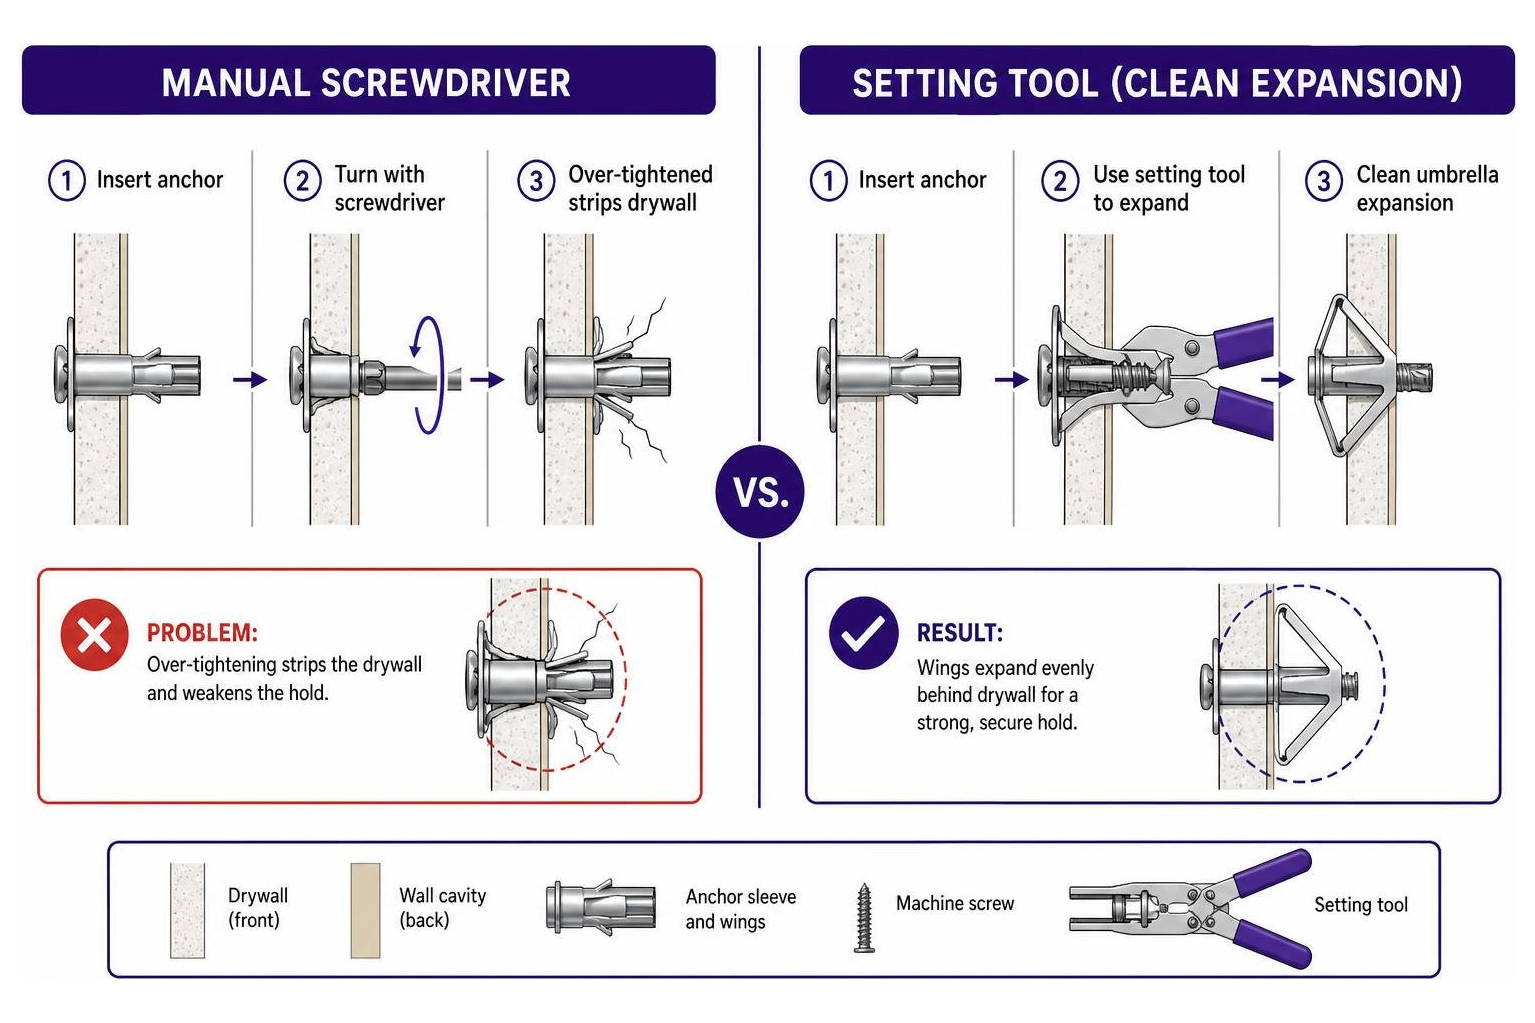
If the handles close fully without reaching a firm stop, the screw was threaded too far out initially. Release the tool, turn the screw 1 to 2 rotations deeper into the anchor sleeve, re-engage the tool jaws, and squeeze again until solid resistance confirms that the wings have clamped against the rear drywall face.
Troubleshooting and Maintenance for Wall Anchor Tools
Setting tools require basic care to prevent sliding mandrels from binding due to gypsum dust build-up. Wipe down the tool after each project, blow compressed air into the jaw assembly, and place 1 to 2 drops of light machine oil on the pivot pins and sliding tracks.
Understanding the difference between shear load and cantilever pull-out force is critical when securing wall-mounted items:
- Shear Load: Downward force acting parallel to the wall face (e.g., a flat picture frame or low-profile clock). Most published load ratings represent pure static shear.
- Cantilever Pull-Out Force: Outward rotational tension caused by items that extend away from the wall (e.g., deep floating shelves, swinging monitor arms, or projecting coat hooks). As the item extends outward, the top fastener experiences heavy leverage pulling straight out from the drywall core.
When calculating hardware requirements, apply a 2:1 safety buffer for static decor and higher safety margins for active shelving. For example, plastic ribbed anchors hold up to 10 pounds per pair in 1/2-inch drywall for lightweight items, threaded drywall anchors support up to 25 pounds in 1/2-inch drywall, standard hollow-wall anchors hold up to 30 pounds per pair in 1/2-inch drywall, and toggle bolts hold up to 50 pounds per pair in 1/2-inch drywall. In solid masonry or concrete, expansion anchors hold up to 100 pounds per pair, while self-drilling anchors support up to 150 pounds per pair in 1/2-inch drywall. For heavy structural projects, snap toggle bolts can support up to 238 lbs each in 1/2-inch drywall. Plasterboard integrity also scales with substrate layers: a single square meter of single plasterboard supports roughly 15 kg using hollow wall fixings, double plasterboard supports up to 25 kg, and triple wallboard holds up to 35 kg.
Troubleshooting Mistakes When Learning How to Use a Wall Anchor Tool
- Anchor Spins in the Hole: If the pilot hole was drilled slightly oversized, the anti-rotation teeth will not bite into the drywall. Slide the tip of a pair of needle-nose pliers or a flat pry bar under the screw head to hold the anchor flange firmly against the wall, apply the setting tool, and squeeze to expand the wings.
- Tool Handle Closes with No Resistance: The screw head gap was too wide. Turn the screw clockwise two full turns to take up slack and squeeze the tool levers again.
- Anchor Sleeve Fails to Collapse: If you strike a hidden wood stud or backer plate, the anchor body cannot expand. Back out the hardware; when a stud is present, remove the hollow wall anchor and drive a standard wood screw directly into the timber framing.
- Removing an Old Anchor: To remove an expanded molly bolt without ripping open the wall, take a 3/8-inch or 1/2-inch drill bit and drill directly into the center of the outer flange until the head breaks off. Push the remaining expanded sleeve into the wall cavity, then patch the surface using spackle and joint compound. For additional installation scenarios, consult our mounting FAQ.
Frequently Asked Questions About Wall Anchor Tools
Why should I use a setting tool instead of a screwdriver for molly bolts?
A setting tool pulls the screw linearly without twisting it. Turning a screwdriver relies on the friction of tiny teeth pressed into fragile gypsum. If those teeth slip, the anchor spins and tears a wide hole in the drywall. Setting tools eliminate cam-out, ensure uniform 4-wing expansion, reduce wrist strain, and give immediate tactile feedback when the anchor has clamped fully against the back of the wallboard.
How do I fix a hollow wall anchor that spins when using the setting tool?
If the anchor collar spins before the wings engage, wedge a flat screwdriver blade or needle-nose pliers beneath the outer collar to provide friction against the wall surface. Squeeze the tool handles until the wings begin expanding behind the board; once tension builds, the anchor locks itself into place.
How much weight can anchors hold when installed with a setting tool?
Steel molly bolts installed with a setting tool can hold up to 75 pounds per pair in shear on standard 1/2-inch or 5/8-inch drywall. However, published ratings measure static shear force directly against the wall surface. For deep shelves or items that project outward, cantilever forces significantly increase pull-out tension, requiring reduced operating loads or heavy-duty fasteners.
Conclusion
Using a dedicated wall anchor tool gives you a fast, reliable way to set metal cavity anchors in drywall without tearing up the gypsum core. Matching the anchor’s grip range to your 1/2-inch or 5/8-inch wall thickness, drilling clean perpendicular holes, and stopping the tool at firm mechanical resistance ensures your mounting points hold securely.
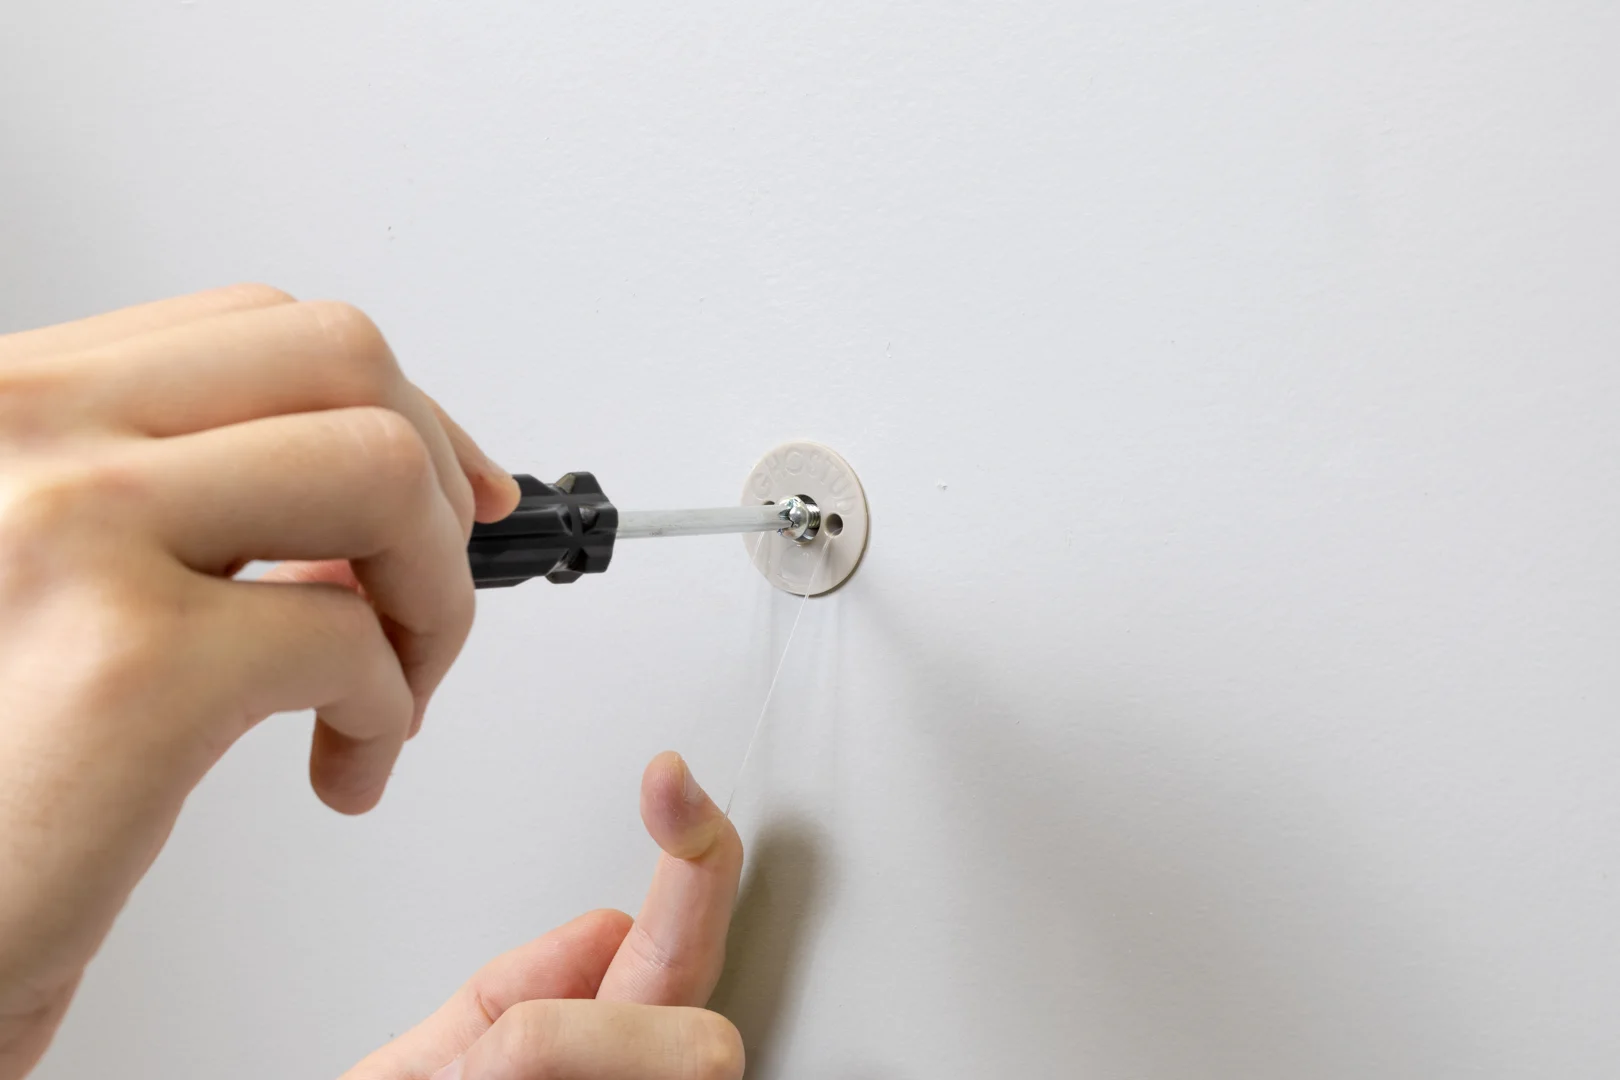
For standard shelving, artwork, and medium fixtures, properly sized molly bolts and toggle fixings provide dependable support. When your project demands higher load capacities across hollow stud bays without wood backing, we manufacture patented load-distributed drywall anchors engineered from 100% recycled plastic in the USA. Our GS1 requires a 1-inch hole saw and supports up to 250 lb in 1/2-inch or 5/8-inch drywall, while our GS2 uses a 2-inch hole saw and supports up to 1,000 lb shear in 1/2-inch or 5/8-inch drywall (both available in 2-packs and 20-packs). GHOSTUD is engineered specifically for drywall—never for masonry, tile, or plaster—and should never be used for grab bars, safety rails, or child-safety furniture anchoring. Whenever an accessible wood stud is available, always drive structural screws directly into the stud.
For detailed hardware specifications and layout steps, review our complete Install Guide.