
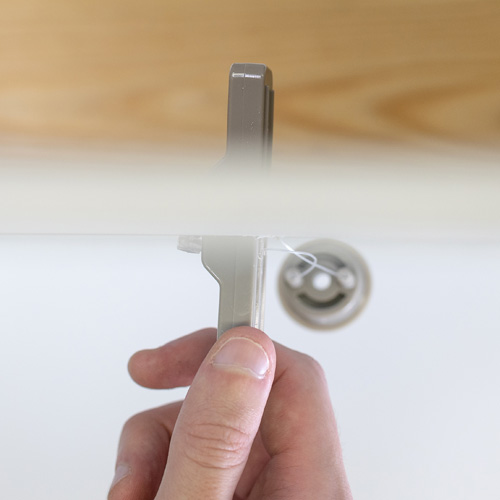
How to Mount a Floating Shelf on Drywall: 3 Methods That Guarantee Results
Mount a Floating Shelf on Drywall Without Sagging
To mount a floating shelf on drywall, first find and use wall studs whenever they line up with the bracket. Mark a level line, drill pilot holes, fasten the backplate securely, slide on the shelf, and tighten its set screws. If studs are not available, use hollow-wall hardware sized and rated for the shelf, bracket, and planned contents – not just the empty shelf.
Floating shelves place more stress on a wall than a standard shelf with visible brackets. Weight at the front edge creates leverage, which pulls the top of the mounting hardware away from the wall while pressing the lower portion into it. That is why a shelf that holds light decor may fail with books, cookware, or other dense items placed near its outer edge.
This guide explains how to mount a floating shelf on drywall with three practical methods: direct stud fastening, standard hollow-wall anchors for light loads, and load-distributed mounting for heavier shelves. You will also learn how to keep the bracket level, choose hardware for the wall, and spot the mistakes that lead to loose anchors and forward tilt.
I am Trevor Jones, with more than 16 years of experience in building hardware, practical mounting methods, and technology. My work focuses on clear, practical guidance for projects such as how to mount a floating shelf on drywall, where the hardware, wall condition, and forces on the shelf all matter.
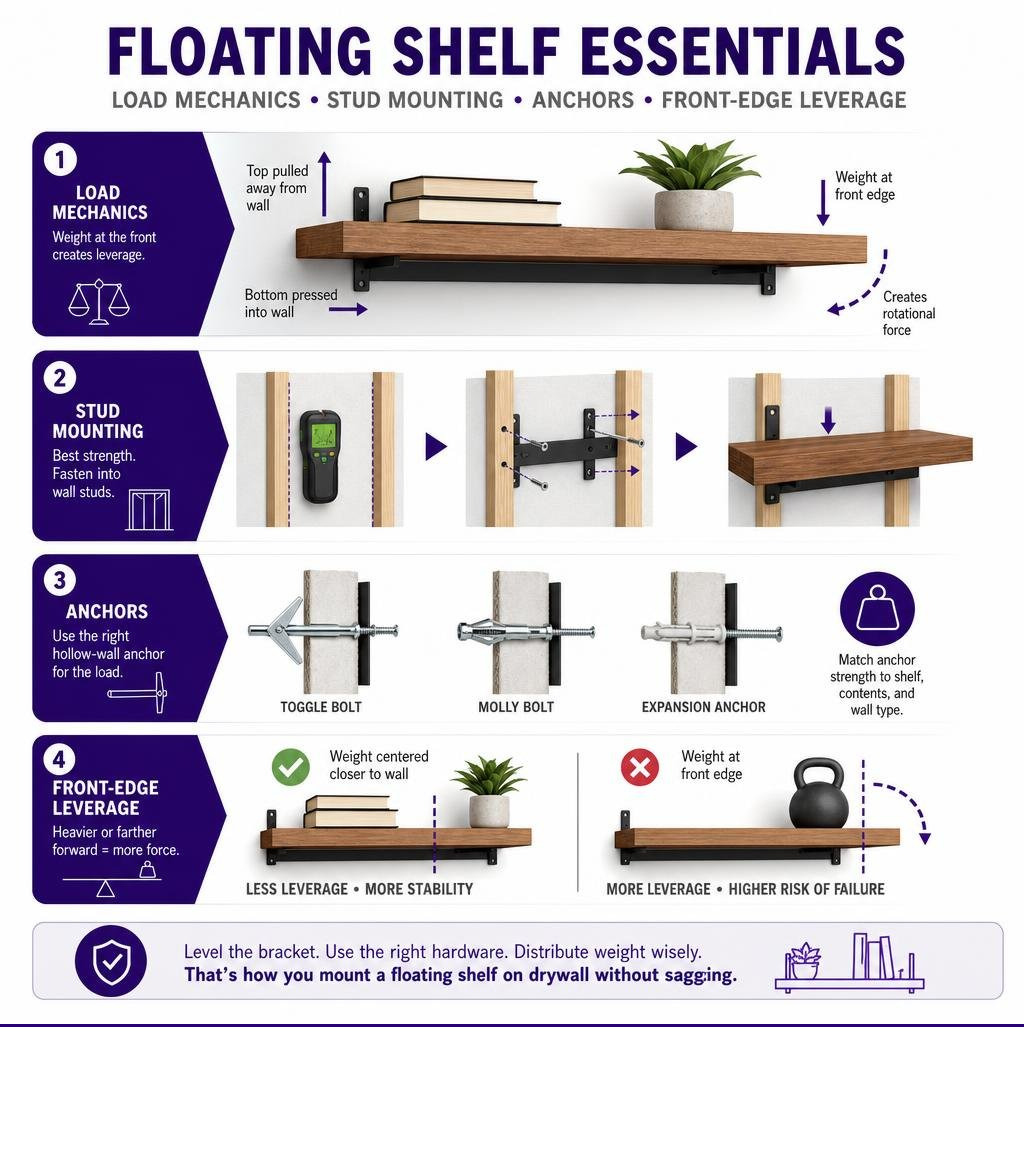
Quick how to mount a floating shelf on drywall terms:
Essential Tools and Wall Preparation Before Mounting
Before you begin drilling into your drywall, you need the right tools laid out on your work surface. A smooth installation depends on accurate layout lines and using the correct driver bits to avoid stripping screw heads or crushing drywall gypsum.
Gather these essential tools:
- Electronic stud finder with deep scan or magnetic stud detector
- 24-inch or 48-inch box level (a torpedo level works well for tight spaces)
- Cordless drill with variable speed control
- High-speed steel drill bit set and pilot bits
- Screwdriver with standard Phillips and Torx bits
- Steel tape measure and sharp pencil
- Painter’s tape for layout marking
- Safety glasses and dust mask
Inspect your wall surface before marking your shelf position. Check for nearby light switches, wall outlets, or plumbing fixtures on the reverse side of the wall. Wires and supply pipes frequently run vertically along studs or horizontally through holes bored in the framing. Setting your stud finder to AC detection mode helps confirm that the mounting path is clear of live electrical wiring behind the wall board.
Locating Wall Studs and Measuring Placement
Locating your structural framing is the most important step in preparing your wall. In standard residential construction across North America, vertical framing members (studs) are spaced either 16 inches or 24 inches on center.
To map out your wall framing:
- Turn on your electronic stud finder and calibrate it on an empty section of drywall.
- Slide the device horizontally across the target area until it indicates an edge. Mark the outer edge with painter’s tape and a pencil.
- Approach the same area from the opposite direction to locate and mark the opposing edge.
- Measure the exact midpoint between the two lines to pinpoint the solid center of the stud.
- If using a magnetic stud finder, slide it in an “S” pattern to locate the drywall screws driven into framing during construction.
- Verify your measurements using our guide on How to Install Floating Shelves Correctly in 5 Steps.
Once you have identified your studs, determine the ideal shelf height. For general living area displays, positioning the shelf at eye level—roughly 57 to 60 inches from the finished floor—creates a balanced sightline. If you are installing kitchen floating shelving above counters, allow 18 to 24 inches of clearance above the countertop surface for appliances. Mark your height, align your box level across the marks, and draw a horizontal guideline along the shelf length.
Understanding Cantilever Weight and Rotational Force
Floating shelves rely on concealed backplates with horizontal support rods extending perpendicular to the wall. Unlike traditional shelving supported by triangular gussets underneath, a floating shelf operates as a cantilever beam. Understanding the physical mechanics of this structure prevents premature wall blowout and drooping hardware.
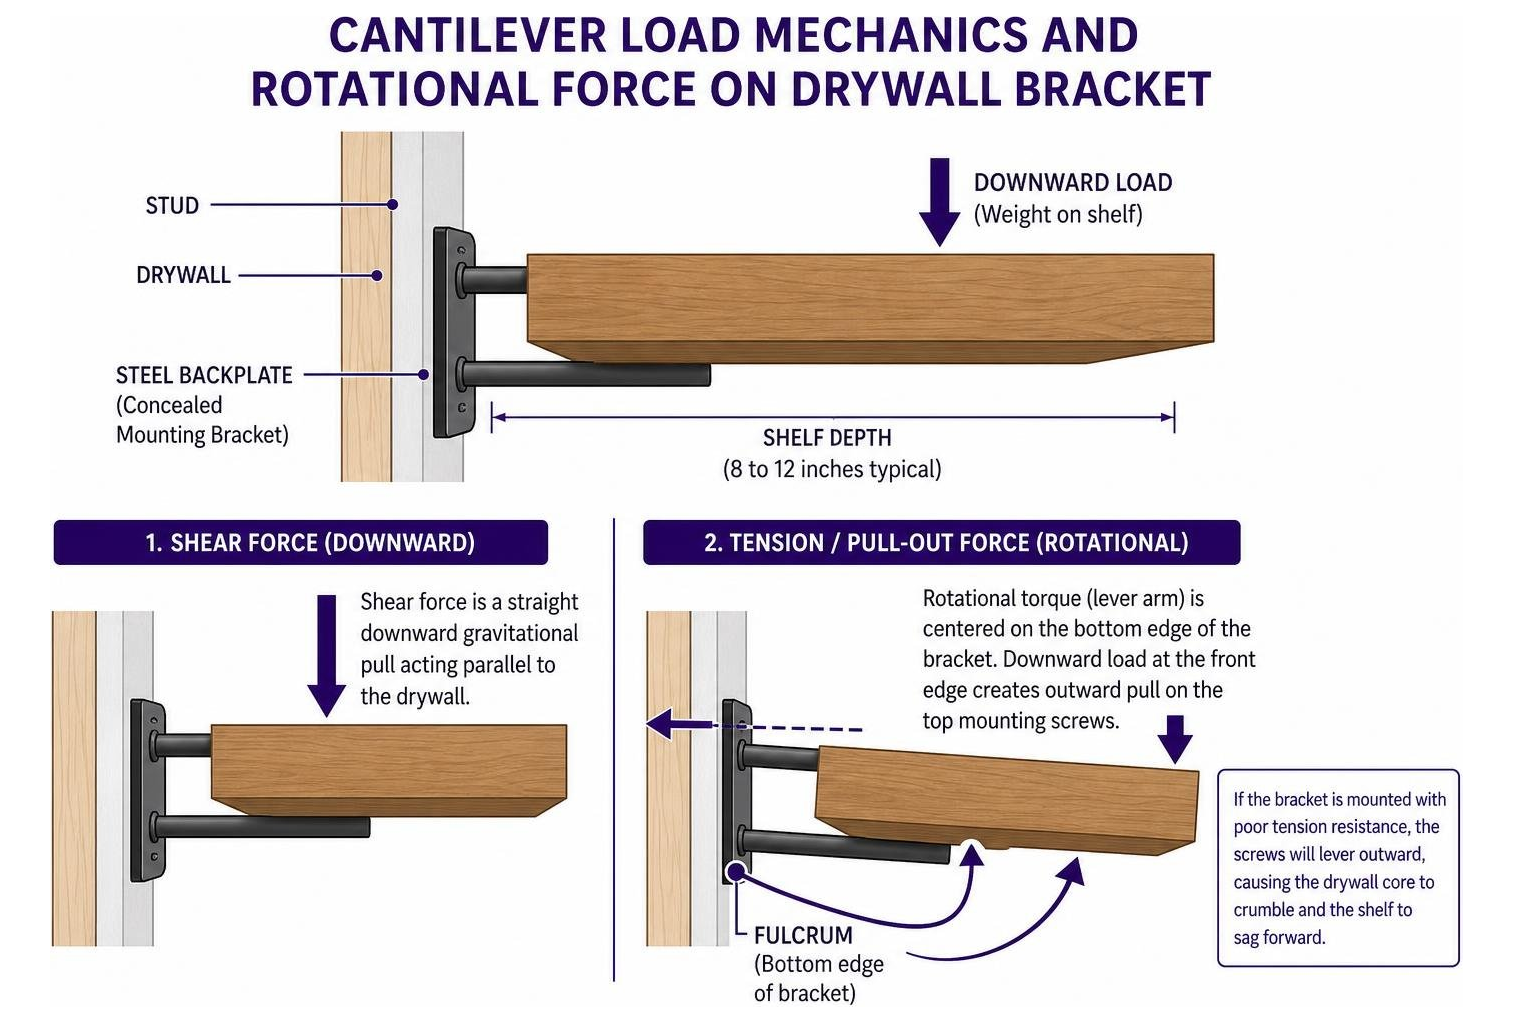
When an object rests on a floating shelf, the total downward weight exerts two separate forces on the wall:
- Shear force: A straight downward gravitational pull acting parallel to the surface of the drywall.
- Tension/Pull-out force: A rotational torque (lever arm) centered on the bottom edge of the mounting bracket.
Because the shelf body extends out into the room (typically 8 to 12 inches deep), the bottom edge of the steel backplate acts as a fulcrum. Downward load at the front edge leverages the top mounting screws outward, pulling directly against the drywall core. If the bracket is mounted using hardware with poor tension resistance, the fasteners will lever outward, causing the gypsum around the hole to crumble and the shelf to sag forward.
Published manufacturer weight ratings for drywall fasteners denote pure downward shear capacity under laboratory test conditions. They do not represent pull-out capacity under dynamic cantilevered loads. A 20-pound stack of books placed on the front lip of a 10-inch shelf exerts significantly more rotational pull on the top fasteners than 20 pounds distributed flat against the wall plate.
| Fastener Type | Drywall Thickness | Shear Capacity per Fastener | Suitable Use Case |
|---|---|---|---|
| Plastic Expansion Plug | 1/2 in | 10–20 lb | Lightweight decorative items only (<5 lb shelf total) |
| Self-Drilling Zinc Anchor | 1/2 in | 30–50 lb | Small pictures, light accents |
| Classic Spring Toggle Bolt | 1/2 in | 50–75 lb | Medium loads, moderate depth brackets |
| Steel Snap-Toggle Anchor | 1/2 in or 5/8 in | 45–65 lb | Medium books, decorative dishware |
| Wood Screw into Stud (#10 x 2.5″) | 1/2 in drywall over wood | 50–100+ lb | Heavy books, cookware, deep solid-wood shelving |
How to Mount a Floating Shelf on Drywall: 3 Reliable Methods
Selecting the correct mounting strategy depends entirely on the location of your wall framing, the depth of your shelf, and the total weight of your items.
Method 1: Direct Stud Attachment for Maximum Stability
Securing the mounting bracket directly into solid wood studs is the strongest way to install any floating shelf. Solid wood framing provides the necessary pull-out resistance to counter the rotational leverage generated by deep shelves.
A standard shelf secured across two wood studs can comfortably hold 50 to 80 pounds of distributed weight. When mounting directly into structural pine or fir framing, follow these parameters:
- Use heavy-gauge wood screws (such as #10 structural screws or 1/4-inch lag screws).
- Ensure a minimum screw length of 2.5 to 3 inches. This accounts for 1/2-inch or 5/8-inch drywall thickness plus bracket backplate thickness, ensuring at least 1.25 inches of structural wood thread engagement.
- Always pre-drill pilot holes with a 1/8-inch bit to prevent splitting the dry stud timber.
- Drive fasteners straight and snug against the backplate using a clutch-adjusted driver to avoid shearing the screw heads.
Method 2: Standard Hollow-Wall Anchors for Light Decorative Loads
When your desired shelf layout does not intersect with wall studs, hollow-wall anchors can bridge the gap for lightweight applications. Review our Step-by-Step Guide to Drywall Anchor Types to match specific hollow-wall hardware to your project.
Standard plastic ribbed expansion anchors expand by friction when a screw is inserted. In 1/2-inch gypsum drywall, these plugs provide very weak pull-out resistance (often failing below 15 pounds of tension) and should only be used for small decorative ledges supporting lightweight picture frames.
For moderate loads where you cannot reach a stud, metal toggle bolts provide a stronger mechanical hold. Spring-wing toggle bolts pass through a pre-drilled hole in the drywall, open inside the wall cavity, and pull flat against the back face of the gypsum board when tightened. You can learn the complete installation steps in our guide on How to Anchor a Shelf Without Studs Fast by Using Toggle Bolts. When using standard toggle bolts alone without studs, keep total load under 25 pounds per bracket and avoid loading heavy items near the outer front edge.
Method 3: High-Capacity Load-Distributed Mounting for Heavy Shelves
For deep, solid-wood shelves, heavy pottery, or book collections where studs are entirely out of reach, standard drywall plugs are insufficient. Heavy loads require high-capacity, load-distributing hardware that spreads the mechanical cantilever force over a broad surface area behind the wall.
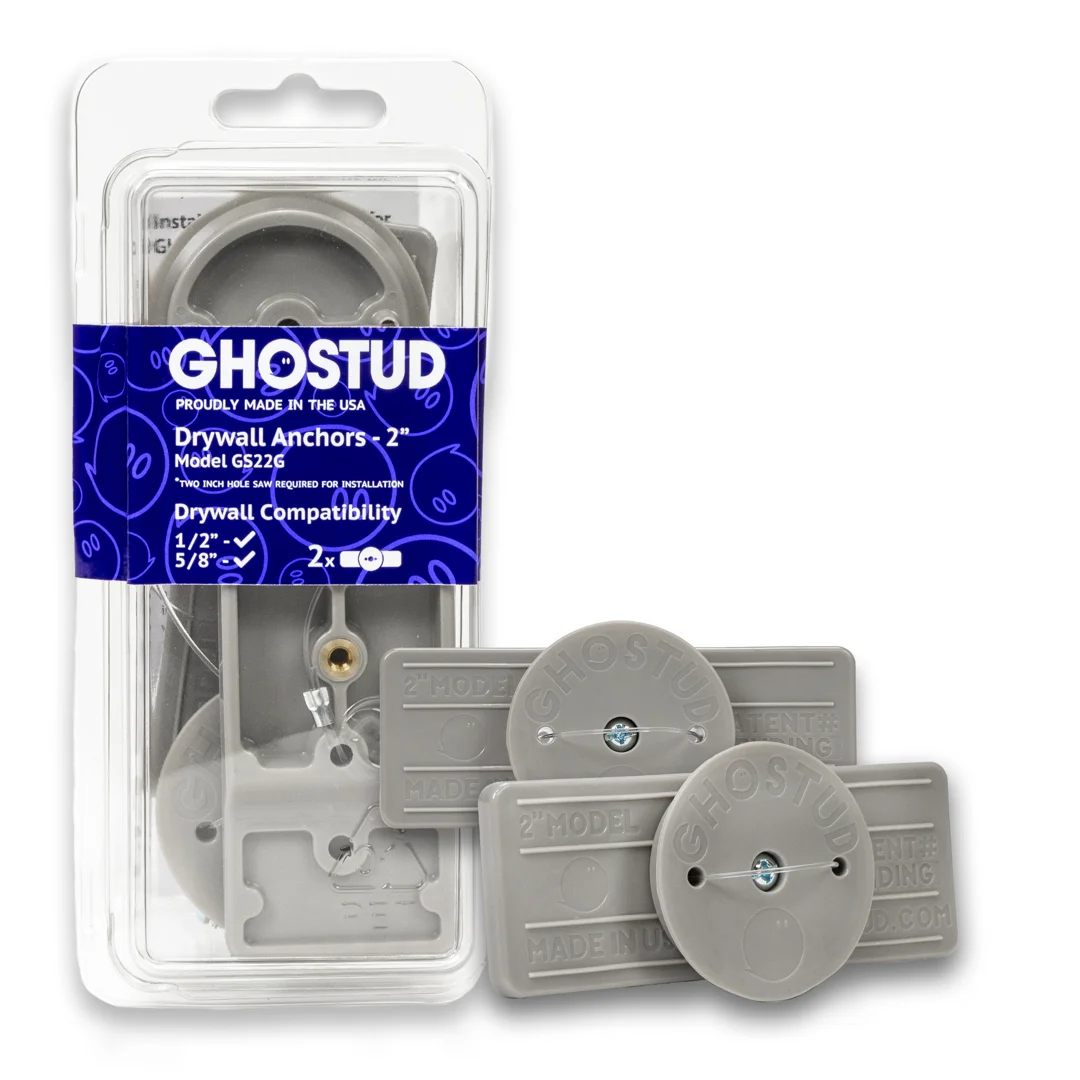
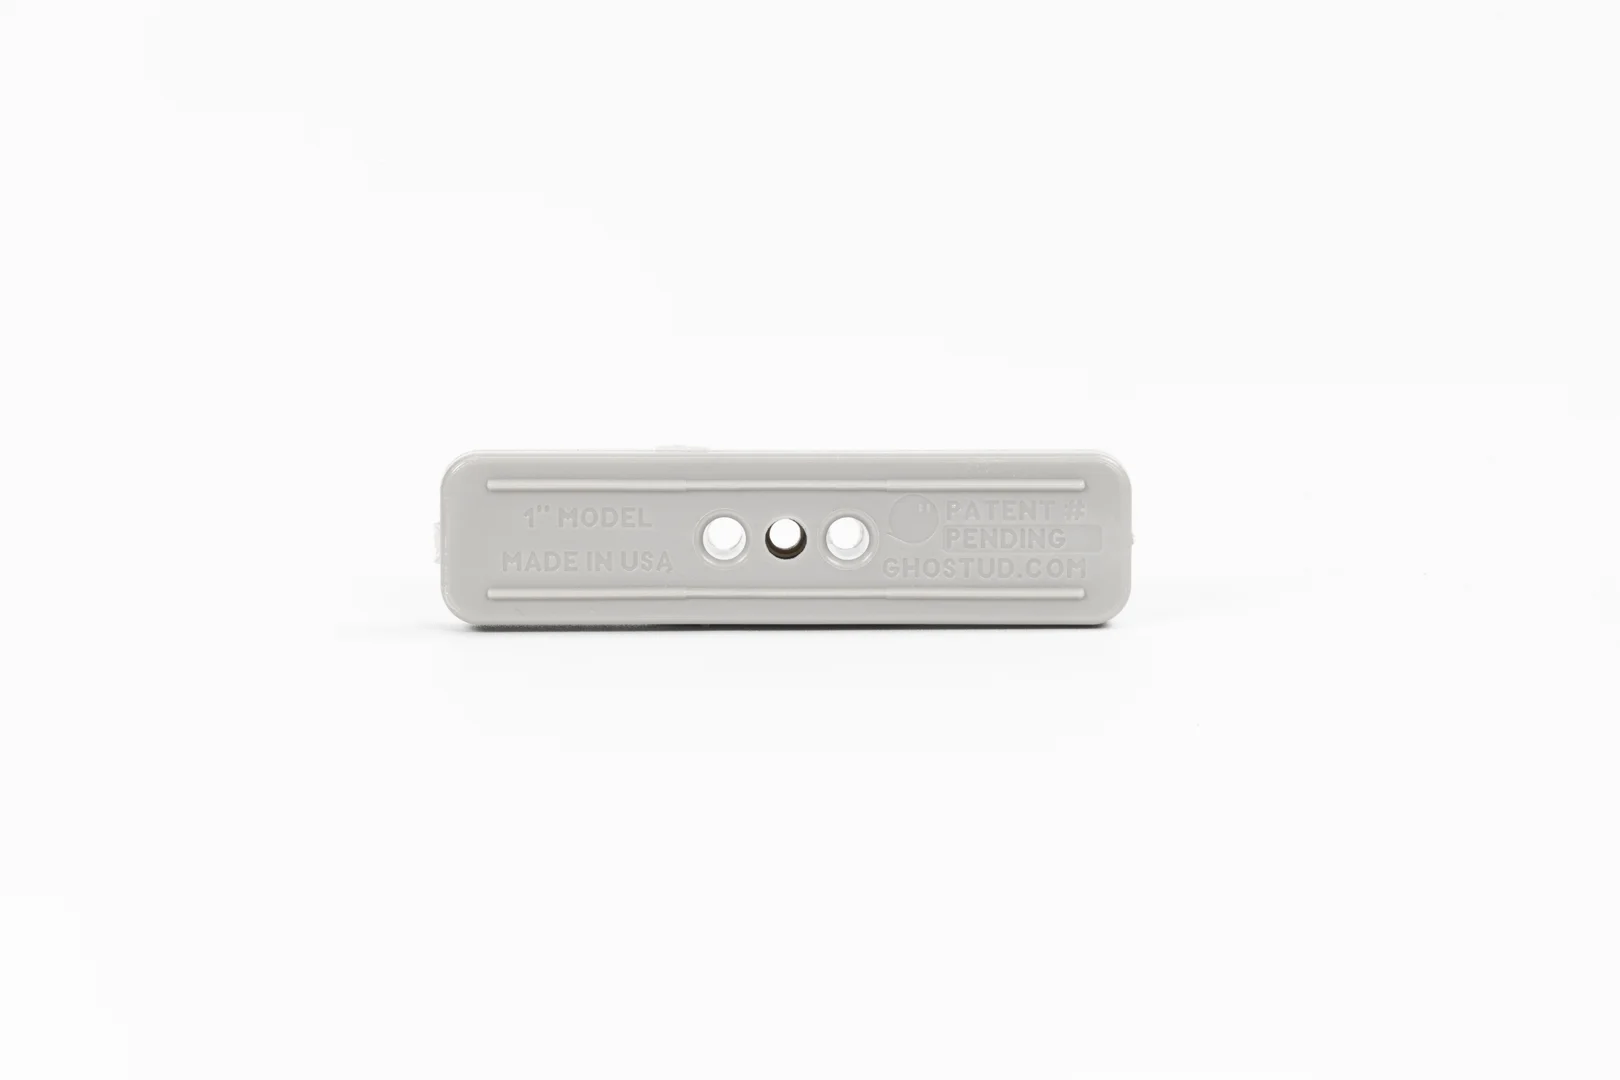
We manufacture patented drywall anchoring systems specifically engineered to support substantial loads when framing is unavailable. Our hardware is manufactured in the USA from 100% recycled plastic, providing permanent holding strength in residential and commercial drywall:
- GS1 System: Installs with a 1-inch hole saw and is rated for up to 250 lb shear in 1/2-inch or 5/8-inch drywall. Sold in convenient 2-packs and 20-packs.
- GS2 System: Installs with a 2-inch hole saw and is rated for up to 1,000 lb shear in 1/2-inch or 5/8-inch drywall. Sold in 2-packs and 20-packs.
Because these units distribute downward shear and rotational tension across a wide backing surface, they protect the brittle gypsum core from local crushing. For in-depth structural advice, read How to Secure a Heavy Shelf Without Pull Out Failure.
Important Wall Condition Note: GHOSTUD products are engineered strictly for drywall installations. If you are mounting to plaster and lath, brick, solid concrete, masonry, tile over cement backer board, or light-gauge metal studs, GHOSTUD is the wrong choice. In those materials, switch immediately to masonry sleeve anchors, concrete screws, or specialized hollow-wall steel toggle hardware designed for your specific substrate.
Step-by-Step Bracket Installation and Leveling Process
Installing a floating shelf requires precise alignment at every stage. An error of just 1/16 of an inch at the backplate translates into a noticeable tilt once the extended shelf body is in place.
Follow this workflow for a secure, level installation:
- Mark the Layout Line: Using your box level, draw a clear reference line where the shelf backplate will sit.
- Align the Bracket: Hold the metal backplate against the line. Mark the mounting screw holes on the drywall with a sharp pencil.
- Drill Pilot Holes: For stud locations, drill a 1/8-inch pilot hole through the drywall into the framing. For drywall anchors, use the exact hole saw or drill bit size specified by the fastener manufacturer.
- Mount the Backplate: Fasten the bracket loosely to the wall with your center screw. Place a torpedo level on top of the bracket bar, adjust until the bubble is centered, then tighten all fasteners securely.
- Inspect the Mounting: Pull forward firmly on the bracket rods to ensure there is zero play between the backplate and the drywall face.
- Install the Shelf Body: Slide the hollow channels of the shelf over the steel mounting rods until the rear edge sits flush against the drywall.
- Fasten the Set Screws: Drive the small underside set screws upward into the bracket rods to lock the shelf in place and prevent it from sliding forward.
Step-by-step bracket installation sequence.
Professional Best Practices on How to Mount a Floating Shelf on Drywall
Achieving clean, level results requires careful torque management and proper alignment techniques:
- Use the Painter’s Tape Transfer Method: Place a strip of wide blue painter’s tape along the back of the shelf bracket. Punch holes through the tape where the mounting slots are located. Peel the tape off and apply it directly onto your wall level line to create a drill template.
- Avoid Over-Torquing Fasteners: When driving screws into drywall anchors, stop as soon as the screw head seats firmly against the bracket. Over-tightening crushes the gypsum plaster core, stripping the anchor’s grip and reducing holding power.
- Check Level Repeatedly: Verify your level four distinct times: along the wall layout line, across the loosely mounted bracket, across the fully tightened bracket, and across the top surface of the installed shelf.
How to Mount a Floating Shelf on Drywall When Studs Are Misaligned
In many rooms, wall framing does not align symmetrically with your furniture layout. When you center a 36-inch shelf over a desk, you may find only a single stud within the bracket zone, leaving the opposite end over empty drywall.
Never mount a floating shelf using only a single off-center screw into a stud without supporting the other end. The unsupported side will act as a lever, twisting the bracket down under weight.
Use a hybrid fastening approach:
- Fasten the bracket into the available wood stud using a 3-inch #10 wood screw to carry the main structural shear load.
- If your bracket’s pre-drilled holes do not line up with the stud center, bore a new mounting hole through the steel backplate using a cobalt or high-speed steel bit.
- Secure the opposite, unsupported end of the bracket into the hollow drywall using a high-capacity anchor or heavy-duty toggle bolt to prevent rotation and maintain level.
Troubleshooting Common Floating Shelf Problems
If your floating shelf feels loose or tilts downward after installation, address the underlying mechanical cause before loading items.
Correcting Shelf Sag and Forward Tilt
Forward tilt occurs when the support rods bend downward under leverage or when the top edge of the backplate pulls away from the wall.
To resolve forward tilt:
- Check Bracket Rod Engagement: Ensure the internal bracket rods extend at least two-thirds into the total depth of the shelf. An 8-inch deep shelf requires support rods that are at least 5.5 inches long. Shorter rods allow the wooden shelf body to lever off the steel.
- Inspect Fastener Tightness: Remove the shelf body and verify that the upper mounting screws have not backed out under load.
- Install Cardboard or Plastic Shims: If the wall framing itself is bowed, place a thin cardboard or plastic shim behind the bottom edge of the backplate. Tilting the base of the backplate outward tilts the support rods slightly upward, compensating for downward sag once loaded.
- Rebalance Shelf Contents: Move heavy, dense objects toward the wall plate and keep lighter decorative items near the outer front edge.
Repairing Damaged Drywall Anchor Holes
If an anchor pulls out during installation, driving a standard screw back into the loose drywall dust will not hold weight.
When an anchor hole blows out:
- Remove the failed fastener and clear away loose gypsum debris.
- If framing is nearby, shift your shelf layout 1 to 2 inches horizontally to drill fresh pilot holes directly into a solid stud.
- If the shelf position cannot move, install a larger-diameter hollow-wall anchor or cut a 1-inch to 2-inch opening to insert a heavy-duty load-distributing anchor with a wide backing plate.
- For completely abandoned holes, fill the void with setting-type joint compound, allow it to cure, sand flush, and apply matching wall paint.
Frequently Asked Questions About Mounting Floating Shelves
How much weight can a floating shelf hold on drywall?
A floating shelf secured into two wood studs with #10 wood screws can hold 50 to 80 pounds of distributed weight. When mounted entirely on 1/2-inch drywall using standard toggle bolts, keep the total load under 25 pounds per bracket to prevent rotational pull-out failure. Weight capacity depends directly on shelf depth: deeper shelves generate more rotational leverage, reducing the total safe weight limit.
Can I install floating shelves on drywall without drilling into studs?
Yes, floating shelves can be mounted on drywall without studs by using hollow-wall fasteners rated for rotational loads, such as toggle bolts or high-capacity backing anchors. However, standard plastic expansion plugs should never be used for heavy loads on hollow drywall. For stud-free installations, use wider brackets with top-and-bottom screw placement to resist cantilevered pulling forces.
What is the best anchor for floating shelves in drywall?
The best anchor depends on the total load and shelf depth. For lightweight decorative ledges, self-drilling metal anchors or standard toggle bolts work well. For heavier solid-wood shelves holding books or kitchenware without studs, use high-capacity load-distributed anchors that clamp a wide plate against the rear drywall face to resist outward pull.
Conclusion
Mounting a secure floating shelf on drywall requires matching your hardware to the physical forces created by cantilevered loads. Whenever framing is accessible, fastening your backplate directly into wood studs provides the highest stability. When studs are out of reach, assess the shelf depth and planned weight, and select heavy-duty hollow-wall hardware engineered to resist rotational tension.
Take your time marking layout lines, verify your level at every step, and tighten your fasteners securely without crushing the wall core. For more detailed instructions on hanging heavy decor and choosing hardware, explore our complete floating shelves without studs guide to ensure your shelves remain stable and level for years to come.