
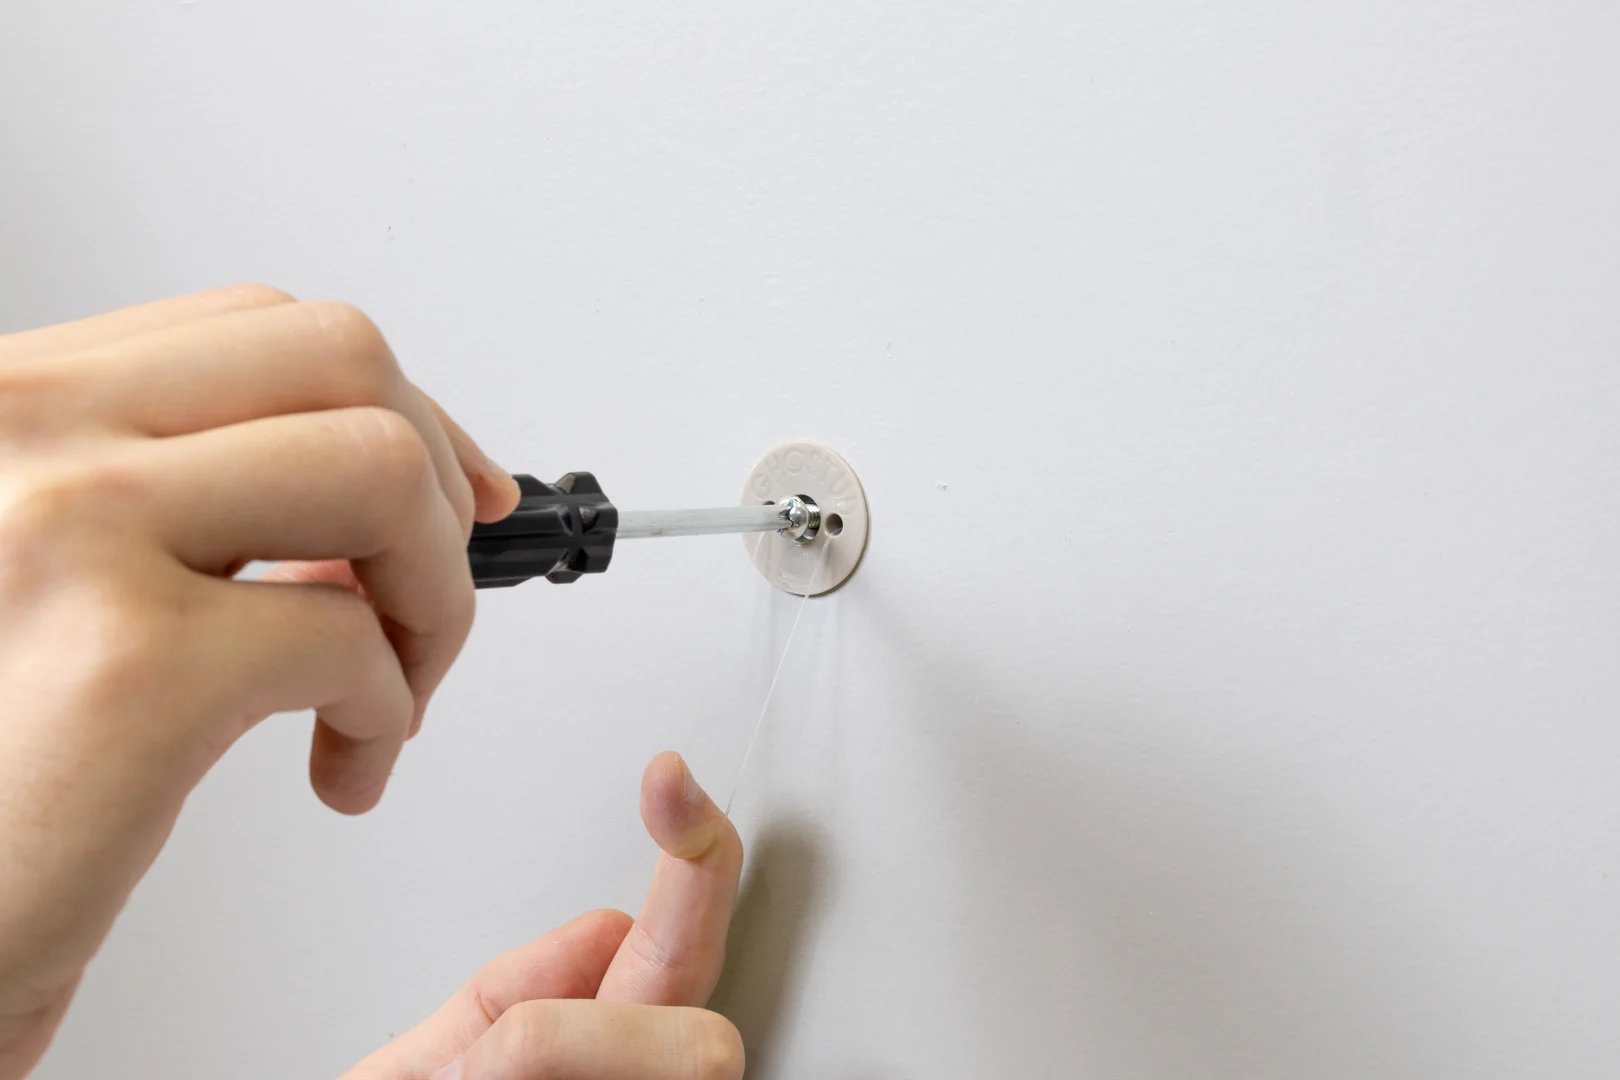
Hang Curtain Rods With Anchors That Match the Load
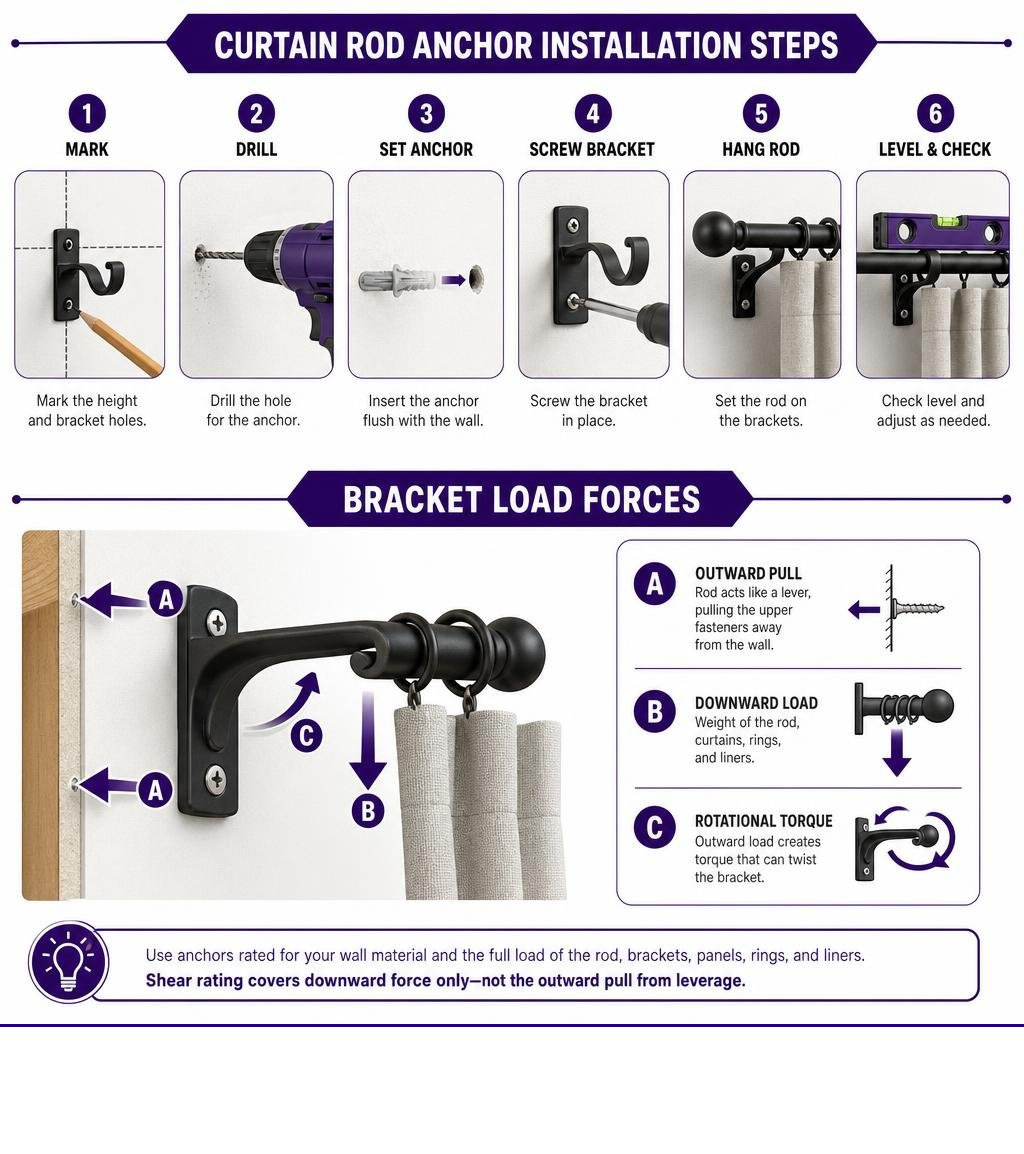
To hang curtain rods with anchors, first locate studs and use wood screws where a bracket lines up with one. For brackets that land on drywall only, mark the height and width, drill the hole required by the anchor, seat the anchor flush, screw the brackets in place, then hang the rod and check it with a level.
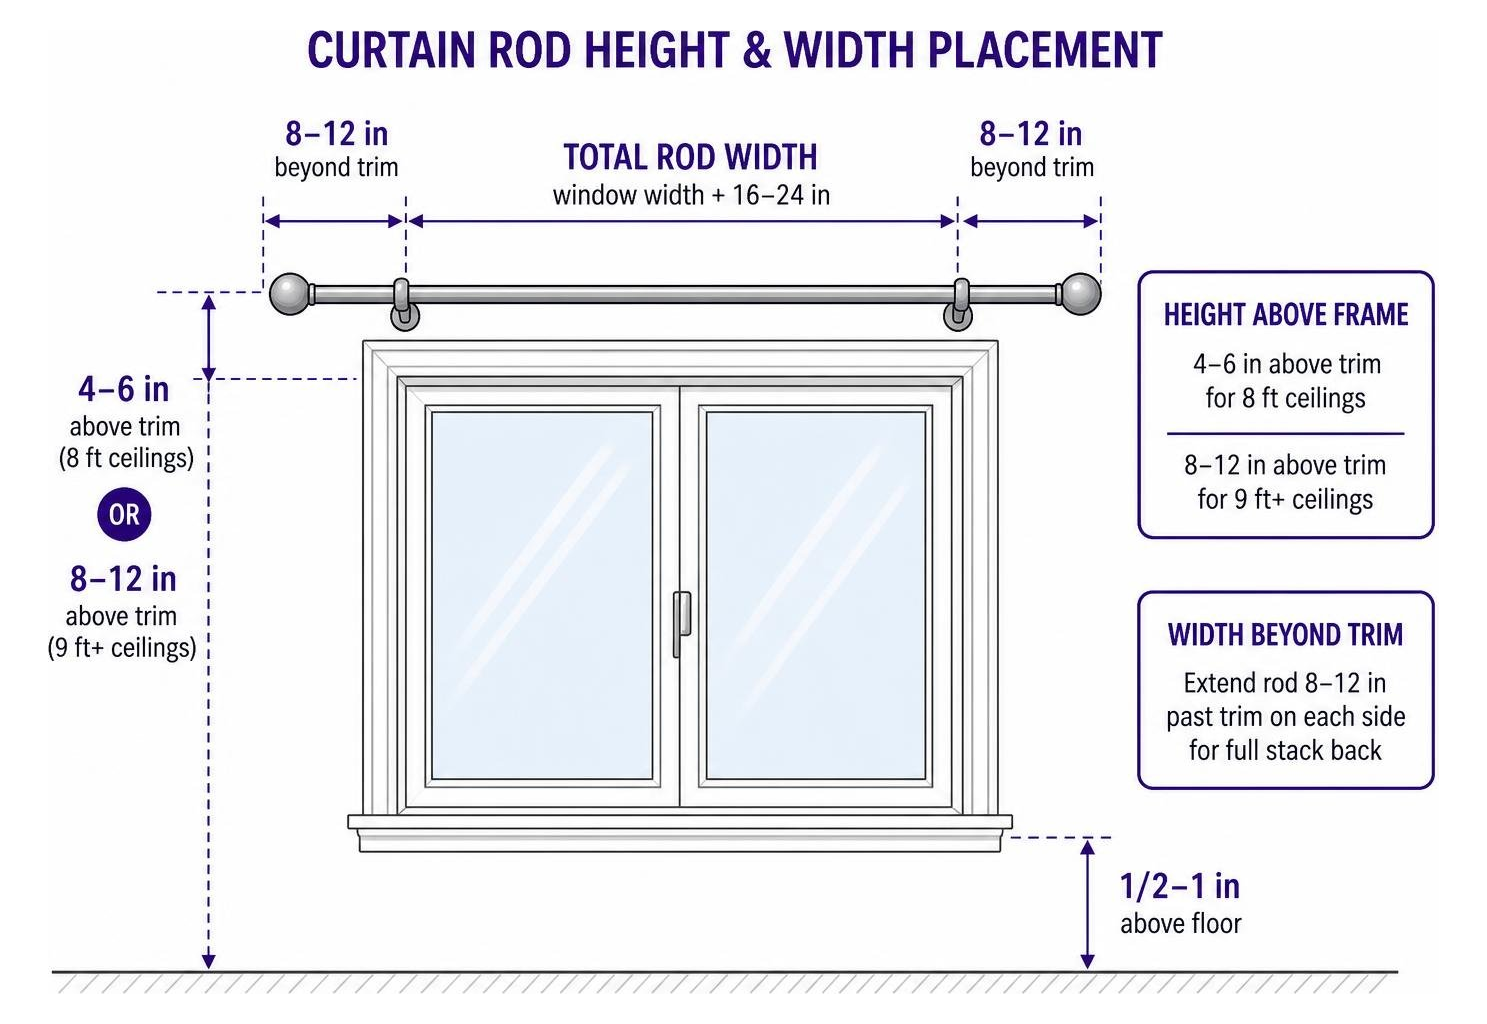
Mount the rod 4 to 6 inches above the window trim for a taller look, and extend it past the frame so open panels do not block as much glass. Use a center bracket on long or heavy rods to reduce sag.
Curtain brackets create more than a straight downward load. Because the rod projects away from the wall, heavy drapes can twist the bracket and pull outward on the upper fasteners. Choose anchors for the wall material and the full load of the rod, brackets, panels, rings, and any blackout liner. A published shear rating measures downward force along the wall; it is not the same as pull-out resistance for a rod that acts like a lever.
I am Trevor Jones, a mounting specialist based in Knoxville, Tennessee, with more than 16 years of experience in hardware, marketing, and technology. I focus on clear, practical guidance for how to hang curtain rods with anchors and other permanent drywall-mounted projects.
Choosing the Right Anchors and Tools for Curtain Hardware
A sturdy installation depends on using the proper tools and matching the hardware to your wall material. When you need to securely install curtain rods in drywall, skipping prep work or using the wrong fasteners can damage the wallboard.
To mount brackets properly, assemble the following tools and supplies:
- Steel tape measure
- Torpedo or 4-foot bubble level
- Electronic stud finder
- Cordless drill/driver with high-speed drill bits
- #2 Phillips hand screwdriver
- Pencil with a fine point
- Step stool or ladder
- Heavy-duty wall anchors (matched to wall thickness)
- Included bracket mounting hardware
Essential Tools: How to Hang Curtain Rods with Anchors Accurately
Accurate hole placement prevents wall damage and ensures brackets sit level. Use a steel tape measure instead of a flexible tailor’s tape to keep vertical and horizontal references true. A standard stud finder lets you verify whether a bracket location lands over solid 2×4 framing (spaced 16 or 24 inches on center) or in a hollow drywall cavity.
When marking tall installations or spans wider than 96 inches, a self-leveling laser ensures a straight visual line across multiple brackets. For higher placements, follow the How to Hang Curtains on Tall Walls — Laser Level Method (2026) to establish a level horizontal reference line across the wall.
Always size your drill bit according to the anchor manufacturer’s packaging. If an anchor requires a 1/4-inch pilot hole, drilling a 5/16-inch hole removes too much gypsum core, eliminating the friction and bite needed to support the fastener.
Matching Anchor Types to Wall Material and Curtain Weight

Drywall consists of a compressed gypsum chalk core encased in heavy paper. Screwing directly into drywall without an anchor causes the screw threads to strip the soft gypsum, providing zero mechanical hold.
The type of anchor you need depends directly on the combined static weight of your curtain rod, hardware, fabric panels, and dynamic pulling forces. For lightweight sheer panels (under 5 lb), standard conical plastic sleeves or self-drilling nylon anchors work well. For heavy insulated drapes, blackout curtains, or long spans, choose heavy-duty mechanical anchors that distribute weight across a wider surface area.
Review our technical guide on selecting the right drywall anchor for your load before choosing hardware.
| Anchor Type | Mechanism | Rated Shear Capacity (1/2″ Drywall) | Rated Shear Capacity (5/8″ Drywall) | Best Application |
|---|---|---|---|---|
| Plastic Expansion Sleeve | Expands inside hole as screw advances | 5–10 lb | 10–15 lb | Sheers, light café curtains |
| Self-Drilling Threaded | Wide external threads bite gypsum | 20–50 lb | 30–65 lb | Medium-weight linen panels |
| Steel Molly Bolt | Metal sleeve collapses against back | 30–50 lb | 40–65 lb | Medium-heavy drapes |
| Toggle Bolt (Spring/Strap) | Metal channel clamps behind wallboard | 50–100 lb | 70–140 lb | Heavy velvet, layered blackout |
| GHOSTUD GS1 | Patented load-distribution plate | Up to 250 lb shear | Up to 250 lb shear | Heavy drapery, multi-layer rods |
| GHOSTUD GS2 | Heavy-duty load-distribution plate | Up to 1,000 lb shear | Up to 1,000 lb shear | High-load architectural rods |
Note: Published ratings represent static shear (downward) force. Tension/pull-out capacity is significantly lower due to the cantilever leverage created by projecting curtain brackets.
To explore fastener mechanisms in detail, reference our drywall anchor types breakdown.
Measuring, Placement, and Leveling Guidelines
A properly placed curtain rod improves room proportions and allows maximum natural light into your home. Installing the rod higher and wider than the casing prevents open fabric panels from blocking the glass.
Follow standard sizing methods like the How to Install Curtain Rods: 5 Simple Steps reference to set bracket locations before drilling.
Window Height and Width Placement Rules
- Height Above Frame: For standard 8-foot ceilings, mount brackets 4 to 6 inches above the upper edge of the window trim. For 9-foot or higher ceilings, position brackets 8 to 12 inches above the trim or roughly 3 inches below the ceiling/crown molding to maximize visual vertical height.
- Width Beyond Trim: Extend end brackets 8 to 12 inches past the outer edge of the window trim on each side. This provides “stack back” space, allowing curtains to sit completely clear of the glass when fully opened.
- Floor Clearance:
- Floating: Panels hang 1/2 inch above the floor (prevents dust collection).
- Breaking: Panels touch the floor and bend slightly (1/2 inch to 1 inch of extra fabric).
- Puddling: Panels pool 2 to 4 inches onto the floor (formal velvet drapery).
Leveling Techniques for Long and Tall Spans
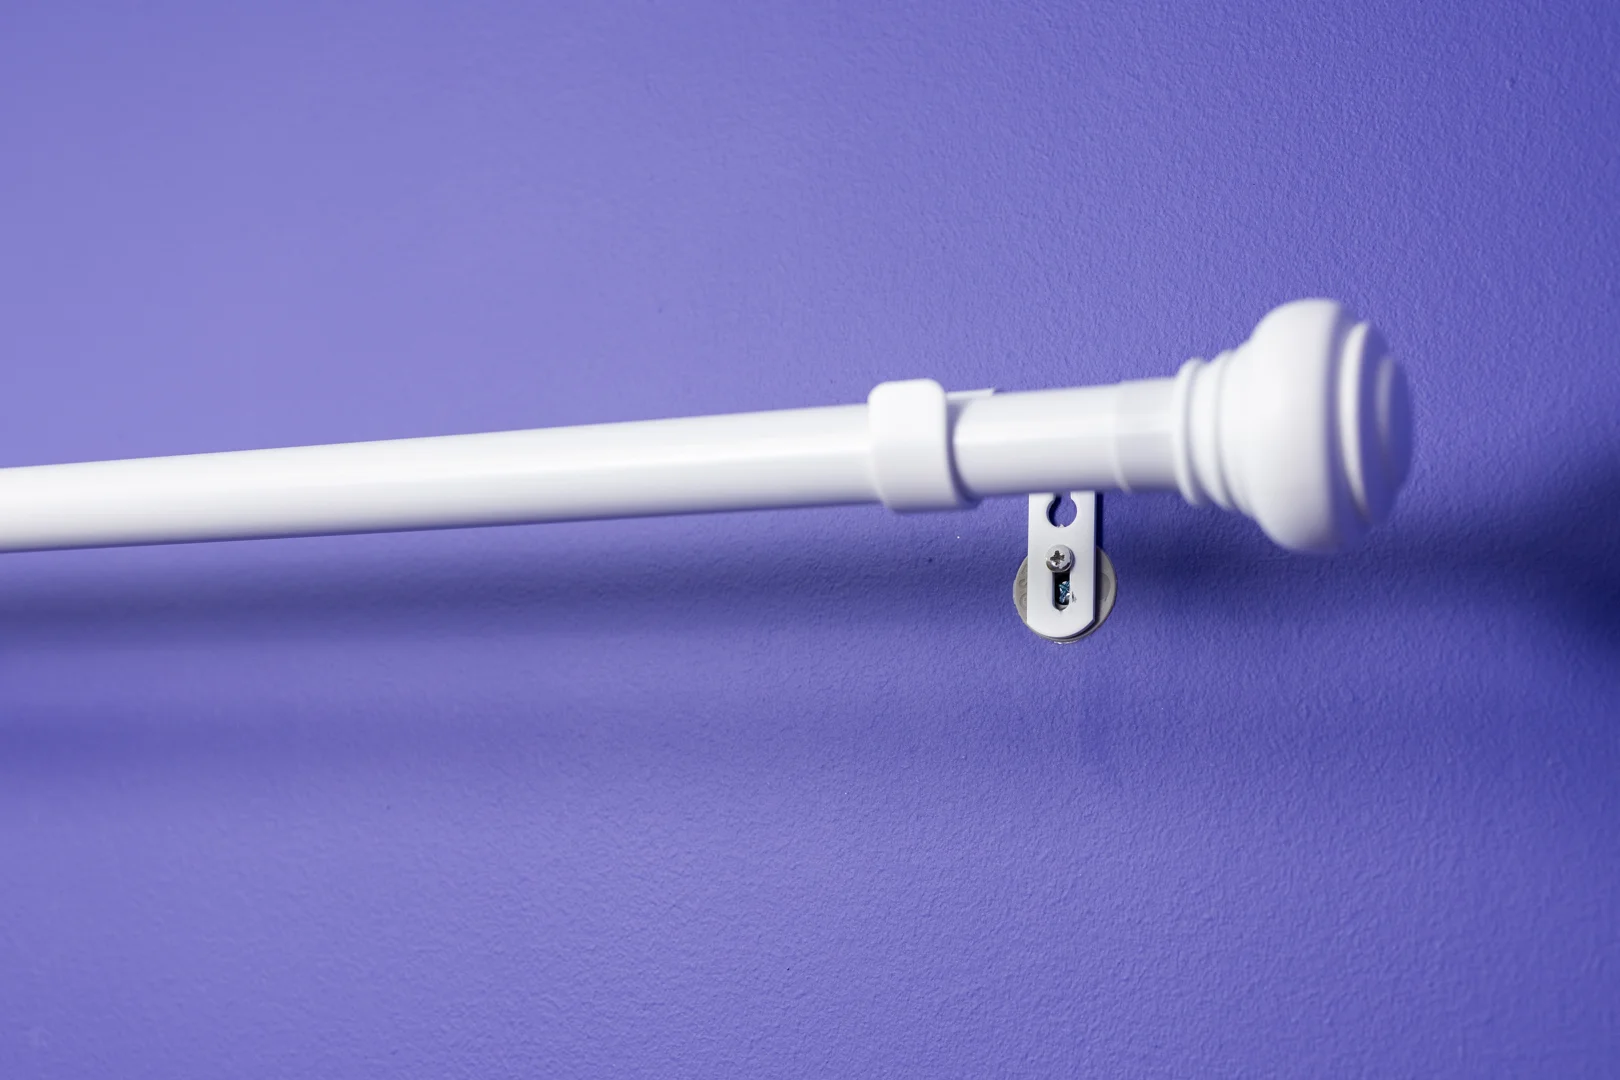
Never rely on window trim as your sole leveling reference. Window casings and ceiling lines in residential construction often settle out of square.
- Short Spans (Under 48 inches): Place a 24-inch or 48-inch spirit level across your bracket marks.
- Long Spans (48 to 120+ inches): Use a self-leveling cross-line laser mounted on a tripod. Project a horizontal beam across the installation height, and place your bracket mounting holes directly on the laser line.
- Sloped or Settled Ceilings: If a ceiling drops more than 1/2 inch across a 6-foot window span, splitting the difference between the true laser level line and the ceiling line prevents the drapery rod from looking tilted against the adjacent drywall corner.
Step-by-Step Guide: How to Hang Curtain Rods with Anchors
Follow this procedural sequence to mount curtain hardware securely into drywall without compromising wall strength.
Step 1: Marking and Pre-Drilling Pilot Holes
- Hold the bracket against the wall at the measured height and width.
- Mark the exact fastener hole centers onto the wall using a sharp pencil.
- Scan each mark with an electronic stud finder.
- If a stud is present: Fasten directly into the wood framing using a 1-1/2 inch #8 wood screw. Do not install a drywall anchor into solid wood.
- If the cavity is hollow: Prepare to install the drywall anchor.
- Chuck a high-speed drill bit matching the specified anchor diameter. Hold the drill perpendicular (90 degrees) to the drywall surface and drill steadily through the wallboard without wallowing the hole.
Step 2: Seating Wall Anchors Flush with Drywall
- Inspect the drilled hole and clear any residual drywall dust.
- Insert the anchor into the pre-drilled hole.
- If using standard plastic expansion sleeves or flanged anchors, tap gently with a lightweight mallet until the flange sits perfectly flush with the painted drywall paper. Do not hammer forcefully, as this crushes the internal gypsum matrix and causes the fastener to spin freely.
- If working without power tools, review our guide on installing anchors without a drill for alternative seating procedures.
Step 3: Mounting Brackets and Center Supports Securely
- Align the curtain rod bracket holes over the seated anchors.
- Drive the mounting screws into the anchors using a hand-held #2 Phillips screwdriver.
- Avoid Drill Overtightening: Power drill drivers can easily strip the internal threads of plastic or nylon anchors when set to high torque. Tighten by hand until the bracket base is held firmly flat against the drywall surface without flexing the wallboard.
- For any curtain rod span exceeding 60 inches, install an intermediate center support bracket midway between the outer ends to distribute weight evenly.
Step 4: Hanging Panels Across Different Heading Styles
- Grommet Panels: Thread the rod through the metal rings in an alternating forward-and-back accordion pattern.
- Rod Pocket: Slide the gathered fabric tunnel over the pole. Spread the gathers evenly across the rod span.
- Pinch-Pleat / Rings: Hook drapery pins into eyelet rings spaced every 4 to 6 inches along the pole.
- Lift the loaded rod into the end and center brackets.
- Secure the rod retention set screws located on each bracket cup. Tighten securely to keep the rod from sliding sideways during daily opening and closing.
- Thread and tighten end finials to lock the panels in place.
Best Practices for Heavy Loads and Special Mounting Situations
Heavy window treatments introduce physical forces that standard plastic hardware cannot handle over time. Understanding these mechanical stresses prevents wall failure.
How to Hang Curtain Rods with Anchors for Heavy Drapes
Layered window treatments (sheers paired with 16 oz/yd² thermal blackout velvet drapes) can easily weigh 20 to 40 pounds across a single window span. Furthermore, manually pulling curtains open and closed introduces repeated dynamic downward and outward shocks.
To choose the correct anchor system for heavier loads, consult our drywall anchor comparison covering hollow-wall fastener mechanics. When working with heavy assemblies in standard 1/2-inch or 5/8-inch drywall, step up to toggle bolts or high-capacity load-distribution plates like the GHOSTUD GS1 (installed via a 1-inch hole saw for shear loads up to 250 lb) to avoid anchor tear-out.
Cantilever Dynamics and Center Support Spacing
Curtain brackets extend the rod 3 to 6 inches away from the wall to clear window trim, blinds, and sills. This projection converts a downward static load into a rotational cantilever force.
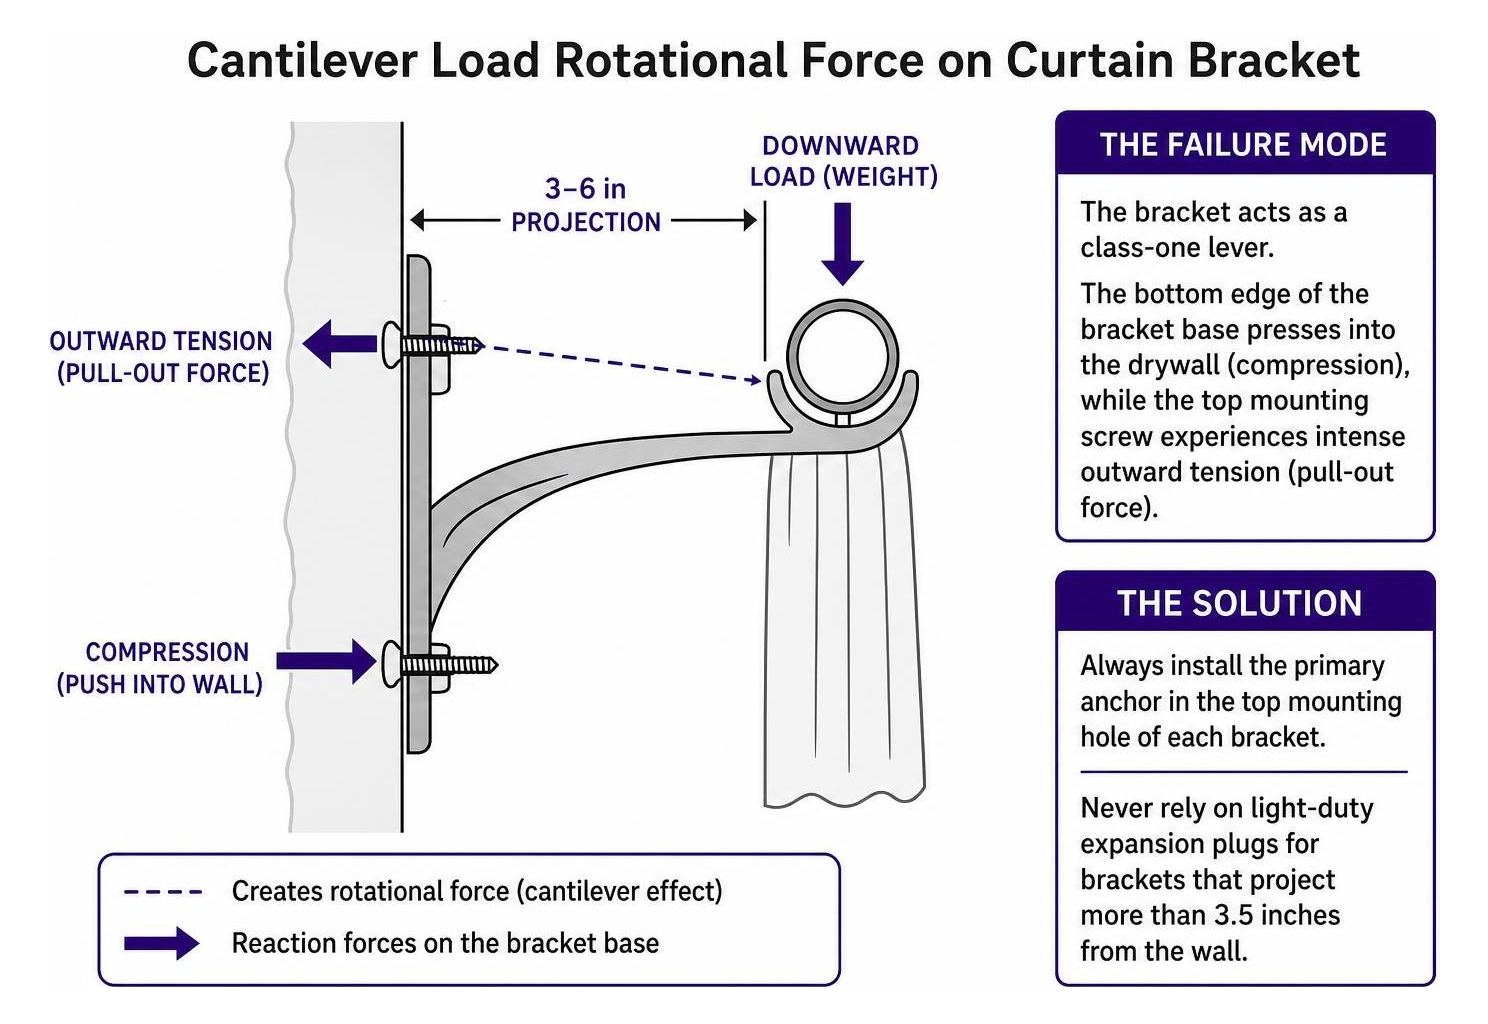
- The Failure Mode: The bracket acts as a class-one lever. The bottom edge of the bracket base presses into the drywall (compression), while the top mounting screw experiences intense outward tension (pull-out force).
- The Solution: Always install the primary anchor in the top mounting hole of each bracket. Never rely on light-duty expansion plugs for brackets that project more than 3.5 inches from the wall.
Managing Extra-Wide Windows and Span Deflection
For large picture windows or sliding patio doors spanning 8 to 12 feet (96 to 144 inches):
- Metal rods will bow under their own weight if unsupported over spans greater than 50 to 60 inches.
- Install support brackets every 30 to 48 inches along the total length.
- Distribute panel weights across multiple bracket points to ensure no single drywall anchor bears more than its recommended working load.
Where Wall Anchors Should NOT Be Used
While modern drywall anchors provide reliable holding strength in hollow wallboard, specific wall conditions demand different hardware:
- Solid Wood Framing: If your stud finder detects a 2×4 framing member behind the bracket location, do not install a drywall anchor. Drive a #8 or #10 wood screw directly into the stud for maximum holding capacity.
- Plaster and Lath Walls: Traditional plaster and lath consists of brittle lime/gypsum keys over thin wood slats. Drywall anchors (including self-drilling and large-format hole-saw anchors) will shatter plaster backing. Use masonry toggle bolts or anchor directly into wood lath framing.
- Masonry, Brick, and Concrete: Drywall fasteners cannot penetrate solid structural materials. Use a hammer drill with a carbide bit and install dedicated concrete sleeve anchors or masonry screws.
- Rented Properties Requiring Zero Damage: Heavy-duty structural anchors require cutting access holes (such as 1-inch or 2-inch cutouts for large plates). In short-term rental scenarios where wall patching is restricted, use spring-loaded internal tension rods or non-damaging adhesive brackets rated for lightweight sheers only.
Frequently Asked Questions About Installing Curtain Rods
Do I need wall anchors if my bracket aligns with a wall stud?
No. When a mounting hole aligns over a wooden wall stud, drill a 1/8-inch pilot hole into the timber and drive a standard #8 x 1-1/2-inch wood screw directly into the framing. Anchors are engineered strictly for hollow drywall cavities and will not seat or expand properly inside solid wood.
How much weight can drywall anchors hold for curtain rods?
Standard plastic expansion anchors hold 5 to 10 lb in 1/2-inch drywall, threaded self-drilling anchors support 20 to 50 lb shear, and heavy toggle bolts hold 50 to 100 lb shear. However, because curtain rods cantilever 3 to 6 inches away from the wall, the outward pull-out tension on the upper screw is substantially higher than the downward shear weight. Always select an anchor rated well above the calculated static fabric weight.
Why is my curtain rod pulling out of the drywall?
Curtain rods pull out when undersized expansion anchors slip under rotational torque, when pilot holes were drilled too large, or when the drywall core has degraded from repeated downward pulling. If the gypsum hole is blown out, standard screws can no longer bite. Replace the failed fastener with a wide-surface toggle bolt or a high-capacity drywall anchor that clamps across a fresh, undamaged section of wallboard behind the hole.
Conclusion
Hanging curtain rods securely requires understanding the mechanical forces at play. By mounting hardware high and wide, verifying the presence of framing studs, and installing heavy-duty anchors matched to your fabric weight, you ensure your window treatments remain straight and secure over years of daily use.
For permanent installations involving heavy blackout drapes or wide spans in 1/2-inch or 5/8-inch drywall where no studs exist, GHOSTUD manufactures patented, high-capacity load-distributed drywall anchors in the USA from 100% recycled plastic. The GS1 (installed with a 1-inch hole saw) is rated for up to 250 lb shear, while the GS2 (installed with a 2-inch hole saw) provides up to 1,000 lb shear capacity in standard drywall cavities.
Take time to measure carefully, level your brackets before fastening, and explore our comprehensive curtain rod anchor guide to complete your window installation the right way.