
How to Choose the Correct Toggle Bolt Size for a TV Mount
Choose a Toggle Bolt Anchor for a TV Mount by Weight, Wall, and Mount Type
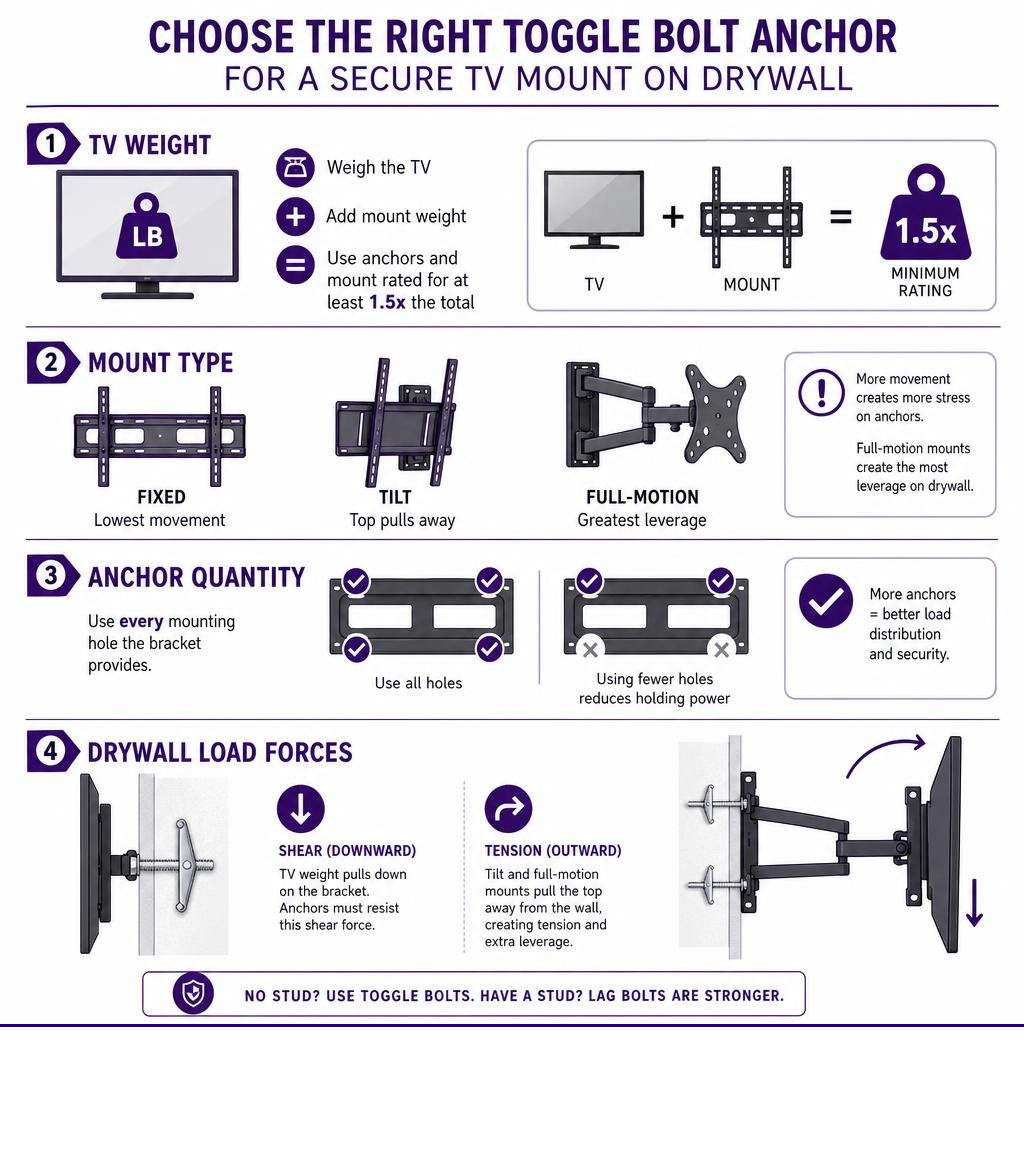
Use a toggle bolt anchor for TV mount only where the bracket cannot fasten into a wood stud. First, weigh the TV, add the mount’s weight, and choose anchors and a bracket rated for at least 1.5 times that total. For drywall-only fixed or tilt mounts, use every bracket hole available and select the bolt diameter that fits the mount’s holes and meets the anchor maker’s rating for your drywall thickness.
A 3/16-inch toggle may suit lighter TVs and compact fixed mounts. A 1/4-inch heavy-duty toggle is a more common choice for larger TVs or wider mounting plates. Screen size helps estimate the job, but actual TV weight and mount style matter more.
A TV pulls down on the bracket in shear. A tilt or full-motion arm also pulls the top of the bracket away from the wall, creating tension and leverage. Published anchor ratings are often shear ratings, so do not treat them as pull-out capacity for an extended articulating mount. If a convenient wood stud is available, lag bolts into that stud remain the stronger mounting method.
I’m Trevor Jones, and I bring more than 16 years of experience in entrepreneurship, technology, and building-hardware development to the topic of selecting a toggle bolt anchor for TV mount projects. My work focuses on making drywall mounting choices easier to understand by matching the hardware to the real load and wall conditions.
Simple guide to toggle bolt anchor for tv mount:
Understanding Toggle Bolt Mechanics and Load Physics
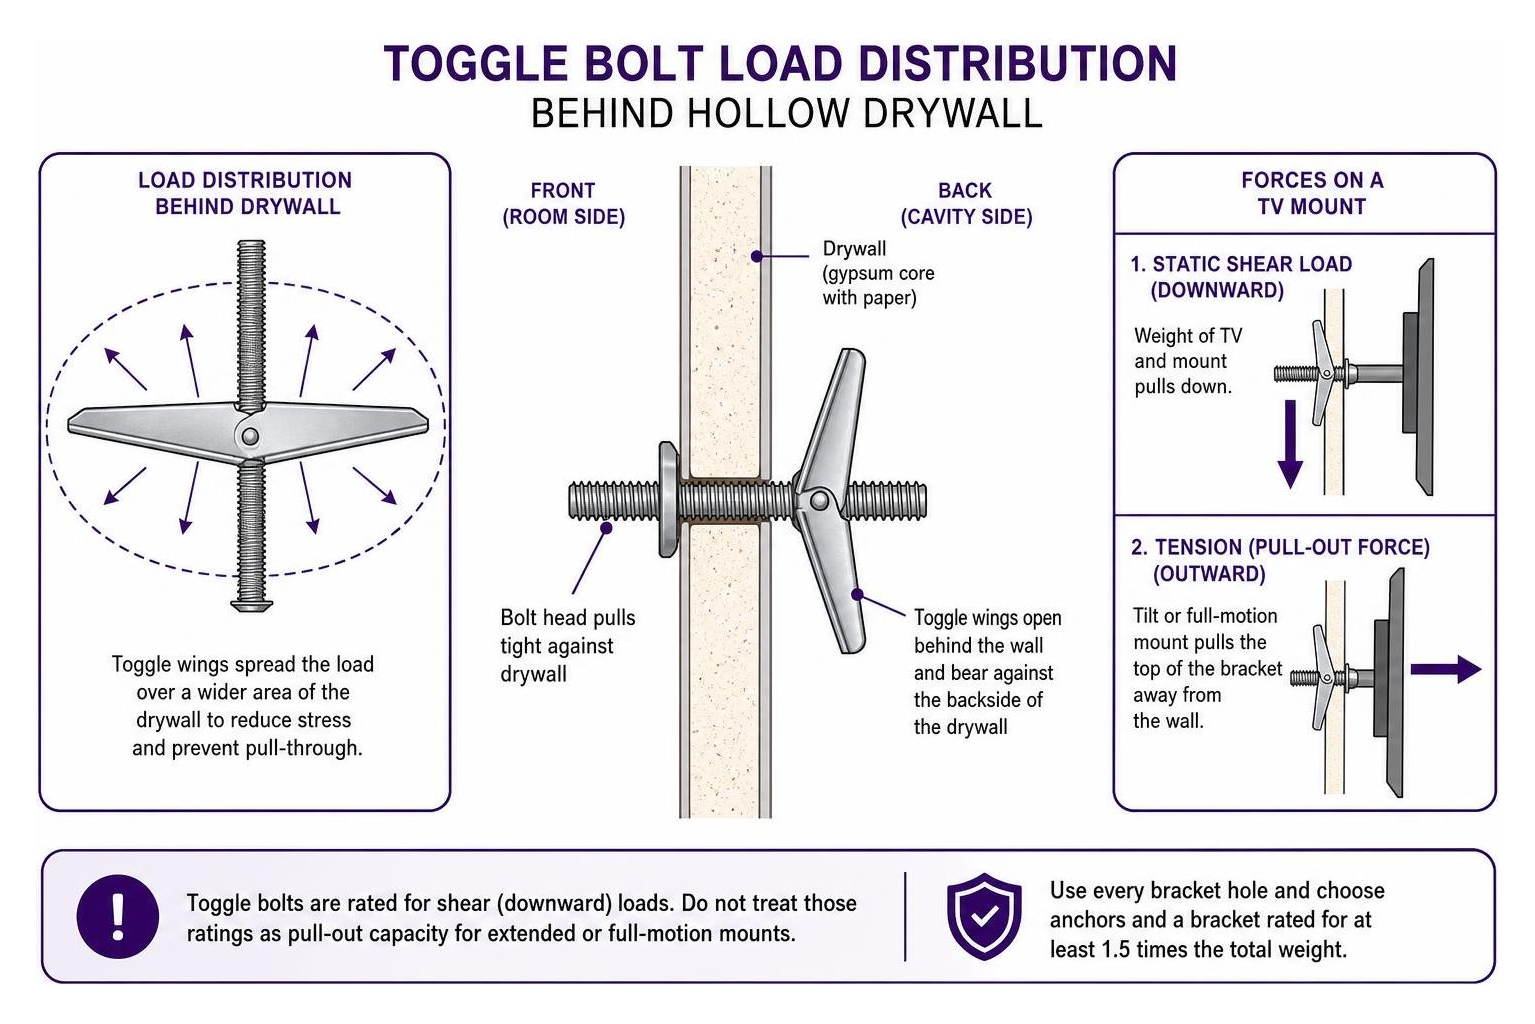
Mounting a television to drywall without attaching to a wood stud relies entirely on distributing mechanical stress across the gypsum board. Gypsum is brittle and crumbles when subjected to concentrated point loads. Toggle bolts solve this problem by passing a folded mechanical anchor through a drilled hole in the wall. Once behind the wallboard, the anchor expands across a wider surface area on the backside of the drywall paper and gypsum core.
When selecting hardware, review this step-by-step guide to drywall anchor types to evaluate the mechanical differences between friction anchors, expanding sleeves, and hollow-wall fasteners.
Two primary forces act on any wall-mounted television:
- Static Shear Load: The downward gravitational pull exerted by the weight of the display and bracket. The fastener rests directly against the lower rim of the drywall hole.
- Tension (Pull-Out Force): The outward horizontal force that attempts to pull the anchor through the wall.
Standard flat or fixed brackets generate almost pure downward shear force. The backplate rests flush against the front drywall paper, while the toggle wing or channel presses against the back paper. Hollow wall cavities provide 3.5 inches of open depth in standard 2×4 stud framing (or 1.5 inches in shallow partitions). This hollow space allows the toggle mechanism to snap or spring open fully.
To protect the drywall core from crushing, apply a baseline safety factor of at least 1.5× the combined weight of the screen and mount for static installations. If your TV and mount weigh 50 lbs, your overall anchoring system must be rated for at least 75 lbs.
Spring Wing Toggles vs Solid Channel Toggles
Traditional spring-wing toggle bolts use two stamped-metal wings tensioned by an internal spring. To install them, thread the bolt through the TV bracket first, spin the wing onto the bolt threads, pinch the wings flat, and push the assembly through the hole. Once inside the cavity, the spring snaps the wings open.
Spring-wing toggles present distinct mechanical drawbacks:
- Oversized Holes: A 1/4-inch bolt requires a 3/4-inch drilled hole so the folded wings can pass through.
- Blind Positioning: You cannot pre-install the fastener into the wall before aligning the bracket.
- One-Time Use: Backing out the bolt causes the spring wings to detach and drop permanently into the stud cavity.
Solid channel toggles (such as strap-based channel anchors) replace the spring wings with a solid metal channel connected to flexible plastic guide straps and a sliding retention collar. The metal channel pivots parallel to the straps to slide through a smaller opening—a 1/4-inch channel toggle requires only a 1/2-inch hole. Pulling the straps seats the metal channel flat against the hidden side of the drywall, and sliding the ratchet collar flush locks the channel permanently in place before you insert the machine bolt.
This design prevents the bolt threads from grinding against the raw gypsum core and allows you to remove and rethread the bolt without losing the internal channel. For an in-depth hardware breakdown, read this guide to molly bolt vs toggle bolt comparisons.
The Impact of Mount Articulation and Cantilever Forces
A flush, low-profile bracket keeps the television within 1 to 2 inches of the drywall plane. In this position, over 90% of the mechanical force translates into pure downward shear.
Extending an articulating arm 18 to 24 inches away from the wall creates a severe cantilever effect. Gravity pulling down on the screen leverages the mount bracket like a pry bar.
- Top Fasteners: Subjected to severe tensile pull-out forces that try to tear the anchors through the wall.
- Bottom Fasteners: Subjected to heavy compressive loads that drive the lower lip of the bracket into the drywall.
Drywall has low tensile and flexural strength. Repeatedly swinging, extending, or adjusting an articulating mount generates dynamic shock loads and torque amplification. Over time, these dynamic forces cause the gypsum core around the top anchors to fracture and fatigue.
Do not install full-motion, long-arm articulating mounts for heavy displays on hollow drywall alone. If you are installing an articulating mount, anchor the bracket directly into solid wood studs or attach a structural wood backing panel across multiple studs.
How to Choose the Right Toggle Bolt Anchor for TV Mount Installations
Selecting the correct fastener requires matching the bolt diameter to the total load, the mounting bracket’s pre-drilled slots, and the drywall thickness (typically 1/2-inch or 5/8-inch).
Follow these hardware sizing rules:
- Weigh your TV: Check the manufacturer label on the back of the panel. Do not guess based on screen diagonal.
- Check Bracket Slots: TV mount backplates typically feature 5/16-inch or 3/8-inch wide routing slots. Verify that your toggle bolt washer covers the slot completely without slipping through.
- Calculate Total System Capacity: Use a minimum of four toggle anchors spread evenly across the top and bottom rows of the bracket.
Sizing a Toggle Bolt Anchor for TV Mount Hardware by Screen Weight
In standard 1/2-inch gypsum board, toggle fasteners provide varying levels of mechanical support based on bolt diameter and backing channel width:
| Bolt Diameter | Required Drill Hole | Ultimate Shear (1/2″ Drywall) | Safe Working Shear Load | Recommended TV Weight Class |
|---|---|---|---|---|
| 1/8 in | 3/8 in | ~80–100 lbs | 20–25 lbs | Small displays/monitors under 25 lbs (flush mount only) |
| 3/16 in | 1/2 in | ~170–200 lbs | 40–50 lbs | TVs up to 43 in (weighing under 35 lbs) |
| 1/4 in | 1/2 in (channel) / 3/4 in (wing) | ~238–265 lbs | 60–65 lbs | TVs 43 in to 65 in (weighing 35–65 lbs) |
| 3/8 in | 3/4 in (channel) / 7/8 in (wing) | ~350–400 lbs | 85–100 lbs | Large TVs up to 75 in (weighing 65–85 lbs) |
Note: Ultimate shear represents laboratory failure thresholds. Safe working load applies an industry-standard 4:1 safety factor for wallboard. When calculating your installation, ensure the combined safe working load of all installed anchors exceeds the combined weight of your TV and bracket by at least 1.5×.
Wall Material Compatibility and Thickness Limits
Toggle fasteners function in specific wall substrates:
- Standard Drywall (1/2″ and 5/8″): Ideal for channel toggles. The solid channel spans across the gypsum core to deliver reliable shear support.
- Double-Layer Drywall (1″): Common in fire-rated commercial walls and soundproof partitions. Ensure your machine bolts have at least 2.5 to 3 inches of length to pass through the mount, double drywall, and toggle mechanism.
- Hollow Concrete Block (CMU): Channel toggles work effectively inside the hollow cells of cinder blocks. A 1/4-inch channel toggle can achieve over 800 lbs of holding capacity in solid or hollow masonry.
- Metal Stud Framing: When working in high-rise condos or commercial buildings with light-gauge (20-gauge to 25-gauge) steel studs, sheet metal screws strip out easily. Installing 1/4-inch channel toggles directly through the center of the metal stud flange provides a secure mechanical anchor.
Situations Where Toggle Bolts Fail: Toggle bolts are not recommended for fragile plaster-and-lath walls without caution. Drilling large 1/2-inch to 3/4-inch holes in old plaster often cracks the surrounding surface keys, detaching the plaster from the underlying wood lath and compromising structural integrity.
For plaster walls, locate the structural framing with an electronic scanner or mount a 3/4-inch plywood ledger across the studs using structural wood screws.
Step-by-Step Guide to Installing Toggle Bolts for a TV Mount
Follow this direct procedural guide to mount your television bracket securely onto hollow drywall.
Tools and Materials Required
- TV wall mount bracket and hardware kit
- 4 to 6 solid channel toggle anchors (1/4-inch diameter recommended)
- 1/4-20 machine screws (length: drywall thickness + bracket thickness + 1/2 inch)
- 1/4-inch heavy-duty steel flat washers
- Power drill and 1/2-inch brad-point or spade drill bit
- Torpedo level and bubble level
- Stud finder and painter’s tape
- Handheld #2 or #3 Phillips screwdriver
For additional procedural details, consult our install guide.
Pre-Drilling and Setting Your Toggle Bolt Anchor for TV Mount Brackets
- Scan for Hidden Obstructions: Run a stud finder across the intended mounting zone. If a wood stud sits inside the bracket footprint, plan a hybrid installation. Use a small finishing nail or a 1/8-inch pilot bit to probe the drywall cavity and verify the area is free of electrical conduit, plumbing lines, or HVAC ducts.
- Position and Level the Bracket: Hold the metal TV wall plate at your desired viewing height (typically 42 to 60 inches from the floor to screen center). Place a level across the top edge. Mark your drill locations through the bracket slots using a pencil—mark at least four points (two in the top row spread wide apart, two in the bottom row).
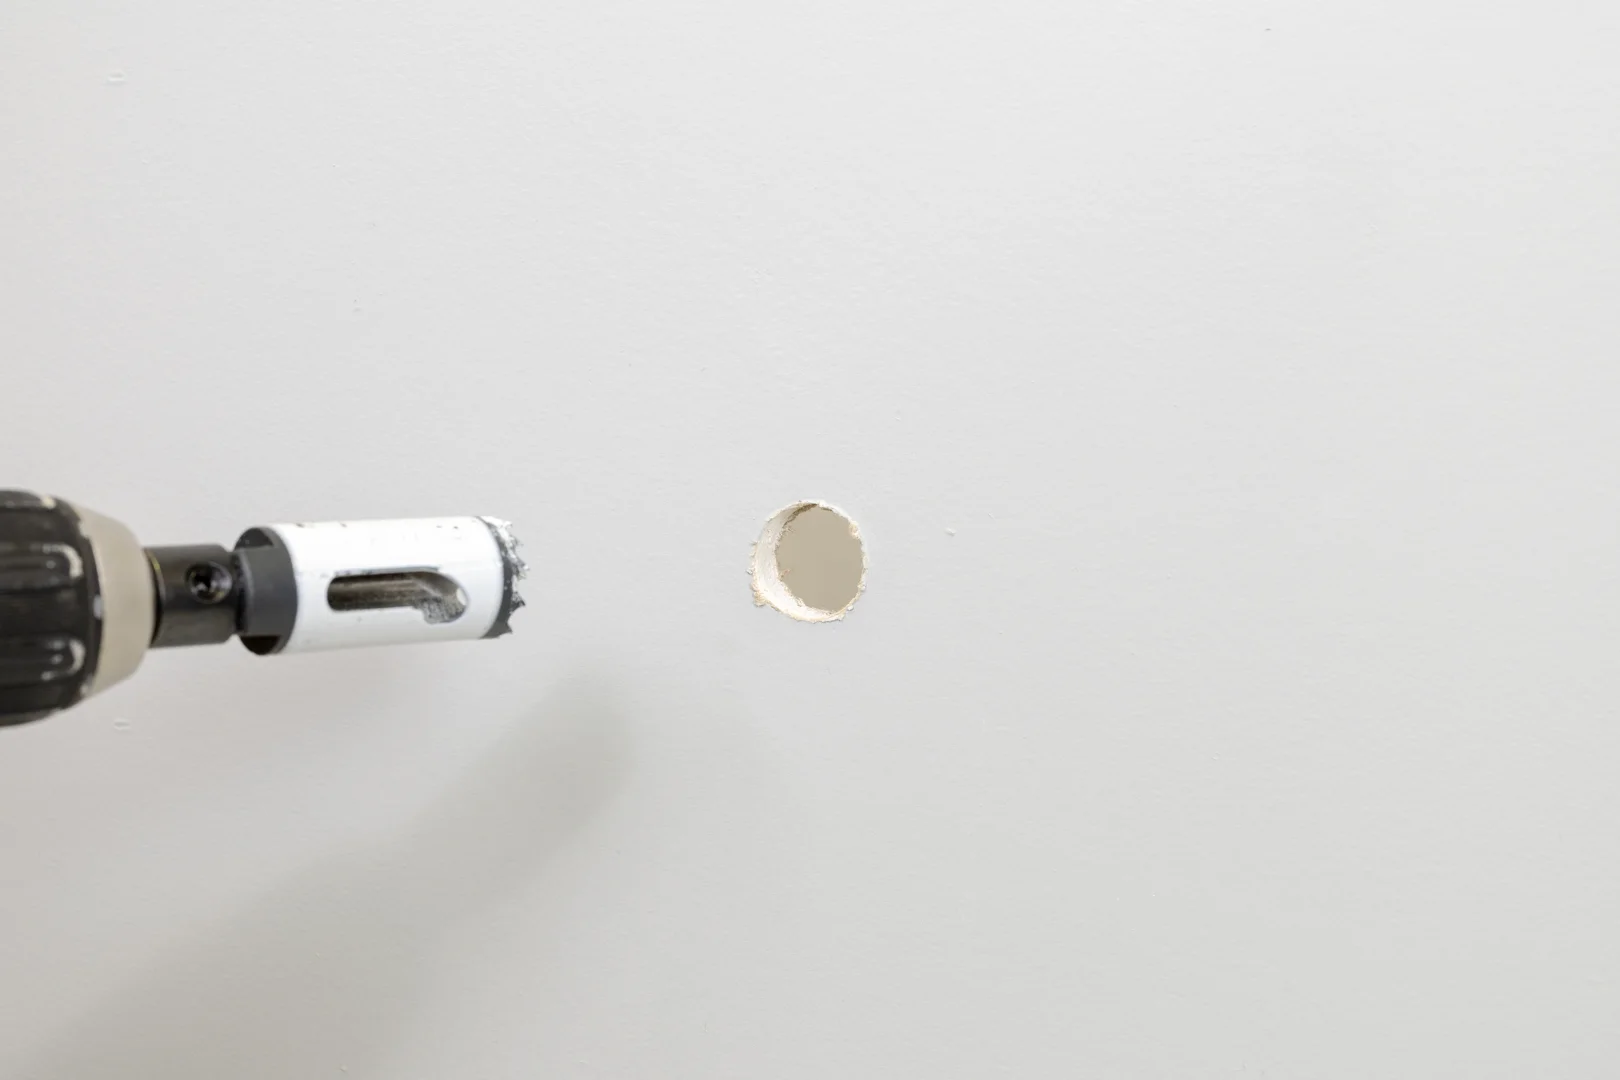
- Bore Clean Anchor Holes: Chuck a 1/2-inch drill bit into your drill. Hold the bit perpendicular (90 degrees) to the wall. Drill through the drywall using steady, moderate forward pressure. Avoid wall blowout on the back paper. Learn more about drilling methods in our guide on how to insert an anchor into wall using 5 methods that guarantee results.
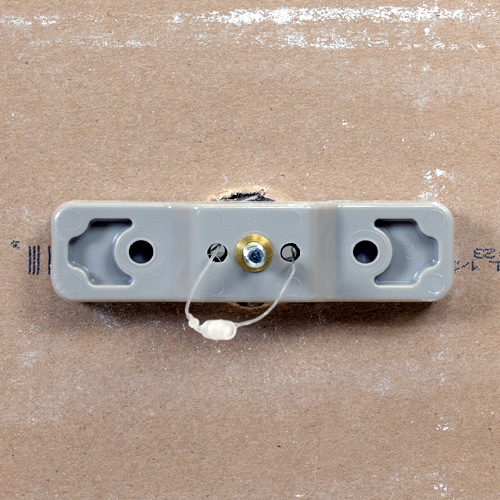
- Insert the Toggle Channel: Pivot the metal channel of the solid toggle anchor flat against its plastic guide straps. Push the metal channel completely through the 1/2-inch hole into the wall cavity.
- Set the Backing Plate: Pull the plastic ring toward you until the metal channel seats firmly against the back of the drywall. Slide the plastic retention cap along the straps until the cap sits flush and flat against the front drywall paper.
- Snap Off the Straps: Bend the protruding plastic straps up and down at the face of the wall until they snap off flush with the outer rim of the collar. Repeat this process for all marked hole locations.
Securing the Mounting Plate and Torque Management
- Prepare the Fasteners: Slide a heavy-gauge steel flat washer onto each 1/4-20 machine bolt.
- Mount the Wall Plate: Align the TV bracket slots over the installed toggle collars. Hand-thread each machine bolt through the bracket slots into the threaded metal channels behind the wall. Ensure threads engage cleanly without cross-threading.
- Drive Bolts in a Cross-Pattern: Use a handheld screwdriver to tighten the bolts sequentially in an “X” pattern (top-left, bottom-right, top-right, bottom-left). This distributes tension evenly across the metal plate.
- Avoid Drywall Core Crushing: Do not use an impact driver to tighten toggle bolts in drywall. High-torque power tools can crush the soft gypsum core between the toggle channel and the front washer, stripping the anchor cavity. Tighten firmly by hand until the bracket is immovable against the wall face.
- Load Test the Bracket: Before attaching the television, grip the mounting plate with both hands and apply firm downward and outward pressure. Check for play, flexing, or drywall cracking around the perimeter.
- Hang the Display: Attach the vertical bracket rails to the VESA holes on the back of your TV using the manufacturer-specified machine screws. Lift the TV onto the wall plate, center the unit, and tighten the lower safety locking screws to prevent accidental displacement.
Hybrid Mounting Strategies and Critical Mistakes to Avoid
A hybrid installation provides exceptional strength when your TV needs to be centered on a wall section where only one wood stud is available.
Standard wall framing sets studs at 16 inches or 24 inches on center. If your screen centering aligns a single stud behind the bracket plate:
- Drive two 5/16-inch or 3/8-inch lag bolts (or structural wood screws) directly into the center of the wood stud through the middle bracket slots.
- Install two to four 1/4-inch channel toggle anchors into the hollow drywall on the left and right wings of the bracket plate.
The lag bolts anchored in the stud bear the primary downward shear and cantilever loads, while the toggle bolts keep the bracket level and prevent rotational movement.
Common Mounting Mistakes That Lead to Wall Failure
- Using Plastic Expansion Plugs: Standard plastic ribbed or conical expansion plugs rely on friction against the gypsum core. Under the cantilevered downward and outward pull of a 40+ lb television, plastic plugs fail and pull free within weeks. Use high-strength toggle hardware instead.
- Drilling Holes Too Close Together: Placing two toggle anchors within 2 to 3 inches of each other fractures the interior gypsum web between the holes. Maintain at least 4 to 6 inches of horizontal and vertical spacing between toggle anchors.
- Skipping the Top Row Anchors: Top fasteners resist outward tension, while bottom fasteners resist inward compression. Always place your strongest anchors in the top horizontal row of the mounting plate.
- Ignoring Wall Thickness: Using standard-length 1.5-inch bolts on 5/8-inch drywall with a thick heavy-gauge steel bracket leaves insufficient thread engagement with the toggle channel. Ensure bolts extend at least 1/2 inch past the back of the drywall.
Frequently Asked Questions About Mounting TVs with Hollow Wall Anchors
Can toggle bolts support a 65-inch or 75-inch TV on drywall alone?
Yes, modern flat-screen LED/OLED televisions between 65 and 75 inches generally weigh between 45 and 75 lbs. Four 1/4-inch channel toggle anchors installed in undamaged 1/2-inch drywall provide a theoretical combined ultimate shear capacity exceeding 900 lbs, easily clearing the required 1.5× safety margin for a 75 lb TV. However, this is safe only when using a low-profile fixed or tilting mount. Do not hang a 65-inch or 75-inch display on drywall alone using an articulating swing-arm mount.
Are standard light-duty anchors safe for mounting a television?
No. Standard plastic expansion plugs, hammer-in nylon sleeves, and light self-drilling screw anchors are designed for static loads under 15 to 20 lbs (such as small picture frames or wall clocks). When subjected to the sustained, dynamic pull-out forces of a television, the gypsum core crumbles around the anchor body, causing catastrophic wall failure. For displays, use only through-wall toggle mechanisms or structural anchors. For very lightweight displays under 15 lbs on fixed plates, smaller 1/8-inch toggle bolts can work, but heavy-duty toggle anchors remain the standard for all primary displays.
Can toggle bolts be reused if the TV bracket is removed?
Spring-wing toggle bolts cannot be reused because the loose metal wings drop down inside the hollow wall cavity as soon as the bolt is unthreaded. Solid channel toggles (strap toggles) can be reused. Because their plastic collar holds the threaded metal channel locked securely against the inner drywall face, you can unscrew the bolt, swap out your TV bracket, and rethread the bolt into the existing anchor channel without damaging the wall.
Conclusion
Choosing the correct toggle bolt size comes down to matching fastener diameter to your screen’s verified weight, accounting for drywall thickness, and calculating the mechanical leverage of your bracket. For static installations in hollow drywall without accessible studs:
- Use 3/16-inch toggle bolts for lightweight screens under 35 lbs.
- Use 1/4-inch heavy-duty toggle bolts for medium-to-large displays weighing between 35 and 65 lbs.
- Install at least four to six anchors spread widely across the bracket plate to distribute load forces evenly across the drywall.
- Keep your installation on a fixed or tilting mount to eliminate the dangerous pull-out torque generated by articulating arms.
Where studs are missing entirely and maximum load-bearing drywall capacity is required, consider Ghostud Drywall Anchors. Manufactured in the USA from 100% recycled plastic, GHOSTUD hardware utilizes a patented load-distributing architecture to provide permanent strength in hollow drywall.
- GS1 Drywall Anchor: Installs with a 1-inch hole saw and supports up to 250 lb shear in 1/2 in or 5/8 in drywall.
- GS2 Drywall Anchor: Installs with a 2-inch hole saw and supports up to 1,000 lb shear in 1/2 in or 5/8 in drywall.
(Note: Published ratings reflect shear capacity in sound drywall. GHOSTUD is engineered specifically for drywall applications and should never replace solid wood stud attachment when a convenient stud is accessible, nor is it suitable for plaster, masonry, or metal studs.)
To view complete step-by-step installation guides and choose the right mounting hardware for your wall, explore our full library at Mounting a TV Without Studs.