
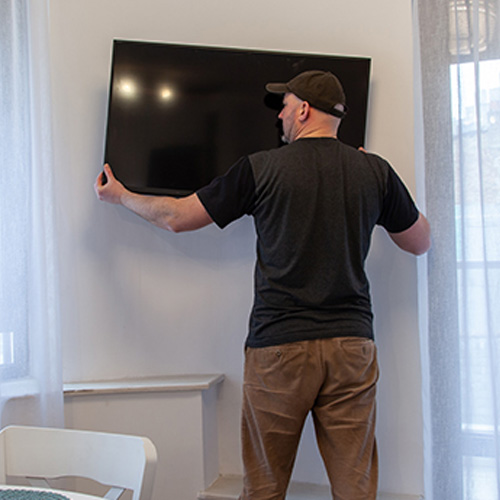
How to Hang a TV Without a Stud Safely
To hang a TV without a stud, check the wall first. Scan for studs, wiring, and pipes. If a stud is in the right place, fasten the mount to it. If not, use a fixed mount approved for hollow-wall installation and anchors suited to your drywall thickness and the combined weight of the TV and mount. Follow the hardware instructions, then check that the bracket stays firm before lifting the TV into place. Avoid a full-motion arm: extending the TV adds pull-out force.
Wall material matters. Many high-capacity drywall anchors are for 1/2 in or 5/8 in drywall only. Do not use them on plaster, lath, concrete, masonry, brick, stucco, tile over backer board, or metal studs; choose hardware made for those surfaces instead.
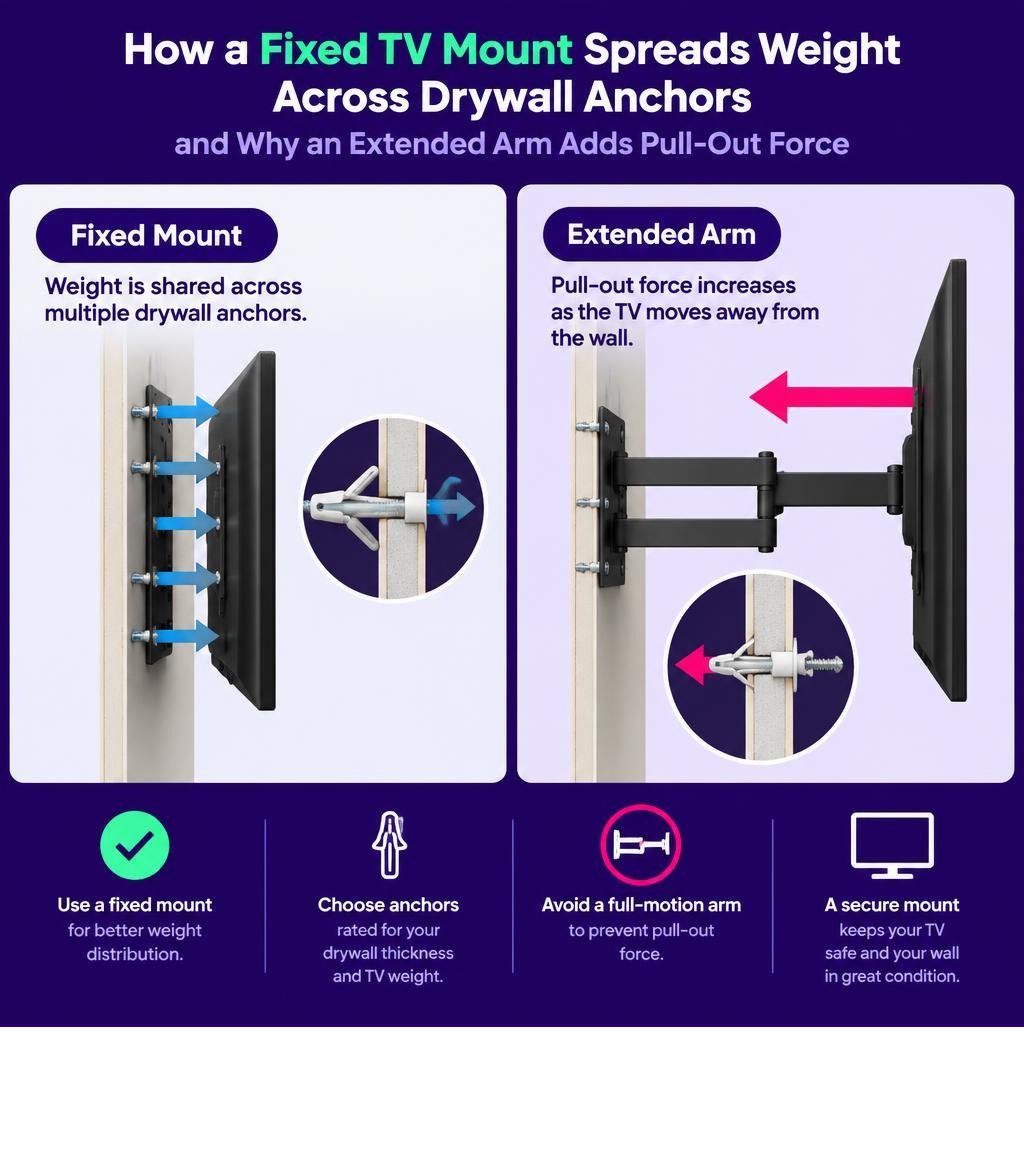
Quick hang a tv without a stud definitions:
- best drywall anchor for tv
- drywall anchor sizing for tv mount
- installing tv mount on drywall without studs
The Mechanics of Studless Wall Mounting: Shear vs. Cantilever Load
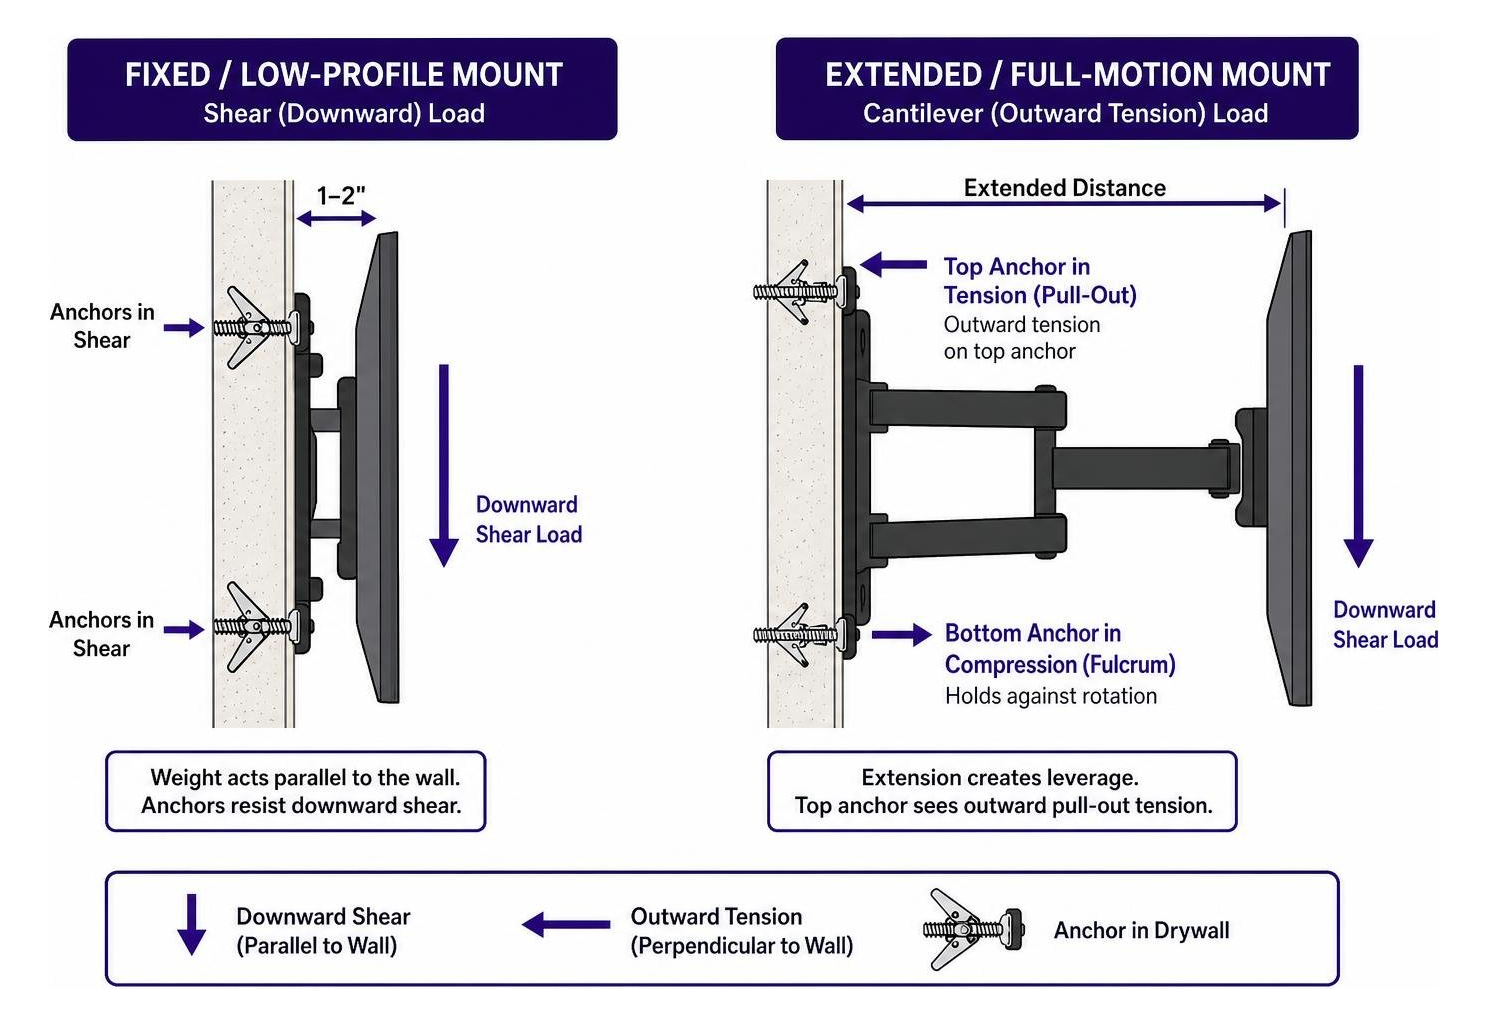
Mounting hardware experiences two primary physical forces: shear and tension. Shear force acts parallel to the wall face, dragging downward toward the floor. Tension force pulls perpendicular to the wall, dragging the fastener straight out of the gypsum core.
When you use a flat, low-profile bracket, the TV’s mass sits roughly 1 to 2 inches from the wall surface. This keeps the load almost entirely in shear. High-quality anchors excel under shear stress because the wall plane resists downward sliding. Understanding these physics starts with reviewing drywall anchor shear ratings to see how different fasteners support vertical mass.
The physics change dramatically when you introduce an articulating or full-motion arm. Extending a 50 lb television 14 inches away from the wall converts simple downward shear into severe rotational leverage (a cantilever load). The top fasteners become a fulcrum. Instead of just holding vertical weight, the top anchors experience outward tension forces exceeding 80 to 100 lb of pure pull-out stress.
Drywall has low tensile strength. Under dynamic movement or extended cantilever loads, standard hollow-wall anchors crush the gypsum core around the hole, causing a blowout failure where a conical chunk of drywall pulls free from the wall plane.
Can You Safely Hang a TV Without a Stud?
Yes, you can securely mount modern flat panels directly to hollow drywall when you use fixed or shallow-tilt brackets paired with appropriate load-bearing hardware. Modern LED and OLED displays are far lighter than older plasma screens or early LCD units. A modern 55-inch LED TV typically weighs between 28 and 42 lb, while a 65-inch screen averages 40 to 55 lb.
Keep within the physical limits of your wall material. When you distribute that static weight across multiple wide-surface mounting points on the wall plate, the gypsum panel handles the vertical shear load without cracking.
Weight Capacities and Drywall Thickness Limits
Standard residential construction uses either 1/2-inch or 5/8-inch gypsum board attached to framing spaced 16 inches on center. Wall thickness directly impacts anchor performance and mechanical strength:
- 1/2-inch Drywall: Standard for interior residential partition walls. It provides adequate shear strength for displays up to 55–65 inches when mounted flat with rated anchors.
- 5/8-inch Drywall: Typically used in commercial spaces, garages, or as fire-rated boundaries. The denser core increases fastener bite, anchor clamping force, and overall shear resistance.
When calculating your wall assembly capacity, apply the 75 percent capacity rule. Never load any anchor system past 75% of its verified working capacity under field conditions. If an installation requires supporting 60 lb of combined display and bracket weight, choose hardware rated for at least 80 lb to absorb minor incidental bumps. For heavier setups, review how to mount a large TV on drywall the right way before drilling holes.
Plaster and lath assemblies behave differently than drywall. Plaster is brittle, lacks uniform thickness, and crumbles under point pressure. Hollow drywall anchors engineered for uniform gypsum boards should not be used on traditional plaster walls.
Step-by-Step Instructions to Hang a TV Without a Stud
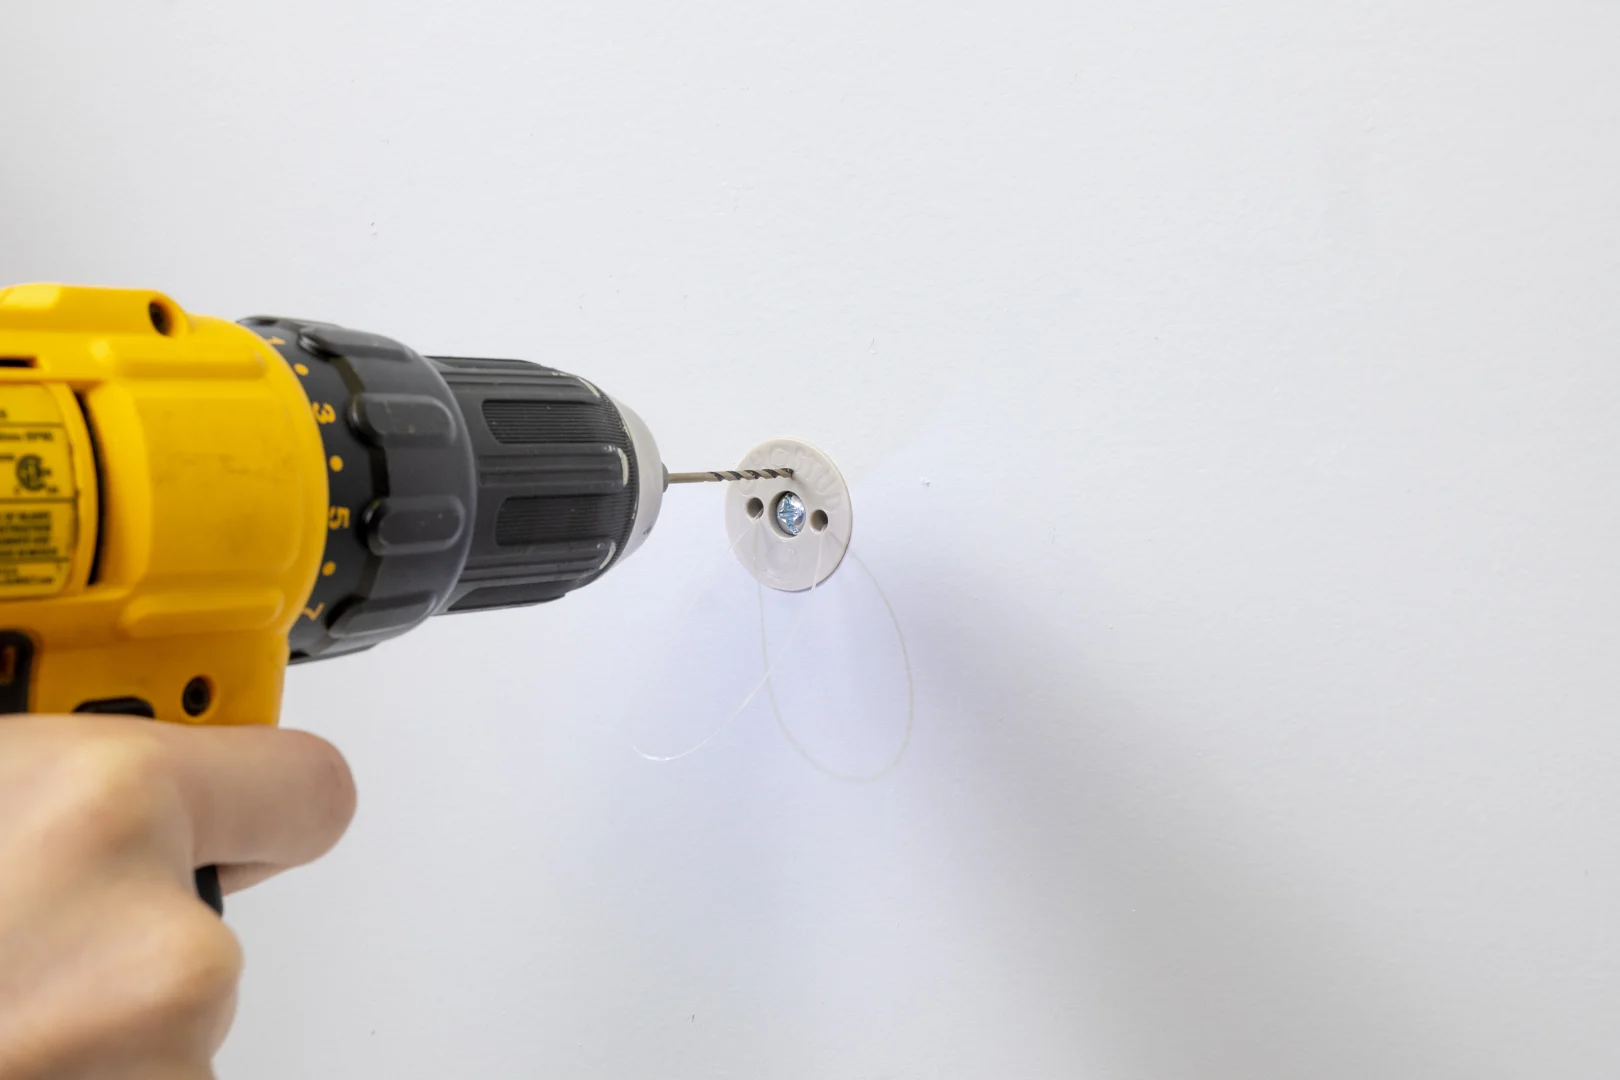
Follow these direct, numbered instructions to securely hang your television on hollow drywall.
Tools and Materials Required
- Electronic stud scanner with deep-scan and AC wire detection
- Torpedo bubble level or 24-inch spirit level
- Cordless drill driver
- Painter’s tape and pencil
- Appropriate hole saw or drill bits matching your anchor specifications
- Fixed or shallow-tilt TV wall bracket
- Drywall anchors rated for your TV’s specific weight class
- Screwdriver or socket set
1. Planning, Placement, and Wall Inspection
- Sit on your primary couch or chair and identify your eye level. Mark the lower third of the TV screen height on the wall using painter’s tape (typically 42 inches from the floor to the display center).
- Set your electronic scanner to deep-scan mode and sweep the entire target installation zone.
- Check for live AC electrical wiring and plumbing lines hidden behind the wall plate. If the scanner alerts to live wires, relocate your mounting height up or down by at least 6 inches.
- Verify whether a wall stud intersects your bracket’s path. If a stud sits within your bracket profile, always drive lag screws into that wood stud and use hollow-wall anchors only on the opposite side. If no studs align with your layout, prepare the hollow-wall field using hardware approved for hollow-wall installation.
2. Marking and Drilling Precise Pilot Holes
- Align the metal wall bracket against the wall at your target height.
- Place a bubble level across the top edge of the bracket. Adjust until the bubble rests dead center.
- Mark at least four mounting points through the bracket slots using a pencil. Space these marks as far apart horizontally and vertically as the bracket allows to distribute the load across the widest possible surface area.
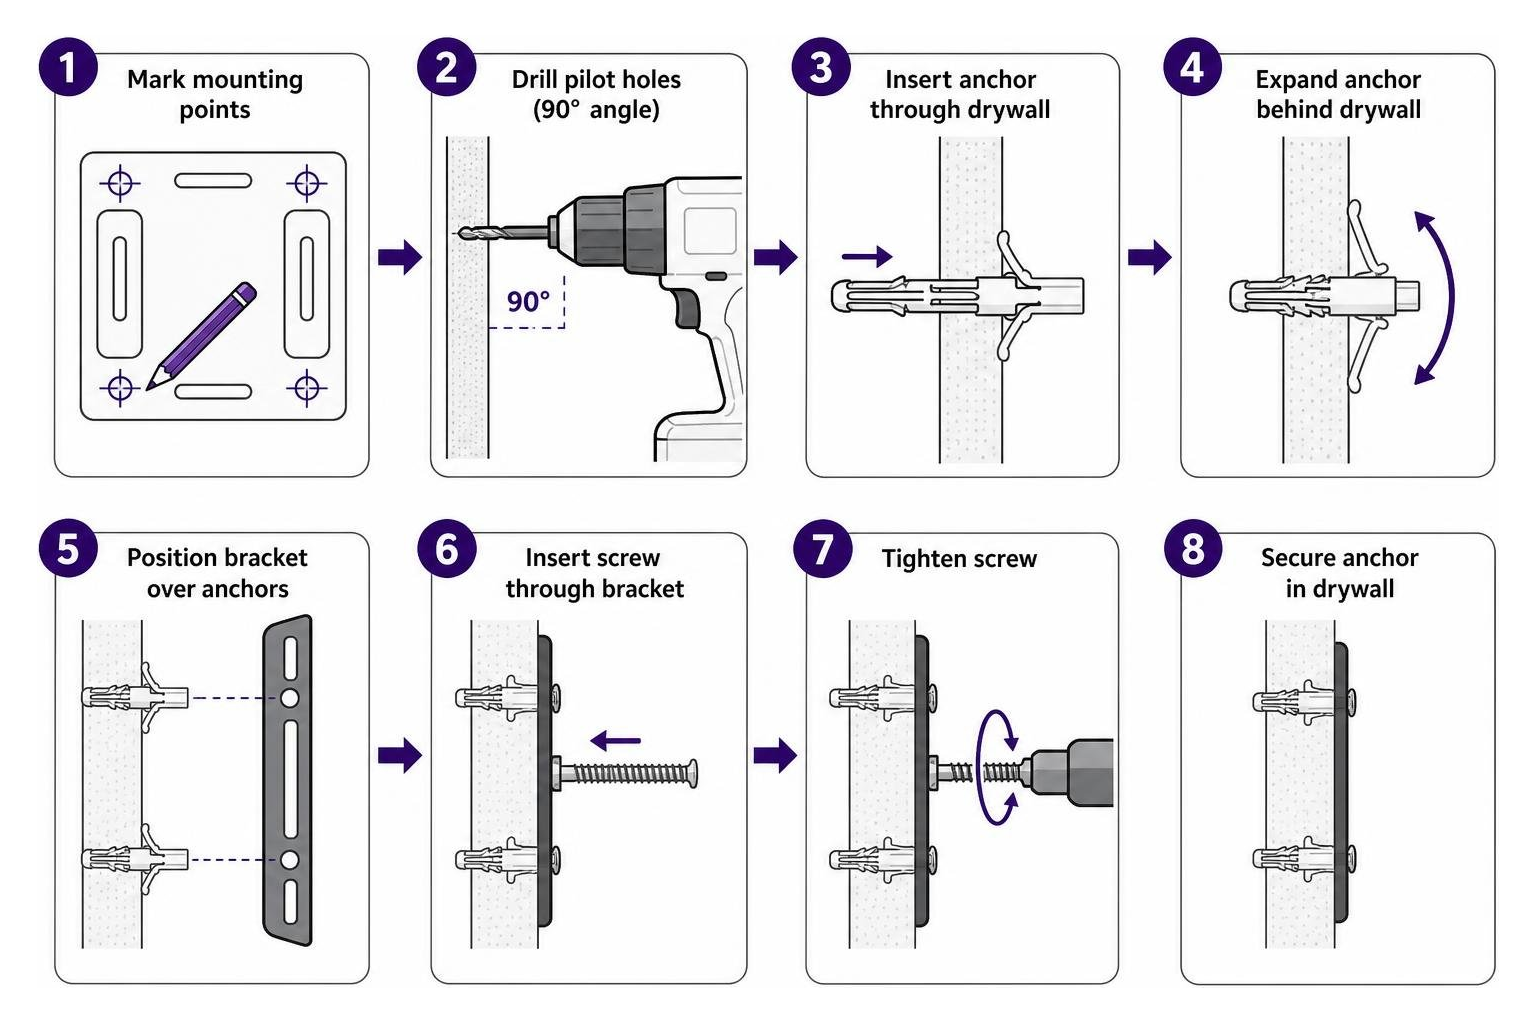
- Put on your safety glasses.
- Hold your drill driver perpendicular (at a strict 90-degree angle) to the wall plane.
- Drill clean holes through the gypsum board at your pencil marks. Match your drill bit or hole saw diameter exactly to your anchor manufacturer’s requirements. Do not wobble the bit; an oval or wallowed hole compromises anchor clamping force.
3. Inserting Anchors and Fastening the Wall Bracket

- Clear gypsum dust out of the drilled holes.
- Insert your anchors into the wall openings and seat them firmly against the drywall face according to the hardware instructions.
- Position the metal wall bracket over the anchor points.
- Insert the anchor bolts through the bracket slots and thread them into the rear clamping mechanisms.
- Tighten the bolts in an alternating diagonal pattern (top-left, bottom-right, top-right, bottom-left) to draw the bracket flush against the wall surface without crushing the drywall paper. Verify the bracket remains level before final torquing.
4. Attaching TV Brackets, Hanging the Screen, and Load Testing
- Lay your television face down on a soft, flat surface (such as a blanket or carpeted floor).
- Align the vertical bracket arms with the VESA bolt holes on the back of the television.
- Secure the vertical arms using the M6 or M8 machine screws provided with your TV mount kit. Use the included nylon spacers if the back of your television is curved or has recessed mounting holes.
- Perform a manual load test on the wall bracket before lifting the display. Grasp the wall plate with both hands and apply firm, downward vertical pressure (at least 30 to 40 lb of force) for 15 seconds. Inspect the wall for any cracking, fastener movement, or bracket deflection.
- With two people, lift the TV by the outer edges, raise it to the wall plate, and hook the top hooks of the vertical arms over the top rail of the wall bracket.
- Engage and tighten the bottom safety locking screws beneath the bracket to lock the TV securely onto the wall plate.
GHOSTUD Anchors for Drywall Mounting
Standard lightweight plastic expansion plugs hold 5 to 15 lb and rely purely on outward friction against soft gypsum. They are suitable for light picture frames, but dynamic vibration or display weight causes them to pull straight out of the wall.
When you need reliable hollow-wall hardware for heavier loads, we manufacture high-capacity drywall anchors designed specifically for stud-free installations.
| Product Model | Required Hole Size | Safe Working Load | Approved Drywall Thickness | Primary Applications |
|---|---|---|---|---|
| GHOSTUD GS1 | 1-inch (Hole Saw) | Up to 250 lb | 1/2 in or 5/8 in Drywall | Towel bars, toilet paper holders, curtain rods, picture frames, light shelving |
| GHOSTUD GS2 | 2-inch (Hole Saw) | Up to 1,000 lb shear | 1/2 in or 5/8 in Drywall | TVs, heavy static displays, upper cabinets, heavy mirrors, shelving |
Mounting something heavy where there’s no stud? GHOSTUD® spreads the load across the drywall with a wide backplate instead of relying on the gypsum core. GS1 holds up to 250 lb shear, GS2 up to 1,000 lb. Made in the USA from recycled structural plastic. Shop GHOSTUD® from $16.99 →
For further comparisons between traditional hardware and modern drywall anchors, consult our guide to the best hollow wall anchors for TVs.
Heavy-Duty Hardware to Hang a TV Without a Stud
For televisions, large static displays, and heavy wall units, the GHOSTUD GS2 delivers maximum holding power across hollow drywall spans.
- High Shear Capacity: Rated for up to 1,000 lb shear in 1/2 in or 5/8 in drywall.
- Large Surface Distribution: Installs using a standard 2-inch hole saw to insert a wide backing plate that clamps a broad surface area behind the wall. This design eliminates point-load stress and prevents gypsum core blowout.
- Sustainable Construction: Manufactured in the USA from durable recycled material.
- Pack Sizes: Available on ghostud.com in convenient 2-packs and 20-packs for multi-room home projects.
That installing a GS2 requires cutting a clean 2-inch opening with a hole saw. It is an intentional, permanent anchoring method rather than a temporary picture-hanging hook.
Risks, Limitations, and When to Choose Alternative Solutions
Hanging displays on drywall without framing studs requires knowing hardware limitations. Never install a full-motion, articulating scissor mount on drywall without framing studs. When you swing a heavy screen outward on a 15-inch arm, the rotational torque tears standard hollow-wall fasteners out of gypsum panels. For full-motion mounts, you must fasten the baseplate directly into solid wood studs or spanning backer boards.
Material Limitations
- GHOSTUD Surface Compatibility: GHOSTUD anchors are strictly engineered for 1/2-inch and 5/8-inch drywall panels. Do not install them in plaster and lath, masonry, brick, solid concrete, stucco, tile over backer board, or light-gauge commercial metal studs. If you have plaster or brick walls, select hardware rated specifically for those masonry surfaces.
- Accessible Framing: Never use hollow-wall anchors as a workaround if a wooden stud is present and correctly positioned behind your target mount location. Lag screws driven 2 inches deep into sound framing timber remain the gold standard for structural TV mounting.
- Physical Prohibitions: GHOSTUD hardware is engineered for static architectural and household fixtures. Never use these anchors for grab bars, safety handrails, ADA compliance applications, fall-prevention fixtures, or anti-tip child safety straps where human body weight may dynamically impact the fastener.
If your walls feature damaged gypsum, crumbling plaster, or structural obstacles, consider alternative structural options:
- Plywood Backer Board Spanning: Fasten a 3/4-inch furniture-grade plywood panel across two distant wall studs using structural wood screws, then bolt your TV mount directly to the reinforced plywood plate.
- Layout Relocation: Shift your mounting layout horizontally across the wall to align the TV bracket directly over sound wood studs.
For broader hardware comparisons and installation setups, explore our comprehensive mounting guides.
Frequently Asked Questions About Studless TV Mounting
Can I use a full-motion articulating mount without studs?
No. Full-motion mounts create extreme cantilever forces. Pulling the TV outward transfers the load into perpendicular tension (pull-out force). This rotational leverage will crush the drywall core and cause the top anchors to pull free. Only use low-profile, fixed, or shallow-tilting brackets (maximum 10-degree tilt) when securing hardware into hollow drywall.
What is the maximum safe TV size for hollow drywall?
Screen size is secondary to total weight and bracket depth. Most modern flat screens up to 65 inches weigh under 55 lb, which is well within safe limits for heavy-duty drywall anchors rated for high shear loads. Always verify your display’s bare weight in the manufacturer manual and use at least four rated anchor points across the bracket.
How do I repair anchor holes if I relocate the TV?
To repair 1-inch or 2-inch anchor holes, press a self-adhesive mesh drywall screen patch over the opening. Apply a thin layer of joint compound over the mesh with a 6-inch putty knife, feathering the edges 2 inches past the hole. Allow it to dry for 24 hours, sand the area smooth with 120-grit sandpaper, apply a second light skim coat, sand with 220-grit paper, and finish with matching primer and paint.
Conclusion
Hanging a TV without a stud is straightforward when you calculate your load, choose a fixed mount, and use the right hollow-wall hardware. Verify your wall material, drill clean holes at a 90-degree angle, and test the bracket’s vertical hold before mounting your screen.
Ready to start? Walk up to your wall with an electronic scanner, check your drywall thickness, and verify your display’s total weight. Gather your tools and install your mount with confidence.
Mount it once, mount it right. Compare GS1 and GS2 →