
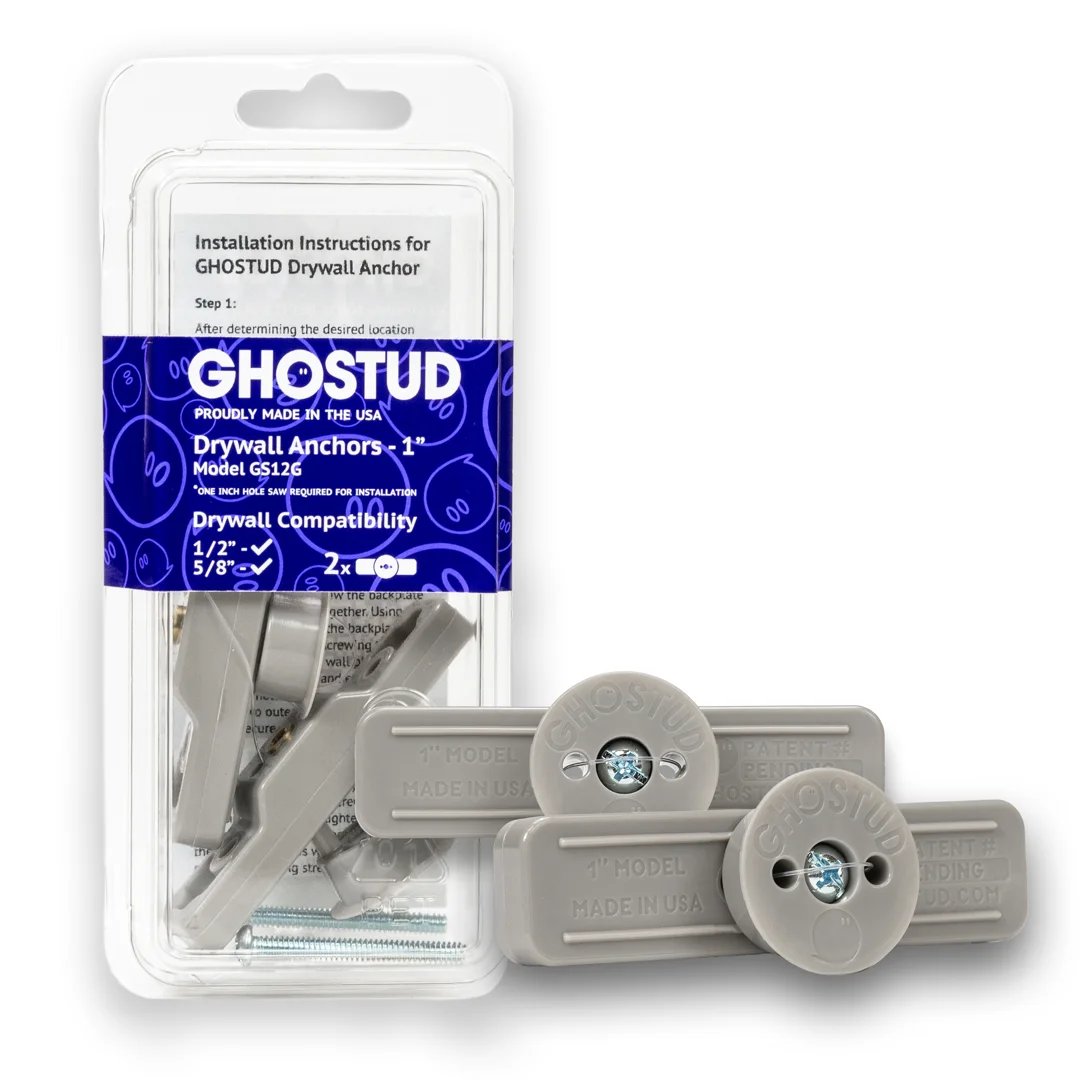
Choose a Wall Anchor That Fits the Wall and the Load
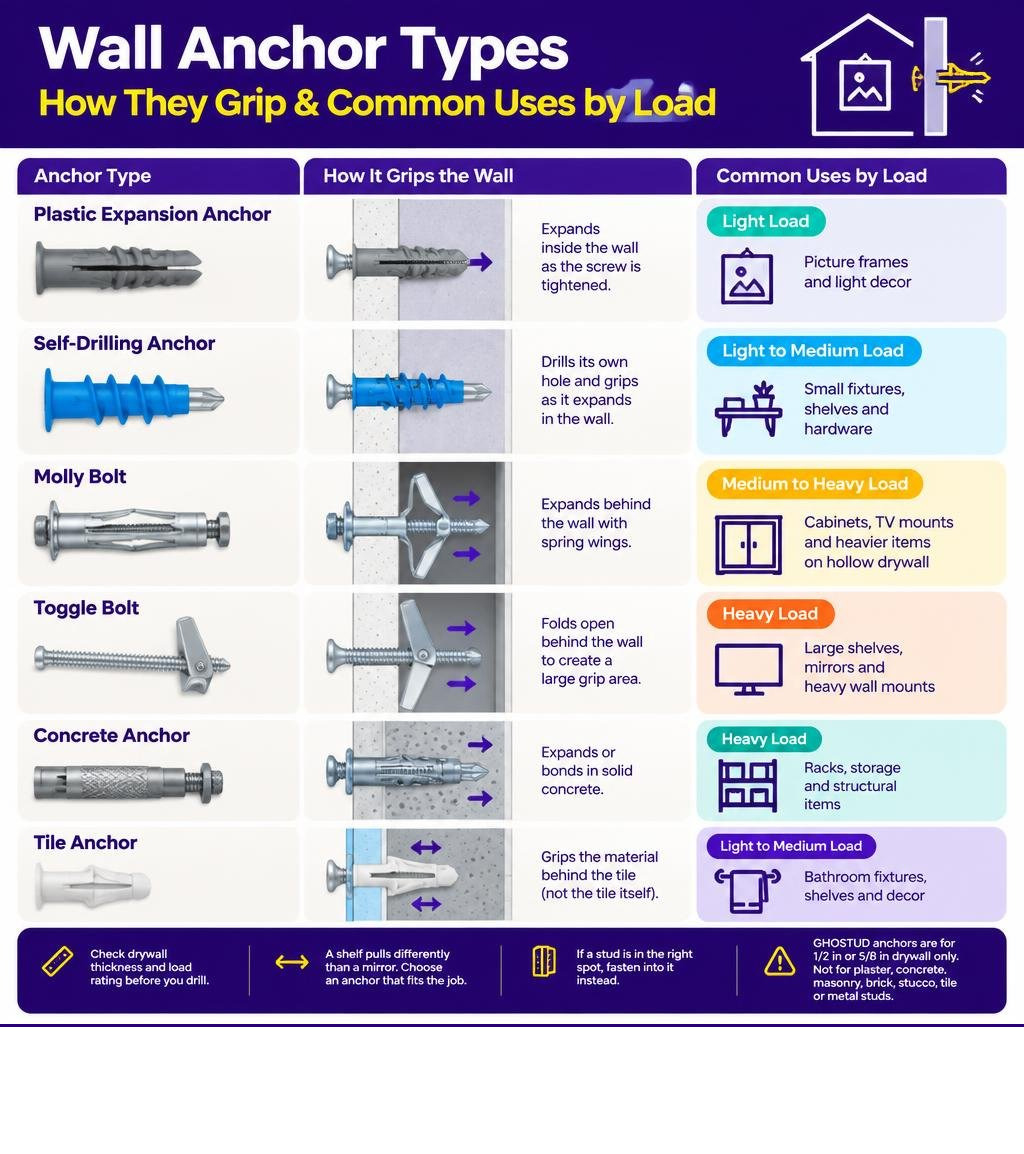
Use plastic expansion anchors for light picture frames, self-drilling anchors for small fixtures, and molly bolts or toggle bolts for heavier items on hollow drywall. For concrete, use concrete-rated fasteners. For tile, choose an anchor rated for the material behind the tile. If a stud is in the right spot, fasten into it instead.
Check drywall thickness and the anchor’s load rating before you drill. A shelf that sticks out from the wall can pull on an anchor differently than a mirror that hangs flat. High-capacity drywall anchors are for 1/2 in or 5/8 in drywall only. They are not for plaster, lath, concrete, masonry, brick, stucco, tile over backer board, or metal studs; use hardware made for those surfaces.
Related guides:
The Mechanics of Wall Anchoring: Tension, Shear, and Substrate Limits
Every wall fastener deals with two physical forces: shear and tension. Shear force acts downward, parallel to the wall face. Tension force pulls straight out, perpendicular to the wall.
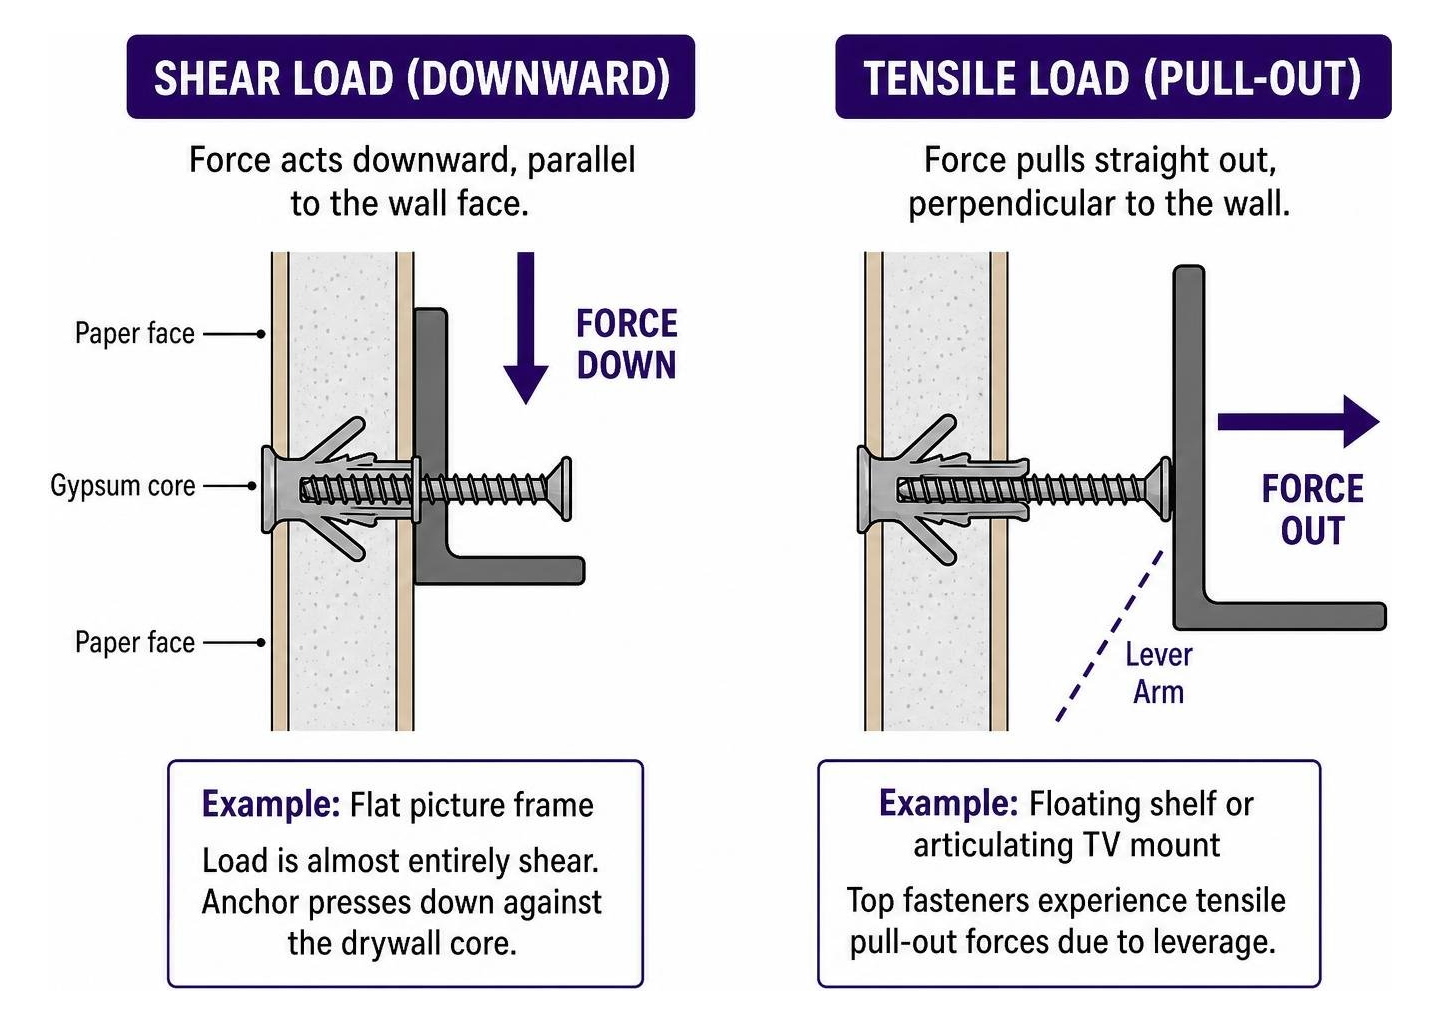
When you hang a flat picture frame, the load is almost entirely shear. The fastener presses down against the drywall core. Drywall consists of a gypsum plaster core sandwiched between two paper faces. Gypsum is brittle and crumbles easily under concentrated point loads. Because of this friability, driving a simple screw into hollow drywall without backing causes the threads to strip the core immediately.
When you install a floating shelf or an articulating TV mount, the physical mechanics change. The bracket acts as a lever arm. The top mounting screws experience heavy tensile pull-out forces, while the bottom of the bracket compresses into the gypsum face.
Fastener manufacturers calculate safe working loads by testing ultimate failure and applying a safety factor. A standard engineering safety factor is 4:1, meaning the allowable working load is 25% of the ultimate failure load. If an anchor lists an ultimate failure capacity of 100 lb, do not load it past 25 lb in practical use. To understand load calculations and safe limits in depth, read our guide on understanding drywall anchor shear ratings or review technical data from the Fastenal Technical Guide on Fastener Mechanics.
The most common failure mode in drywall anchoring is cone breakout or paper face tearing. When an expanding anchor is overloaded in tension, it pulls a circular chunk of gypsum straight out through the paper face. In dynamic applications like curtain rods or towel bars, cyclic pulling creates a secondary failure mode: hole wallowing. The metal or plastic barrel rocks back and forth inside the hole, turning the gypsum to dust until the fastener pulls out completely.
How to Install Wall Anchors Correctly: Step-by-Step Instructions
Installing anchors accurately prevents damaged gypsum and loose hardware. Follow our detailed steps for proper methods to insert an anchor into a wall.

Installing Self-Drilling and Expansion Anchors
- Mark the Location: Use a pencil and level to establish your mounting marks. Check for hidden studs using an electronic stud finder.
- Drill the Pilot Hole (Expansion Anchors Only): Match your drill bit diameter exactly to the anchor manufacturer’s specification (typically 3/16 in or 1/4 in). If installing self-drilling augers, skip drilling and place the sharp tip directly on the pencil mark.
- Drive the Anchor Flush: For plastic expansion plugs, tap the sleeve lightly with a hammer until the collar sits flat against the paper face. For self-drilling augers, use a manual #2 Phillips screwdriver. Drive the anchor slowly until the wide head is perfectly flush with the wall. Do not use high-speed power drills; excess torque will strip the gypsum core.
- Drive the Fastener: Thread the included screw through your fixture and into the anchor center. Tighten until snug. To learn about proper screw threading and shank types, read our guide on different types of drywall screws.
Installing Toggle Bolts and Molly Bolts
- Drill the Main Hole: Drill a clean hole through the drywall. Standard spring toggle wings require a 3/8-inch to 5/8-inch hole. Molly bolts require a 5/16-inch or 3/8-inch hole.
- Assemble the Fixture (Traditional Toggle Bolts): Thread the machine screw through the bracket or fixture first, then spin the metal toggle wing onto the bolt threads with the wing tips facing the bolt head.
- Insert the Wing: Compress the spring-loaded metal wings flat against the bolt shaft with your fingers. Push the assembly through the drilled hole until the wings clear the back of the drywall. You will hear and feel a distinct mechanical click or pop as the spring snaps open.
- Pull and Tighten: Pull the fixture outward toward yourself to keep tension on the wings against the back face of the drywall. Maintain this outward tension while tightening the screw with a screwdriver until fully clamped.
- Setting Molly Bolts: Push the sleeve into the hole. If you have a setting tool, hook the screw head and squeeze the lever to mushroom the sleeve legs behind the drywall. If setting with a screwdriver, turn the screw clockwise until you feel firm mechanical resistance. For specialized techniques, see our guide on using dedicated wall anchor tools.
Primary Types of Wall Anchors and Their Uses by Weight Class
This comparison of types of wall anchors and their uses helps you match the fastener mechanism to the item’s weight and the wall substrate thickness (standard residential 1/2 in or commercial 5/8 in drywall). Before drilling, explore our guide on choosing drywall anchors based on load capacity.
| Anchor Type | Rated Shear Load (1/2 in Drywall) | Rated Shear Load (5/8 in Drywall) | Required Hole Size | Best Applications |
|---|---|---|---|---|
| Plastic Expansion Plug | 5–20 lb | 10–25 lb | 3/16 in to 1/4 in | Small framed photos, smoke detectors |
| Plastic Butterfly / Wing | 25–40 lb | 35–50 lb | 5/16 in to 3/8 in | Clocks, decorative wall plaques |
| Self-Drilling Auger | 30–50 lb | 50–75 lb | No pre-drilling (cores hole) | Canvas art, light bathroom mirrors |
| Steel Molly Bolt | 40–80 lb | 50–100 lb | 5/16 in to 3/8 in | Sconces, light floating shelves |
| Wing Toggle Bolt | 75–120 lb | 100–150 lb | 3/8 in to 5/8 in | Heavy shelving, light TV wall mounts |
| Channel Toggle Bolt | 100–160 lb | 150–265 lb | 1/2 in | Large mirrors, fixed flat TV brackets |
| GHOSTUD GS1 | Up to 250 lb | Up to 250 lb | 1 in (hole saw) | Towel bars, curtain rods, light shelving |
| GHOSTUD GS2 | Up to 1,000 lb shear | Up to 1,000 lb shear | 2 in (hole saw) | TVs, cabinets, heavy mirrors, static shelving |
Mounting something heavy where there’s no stud? GHOSTUD® spreads the load across the drywall with a wide backplate instead of relying on the gypsum core. GS1 holds up to 250 lb shear, GS2 up to 1,000 lb. Made in the USA from recycled structural plastic. Shop GHOSTUD® from $16.99 →
Light-Duty Types of Wall Anchors and Their Uses (Under 30 lbs)
Light-duty anchors rely entirely on mechanical friction or small back-flange spreading.
- Plastic Expansion Anchors (Ribbed Sleeves): These are simple plastic sleeves ribbed along the barrel. When you drive a screw into the sleeve, it splits and expands outward against the internal gypsum core. They carry a typical rating of 5 to 25 lb in 1/2 in drywall. Use them strictly for lightweight items like smoke detectors, thermostat plates, and small picture frames. They have near-zero resistance to dynamic pulling and should never be used on ceilings.
- Plastic Butterfly Anchors: These feature folding side wings. As you push the anchor into the hole and thread the screw, the wings fold flat against the back face of the drywall. They support 25 to 50 lb per anchor.
For lightweight tasks under 25 lb, commodity plastic hardware is cheap, fast, and sufficient for static loads.
Medium-Duty Anchors: Self-Drilling Screws and Plastic Toggles (30 to 75 lbs)
Medium-duty fasteners increase surface area contact inside the wallboard without requiring large back-cavity clearances.
- Self-Drilling Auger Anchors (Threaded Zinc or Nylon): These fasteners have deep outer threads and a sharp cutting tip. You drive them straight into drywall with a screwdriver. As the large external thread cuts into the gypsum core, it displaces the material and establishes a wide mechanical grip. Typical load capacities range from 25 to 75 lb depending on drywall thickness. They are ideal for curtain brackets, framed mirrors, and decorative shelving. Avoid overtightening them; spinning the body inside the hole strips the soft core instantly.
- Pop Toggle Wall Anchors: These hybrid nylon anchors fold to enter a 5/16-inch hole, then pop open when a setting pin or screw pushes through the center. They provide an estimated capacity of 40 to 155 lb across various wall thicknesses.
Heavy-Duty Types of Wall Anchors and Their Uses (75 to 1,000 lbs)
Heavy loads demand fasteners that bridge across the back face of the drywall to spread tensile and shear stresses.
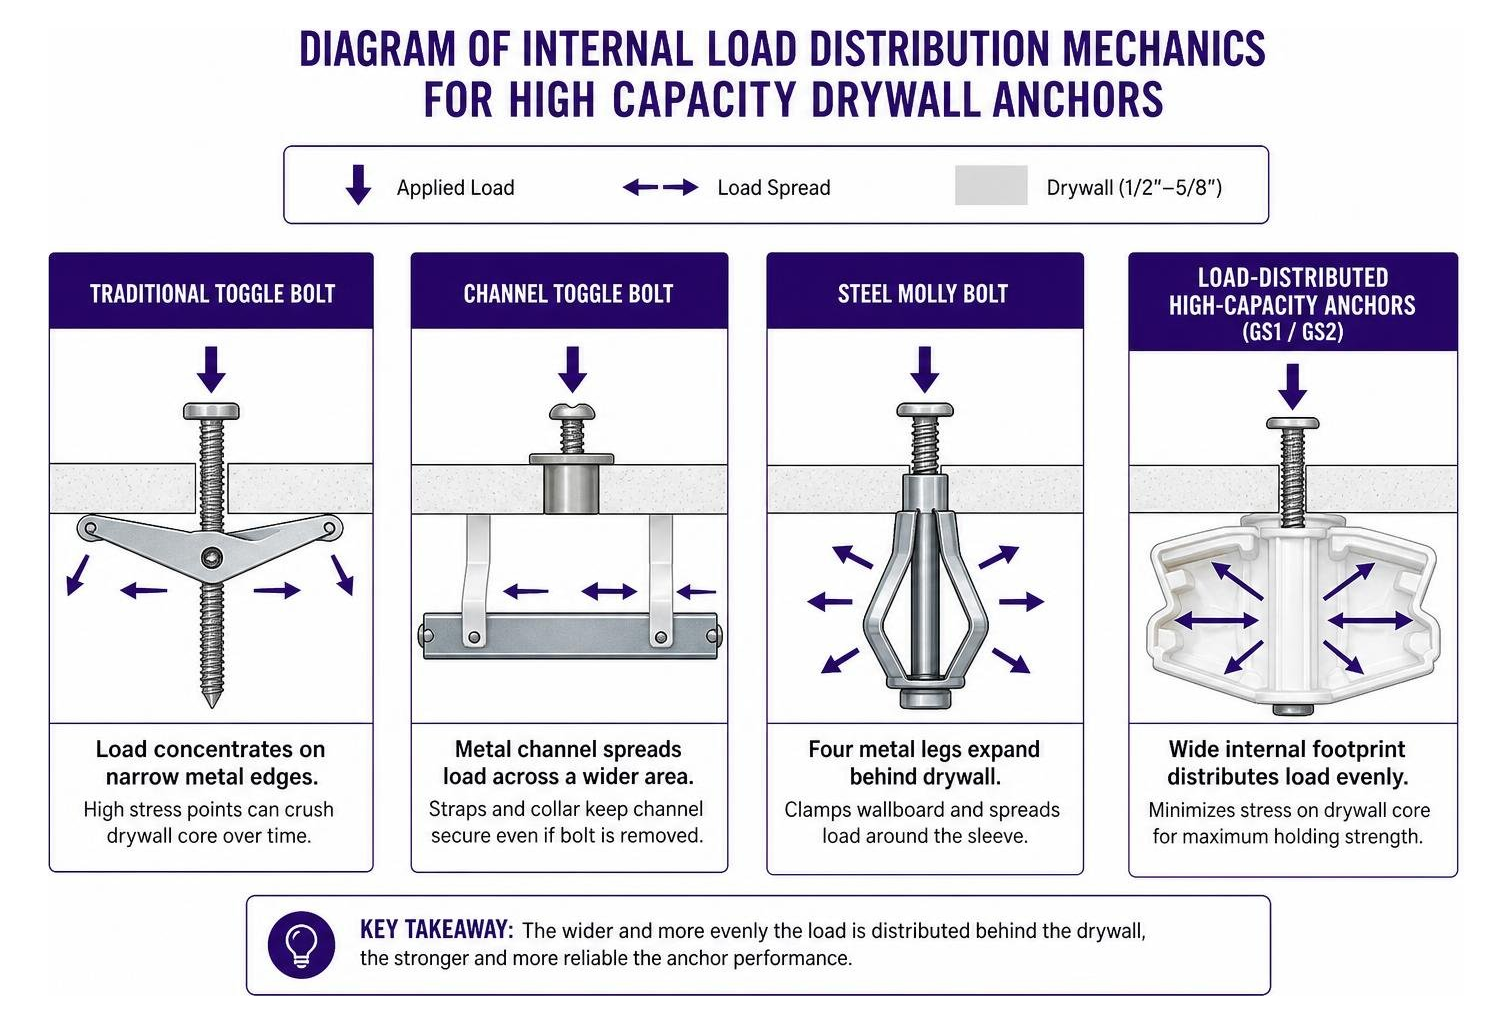
- Traditional Wing Toggle Bolts: A spring-loaded metal wing threads onto a machine screw. You squeeze the wings closed, push them through a 3/8-inch or 1/2-inch pre-drilled hole, and the wings spring open inside the cavity. Tightening the bolt pulls the wings flat against the hidden back face of the drywall. Standard metal toggle bolts provide 50 to 150+ lb capacity. However, they are non-retaining: if you back the machine screw out to adjust a bracket, the metal wing drops into the wall cavity.
- Channel Toggle Bolts (Snap-Style): These improve on standard wings by using a solid metal channel connected to plastic straps. The channel pivots flat behind the wall, and a plastic collar ratchets flush against the front surface. This holds the channel in place even when the bolt is removed, supporting 160 to 265 lb.
Steel Molly Bolts: A molly bolt is an expandable metal sleeve. Driving the screw collapses four metal legs behind the drywall, clamping the wallboard rigidly. Molly bolts hold 50 to 100 lb and create a permanent threaded metal insert. Learn more in our breakdown of molly bolts vs toggle bolts.
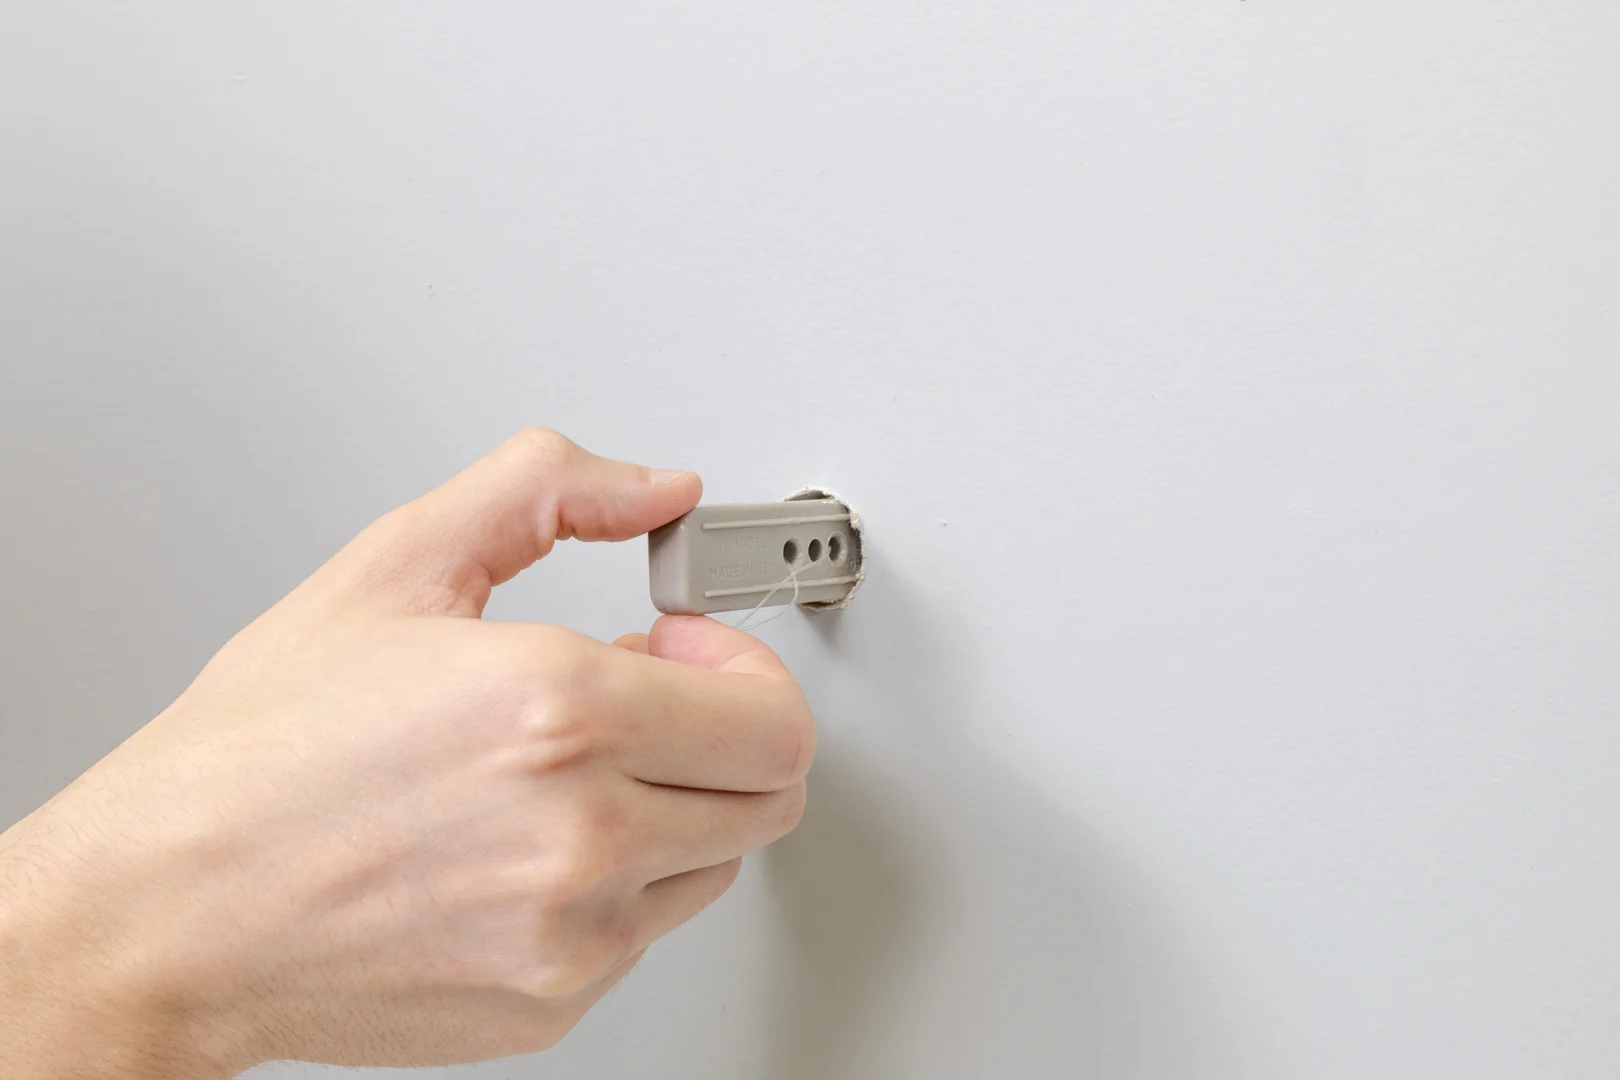
Load-Distributed High-Capacity Fasteners (GHOSTUD): Traditional toggles concentrate load onto narrow steel edges. Under dynamic stress or heavy vibration, those steel edges crush the soft drywall core over time. For heavy installations where studs are missing, we engineered patented, load-distributed anchors made from 100% recycled plastic in the USA.
- GHOSTUD GS1: Installs using a 1-inch hole saw. Rated up to 250 lb in 1/2 in or 5/8 in drywall. It is built specifically to withstand repeated dynamic forces on towel bars, toilet paper holders, curtain rods, picture frames, and light shelving.
- GHOSTUD GS2: Installs using a 2-inch hole saw. Rated up to 1,000 lb shear in 1/2 in or 5/8 in drywall. It distributes heavy downward loads across a wide internal footprint, making it ideal for TVs, upper kitchen cabinets, floating shelving units, large mirrors, and heavy static loads.
Trade-offs to note: GHOSTUD requires cutting a 1-inch or 2-inch hole with a hole saw, carries a higher per-unit hardware cost than commodity plugs, and is an intentional, permanent structural mount on hollow drywall.
Wall Material Compatibility and When to Anchor into Studs
Fasteners perform differently across various wall substrates. Hardware designed for hollow drywall will fail if installed in solid masonry or historic plaster.
| Substrate Type | Recommended Fastener Hardware | Incompatible Fastener Types | Critical Substrate Considerations |
|---|---|---|---|
| Drywall (1/2″ or 5/8″) | Self-drilling augers, toggles, molly bolts, GHOSTUD GS1/GS2 | Wedge anchors, concrete drop-in plugs | Hollow framing with brittle gypsum core. |
| Plaster & Lath | Metal toggle bolts, molly bolts, wood screws into lath | Self-drilling anchors, plastic friction plugs, GHOSTUD | Brittle plaster cracks easily; requires careful pre-drilling. |
| Solid Concrete / Brick | Concrete screws, metal sleeve anchors, nylon plugs | Toggle bolts, molly bolts, self-drilling augers, GHOSTUD | Hard substrate; requires carbide hammer drilling and hole cleaning. |
| Tile over Backer Board | Carbide pre-drill with hollow toggle or masonry screw | Self-drilling augers, expansion plugs, GHOSTUD | Tile face will crack under uneven clamping pressure. |
For solid masonry walls, review the technical principles in this engineering analysis of wall anchors in concrete and masonry. Standard nylon plugs (such as 10 x 50 mm plugs rated for 100 kg in solid masonry) work by mechanical expansion against solid aggregate. In contrast, hollow walls require back-flange clamping.
When NOT to Use Hollow Wall Anchors
- Accessible Wood or Metal Studs: Never use a drywall anchor when a structural stud is available at your mounting point. Fastening directly into structural framing with heavy-duty wood screws provides the highest possible load capacity. Read our complete guide on drywall anchor vs stud mounting.
- Substrates Other Than Drywall for GHOSTUD: GHOSTUD anchors are designed exclusively for 1/2 in or 5/8 in drywall. They are not suitable for plaster, lath, concrete, masonry, brick, stucco, tile over backer board, or metal studs. If mounting to these surfaces, use dedicated masonry anchors or through-bolts.
- Safety-Critical Applications: Never use drywall anchors for grab bars, handrails, safety rails, ADA installations, aging-in-place fixtures, fall-prevention systems, or any application supporting human body weight. Never use drywall anchors for anti-tip child-safety furniture straps. These safety-critical fixtures must anchor directly into solid structural wood framing.
- Loads Under 5 lbs: For very light objects like 5 lb art frames, high-capacity anchors are unnecessary; use simple picture hanging hooks or standard plastic plugs.
Frequently Asked Questions About Wall Anchors
Can wall anchors be removed and reused?
It depends on the anchor design:
- Self-drilling metal or nylon augers can be backed out cleanly by turning the screw head counterclockwise with a screwdriver. You can reuse the hole by inserting a slightly larger fastener, or fill it with spackling paste.
- Plastic expansion plugs can be removed by threading a screw two turns into the collar and pulling the plug out with pliers.
- Traditional spring toggle bolts cannot be removed intact. When you unscrew the bolt, the spring wings drop inside the wall cavity.
- Molly bolts remain permanently expanded. To flush the wall for patching, place a larger drill bit over the exposed metal collar and drill lightly to pop the outer head off, allowing the sleeve to fall into the wall.
- GHOSTUD anchors are permanent structural installations.
What is the difference between molly bolts and toggle bolts?
A molly bolt uses a slotted steel sleeve that expands outward inside the drywall thickness when the screw is tightened. It requires a shallow cavity depth and stays fixed in the wall even if the screw is removed.
A toggle bolt uses a spring-loaded metal wing or a solid channel that spans across the back of the drywall. Toggle bolts require a larger drilled hole (3/8 in to 5/8 in) and deeper clearance inside the wall cavity, but they handle higher shear and tensile capacities than standard molly bolts.
How do I choose between plastic and metal wall anchors?
Choose plastic anchors for light, static indoor loads where corrosion resistance is useful (such as humid bathrooms) and loads stay under 25 to 50 lb. Plastic fasteners are inexpensive and easy to trim.
Choose metal anchors (steel molly bolts, channel toggles, or structural zinc fasteners) when you need higher shear strength, fire resistance, or holding power for loads exceeding 50 lb. Metal fasteners resist shearing forces and maintain mechanical grip under moderate vibrations.
Conclusion
Every successful wall-mounting project comes down to three steps: identify your wall substrate, verify the true weight and dynamic leverage of the item, and maintain a 4:1 safety margin.
Take a physical measurement at your wall right now. Use a stud finder to map the framing layout, measure your drywall thickness at an adjacent outlet box, and verify your fixture’s mounting points. If you are mounting on hollow drywall without studs, check out our complete pillar guide to drywall anchors and our step-by-step guide to drywall anchor types to select the right hardware for your project.
Mount it once, mount it right. Compare GS1 and GS2 →