
Understanding Wall Mechanics: Weight Capacity and Wall Damage Risks
To hang a heavy picture without damaging the wall, weigh the frame, locate solid wood studs, and use two level mounting points with fasteners rated for at least double the total weight. Driving an unanchored nail into hollow drywall causes immediate failure: 1/2-inch gypsum drywall only holds 5 to 10 pounds under pure downward gravity before the nail acts as a lever, crushing the soft mineral core and tearing a downward slot through the wall face. When studs are inaccessible, always pre-drill clean holes and install mechanical hollow-wall anchors rated for your frame’s specific load.
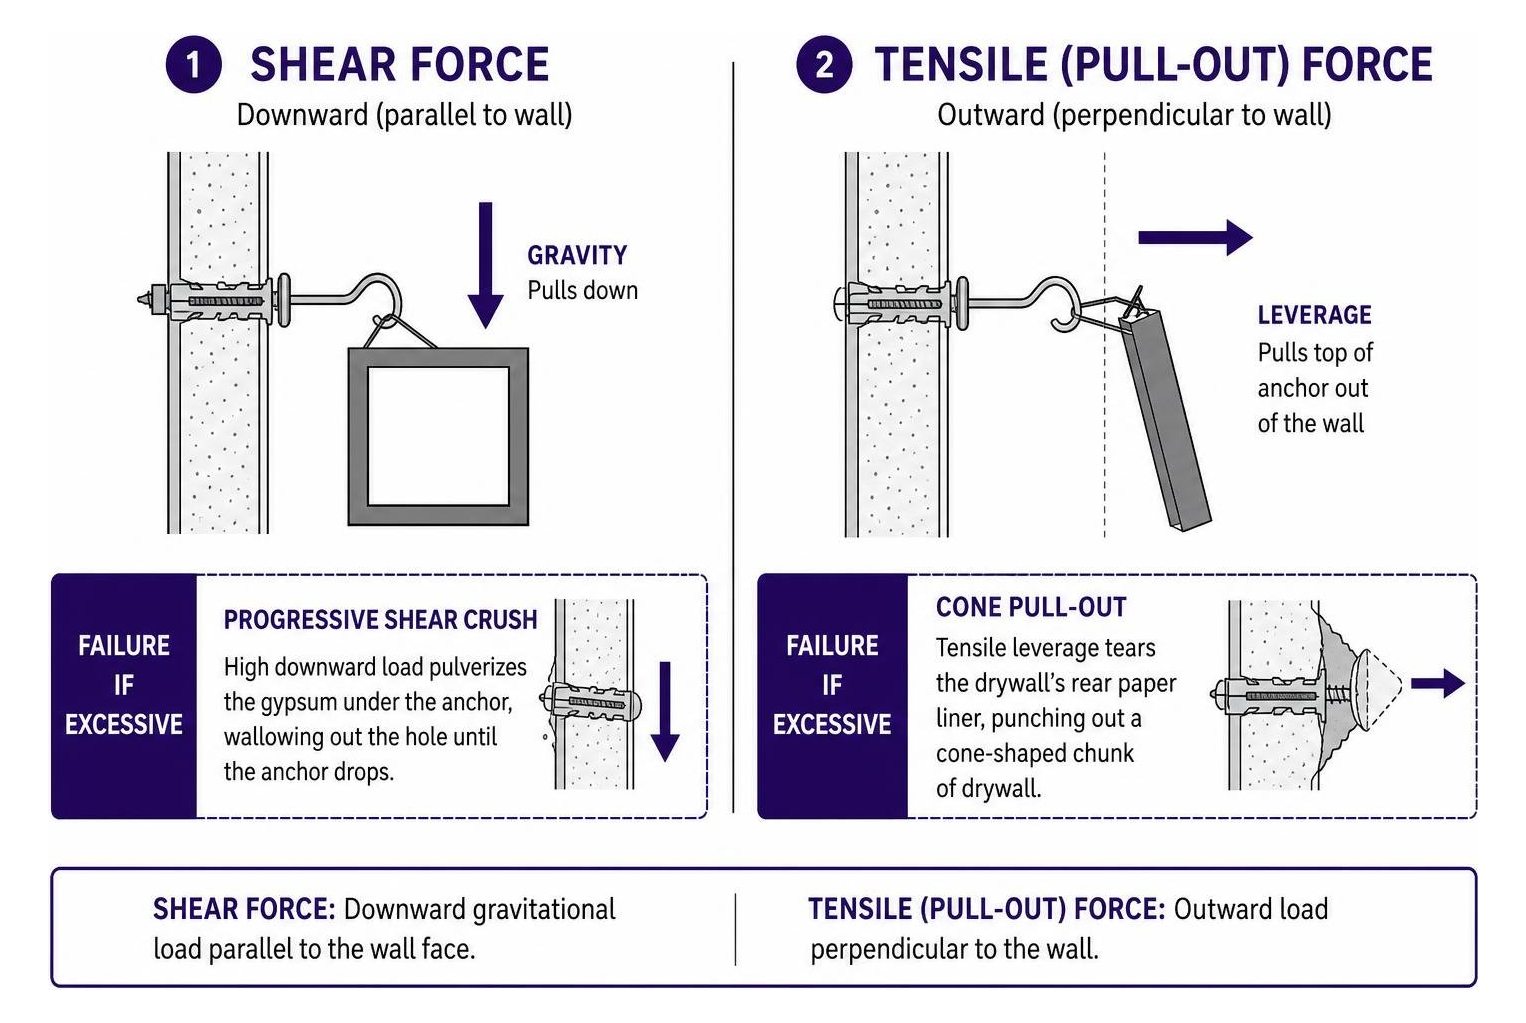
Two physical forces act on any wall fastener:
- Shear force: The downward gravitational load parallel to the wall face.
- Tensile (pull-out) force: The outward load perpendicular to the wall. This happens when a thick frame, heavy mirror, or deep canvas leans forward and pulls the top of the anchor straight out of the wall.
When a fastener fails mechanically, it usually undergoes progressive shear crush or cone pull-out. Progressive crush happens when high shear loads pulverize the gypsum beneath the screw shank, wallowing out the hole until the anchor drops. Cone pull-out happens when tensile leverage snaps the drywall’s rear paper liner, punching a cone-shaped chunk of drywall outward.
Standard residential framing spaces wood studs 16 or 24 inches apart on center. Driving a lag screw directly into the center of a wood stud is always the strongest mounting method because wood handles high shear and tensile loads without crumbling. However, artwork rarely centers cleanly over a hidden stud.
When you cannot hit framing, you face the choice of deciding between a drywall anchor vs stud. If you mount into hollow drywall, you must check shear load capacities across anchor types to ensure the fastener distributes weight across a broad surface area behind the board rather than concentrating it on raw gypsum.
| Mounting Method | Substrate & Thickness Condition | Rated Load Capacity | Primary Mechanical Advantage | Trade-Offs / Limitations |
|---|---|---|---|---|
| Wood Stud (2×4 / 2×6) | Solid wood framing behind wall | 100+ lbs (dependent on screw size) | Pure mechanical grip in solid wood fibers | Limited to fixed 16″ or 24″ stud locations |
| Heavy-Duty Hollow-Wall Anchor | 1/2 in or 5/8 in drywall | 50 to 100+ lbs shear | Rear drywall clamping mechanism | Can crush rear paper liner under cyclic fatigue |
| High-Capacity Load-Spreading Anchor | 1/2 in or 5/8 in drywall | Up to 1,000 lbs shear | Broad internal load distribution plate | Requires hole saw cut; drywall only |
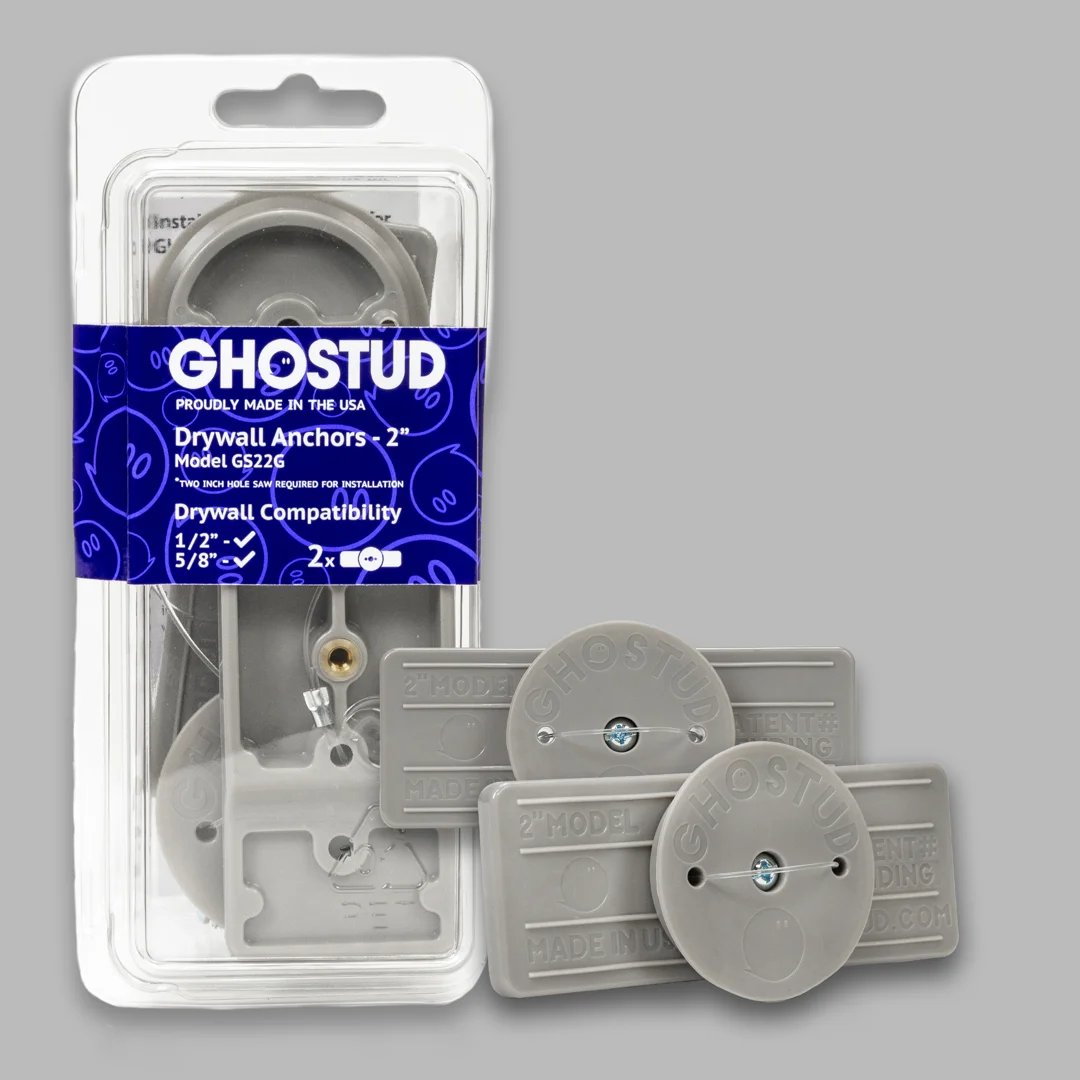
Mounting something heavy where there’s no stud? GHOSTUD® spreads the load across the drywall with a wide backplate instead of relying on the gypsum core. GS1 holds up to 250 lb shear, GS2 up to 1,000 lb. Made in the USA from recycled structural plastic. Shop GHOSTUD® from $16.99 →
Choosing the Right Hardware by Weight and Wall Type
Match the mounting method to the frame’s measured weight, the wall material, and the fastener manufacturer’s stated load rating. For a light or medium framed picture, use hardware specifically rated for that load and wall condition. Do not assume a fastener rated for one wall material will perform the same way in another.
High-Capacity Drywall Anchors and Stud Mounting
For oversized artwork, framed gallery pieces, and heavy wall decor, mount directly into a properly located wood stud with suitable wood screws whenever the stud location works for the frame. A stud remains the preferred mounting point because it provides solid wood for the fastener to grip. Before choosing an anchor, review how to select the right drywall anchor for your load.
When a stud is not available at the required mounting point, use a high-capacity drywall anchor only when the wall is 1/2 in or 5/8 in drywall and the installation matches the product’s stated use.
For hollow-drywall installations where a high-capacity solution is appropriate:
- GHOSTUD manufactures load-distributed drywall anchors made from recycled material in the USA.
- GHOSTUD GS1: Installs with a 1-inch hole saw and is rated up to 250 lb in 1/2 in or 5/8 in drywall. It is made for dynamic, daily-use fixtures such as towel bars, toilet paper holders, curtain rods, picture frames, and light shelving.
- GHOSTUD GS2: Installs with a 2-inch hole saw and is rated up to 1,000 lb shear in 1/2 in or 5/8 in drywall. It is made for heavy static loads such as TVs, cabinets, shelving, mirrors, and large wall decor. For installation planning, see how to anchor heavy wall decor securely.
GHOSTUD anchors require cutting a clean 1-inch or 2-inch hole with a hole saw, so they are not temporary, damage-free, or reversible. They are for 1/2 in or 5/8 in drywall only, not plaster, lath, concrete, masonry, brick, stucco, tile over backer board, or metal studs. If you have an accessible, properly located wood stud, mount directly into the stud instead.
Step-by-Step Guide: How to Hang a Heavy Picture Without Damaging the Wall
Follow this numbered process to install your heavy picture cleanly without unnecessary holes or wall damage. For a second perspective on matching wall type and hardware to the load, see This Old House’s guide to hanging heavy items.
Essential Tools
Gather the following tools before starting:
- Electronic stud finder
- Torpedo level or 24-inch carpenter’s level
- Tape measure and pencil
- Painter’s tape
- Power drill and driver bits
- Correctly sized drill bit or hole saw matching your chosen anchor
- Heavy-duty D-rings or steel mounting brackets
- Rated picture hanging wire or French cleat system
Step 1: Weigh the Picture and Inspect the Frame
- Step onto a bathroom scale without the frame and note your weight.
- Pick up the framed picture, step back onto the scale, and calculate the difference.
- Inspect the back of the frame. Remove weak sawtooth hangers.
- Mount steel D-rings on the left and right frame rails at roughly 1/5 of the total frame height from the top edge.
- If using picture wire, string rated braided stainless steel wire through the D-rings. Keep the wire taut—excess slack increases forward lean, creating unnecessary tensile pull-out leverage on your wall fasteners.

Reviewing beginner heavy mirror hanging mistakes helps ensure your frame hardware is installed squarely.
Step 2: Locate Studs and Mark Anchor Points
- Standard gallery placement puts the center of the picture 57 to 60 inches from the floor. Measure your frame height, divide by two, and add 57 to 60 inches to find your top-of-frame height.
- Run an electronic stud finder horizontally across the mounting area. Mark the left and right edges of any detected wood stud with a light pencil mark.
- Use a level and a strip of painter’s tape to establish your horizontal mounting line on the wall.
- For wide or heavy frames, use two mounting points spaced several inches apart rather than a single center point. Two anchors cut the load on each fastener in half and keep the frame level over time.
Step 3: Drill Pilot Holes and Install Anchor Hardware
- Fold a piece of painter’s tape into a small paper pocket and stick it directly beneath your drill marks to catch drywall dust as you drill.
- If your mark aligns with a stud, drill a small pilot hole through the drywall into the wood framing. Drive a structural wood screw directly into the stud, leaving 1/4 inch of the head exposed.
- If mounting into hollow drywall without a stud:
- Select an anchor rated for your frame weight.
- Drill the exact pilot hole or hole-saw cut required by the manufacturer’s instructions.
- Keep the drill straight and avoid pushing too hard to prevent tearing the paper liner on the back of the drywall.
- Seat your anchor flush against the drywall face. Drive the mounting screw into the anchor until it sits snug without crushing the surface gypsum.
Step 4: Mount, Level, and Test the Heavy Art
- Have a helper assist you with lifting any piece over 25 pounds.
- Lift the frame above the mounting hardware and lower the D-rings, wire, or cleat onto the wall brackets.
- Slowly let go of the frame while watching the wall closely to confirm the anchors hold the weight without pulling forward.
- Place a torpedo level across the top edge of the frame. Make small adjustments until the bubble centers cleanly.
Edge Cases: Plaster, Masonry, and Crooked Frames
Old houses and hard wall materials require different mounting strategies.
Plaster and Masonry
Plaster walls (common in homes built before the 1950s) consist of brittle plaster troweled over horizontal wood laths.
- Never hammer nails directly into old plaster; the impact will shatter the plaster keys behind the lath, causing the wall to crumble.
- Always drill pilot holes using a sharp masonry or carbide bit. Place a piece of painter’s tape over the mark before drilling to keep the surface plaster from flaking.
- If a wood stud can be reached behind the lath, fasten directly into that stud. Otherwise, use a mounting method designed and rated specifically for plaster walls.
- For concrete, solid brick, or cinder block walls, use a hammer drill paired with a carbide masonry bit and hardware designed for that substrate. For more material-specific guidance, see hanging securely on plasterboard.
Material Limitation: GHOSTUD anchors are designed and rated strictly for 1/2 in or 5/8 in drywall. They are not suitable for plaster, lath, concrete, masonry, brick, stucco, tile over backer board, or metal studs. If you are mounting to these surfaces, use hardware designed and rated for the specific wall material.
Troubleshooting Uneven Walls and Post-Hanging Leveling
- Forward Lean: If the top of the frame leans away from the wall, your hanging wire has too much slack or the D-rings are set too low. Shorten the wire or raise the D-rings closer to the top third of the frame.
- Frame Rocking: Walls are rarely perfectly flat. Stick soft self-adhesive rubber bumpers to the bottom rear corners of your frame. These bumpers grip the wall, keep the frame from slipping out of level, and prevent the frame corners from scuffing your paint.
- Crooked French Cleats: If a two-piece cleat sits slightly crooked on an uneven wall, loosen the wall-bracket screws slightly, slip a thin plastic shim behind the low side, and tighten the screws back down.
Frequently Asked Questions About Hanging Heavy Pictures
Can a heavy picture be hung without drilling?
No. Adhesive strips, mounting tapes, and suction mounts are only reliable for lightweight items under 5 to 8 pounds. Heavy pictures exert continuous shear and tensile pull on paint layers. Over time, the adhesive pulls the top layer of paint and paper away from the drywall core, sending the frame crashing down and tearing a large patch off your wall. High-capacity mounting requires mechanical anchors or wood screws. High-capacity options like GHOSTUD require cutting a 1-inch or 2-inch hole with a hole saw and are not damage-free or reversible.
How do you hang a heavy picture if there is no stud available?
If you cannot locate a wood stud where you want to center your frame, use hollow-wall anchors rated for your frame’s weight. For items above light-duty picture-hanging loads, select a mounting method using the exact wall material and manufacturer-rated load as your guide. For heavy static loads in 1/2 in or 5/8 in drywall, GHOSTUD GS2 is rated up to 1,000 lb shear and spreads the load across a broad internal surface area.
How do I prevent drywall from crumbling when drilling anchor holes?
To keep drywall from tearing or blowing out:
- Apply a square of blue painter’s tape over your pencil mark before drilling.
- Use a sharp, high-speed drill bit or clean hole saw.
- Run the drill at high speed with light forward pressure. Let the cutting edge slice through the drywall paper rather than forcing it through.
- Stop drilling immediately once you punch through the inner cavity so you don’t chew up the back paper liner.
Conclusion
Hanging heavy artwork without destroying your walls comes down to three basic steps: weigh your piece, pick the right fastener for your wall material, and use two level mounting points to spread the load. Taking the time to pre-drill clean holes and match your hardware to your wall board prevents crushed drywall and broken frames.
Take your tape measure and bathroom scale to the wall, check your frame’s actual weight, and select the right studs or rated anchors before making your first mark. For more detailed mounting techniques, review our complete pillar guide on hanging heavy mirrors and wall art securely.
Mount it once, mount it right. Compare GS1 and GS2 →