
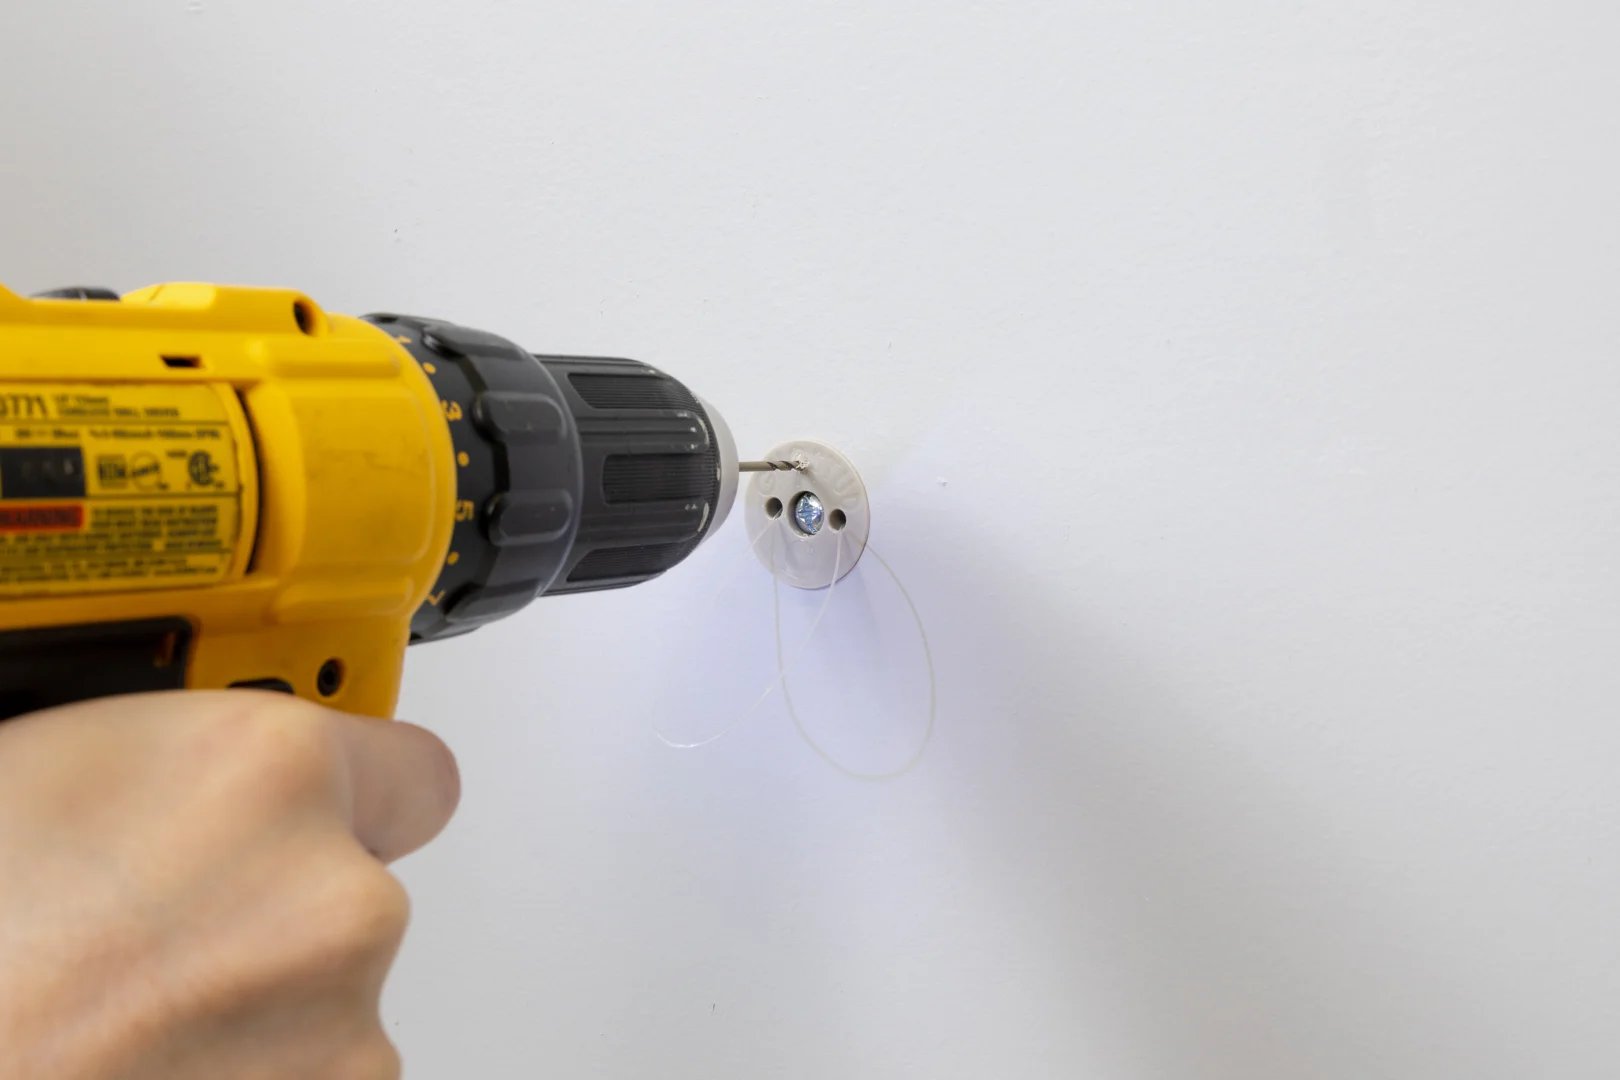
How to Use Wall Anchors in Drywall
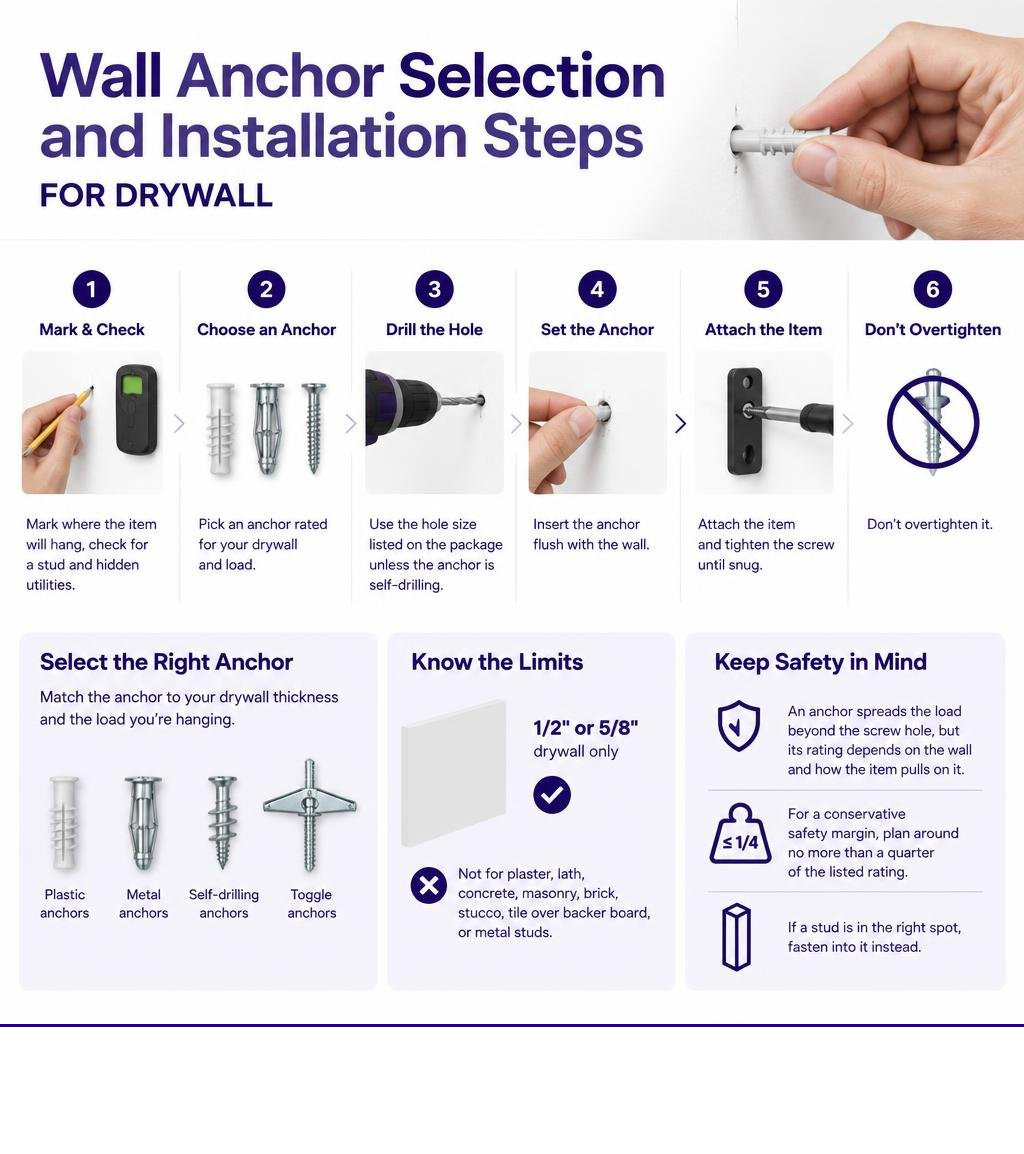
To install a wall anchor, mark where the item will hang, check for a stud and hidden utilities, then choose an anchor rated for your drywall and load. Drill the hole size listed on the package unless the anchor is self-drilling. Set the anchor flush, attach the item, and tighten the screw until snug. Don’t overtighten it.
An anchor spreads the load beyond the screw hole, but its rating depends on the wall and how the item pulls on it. For a conservative safety margin, plan around no more than a quarter of the listed rating, and follow the anchor maker’s instructions. If a stud is in the right spot, fasten into it instead.
Wall anchors are for 1/2-inch or 5/8-inch drywall only. For plaster, lath, concrete, masonry, brick, stucco, tile over backer board, or metal studs, choose a fastener made for that surface.
How to use wall anchors terms you need:
- Drywall mounting guides
- How to use a wall anchor tool
- Metal drywall anchor installation
Understanding Drywall Mechanics: Why Fasteners Fail
Drywall consists of a brittle gypsum chalk core pressed between two layers of paper. A standard wood screw driven directly into drywall has almost no holding power. The screw threads crush the gypsum core into fine powder, leaving only thin paper layers to grip the metal threads. Under minimal weight, the screw pulls straight out.
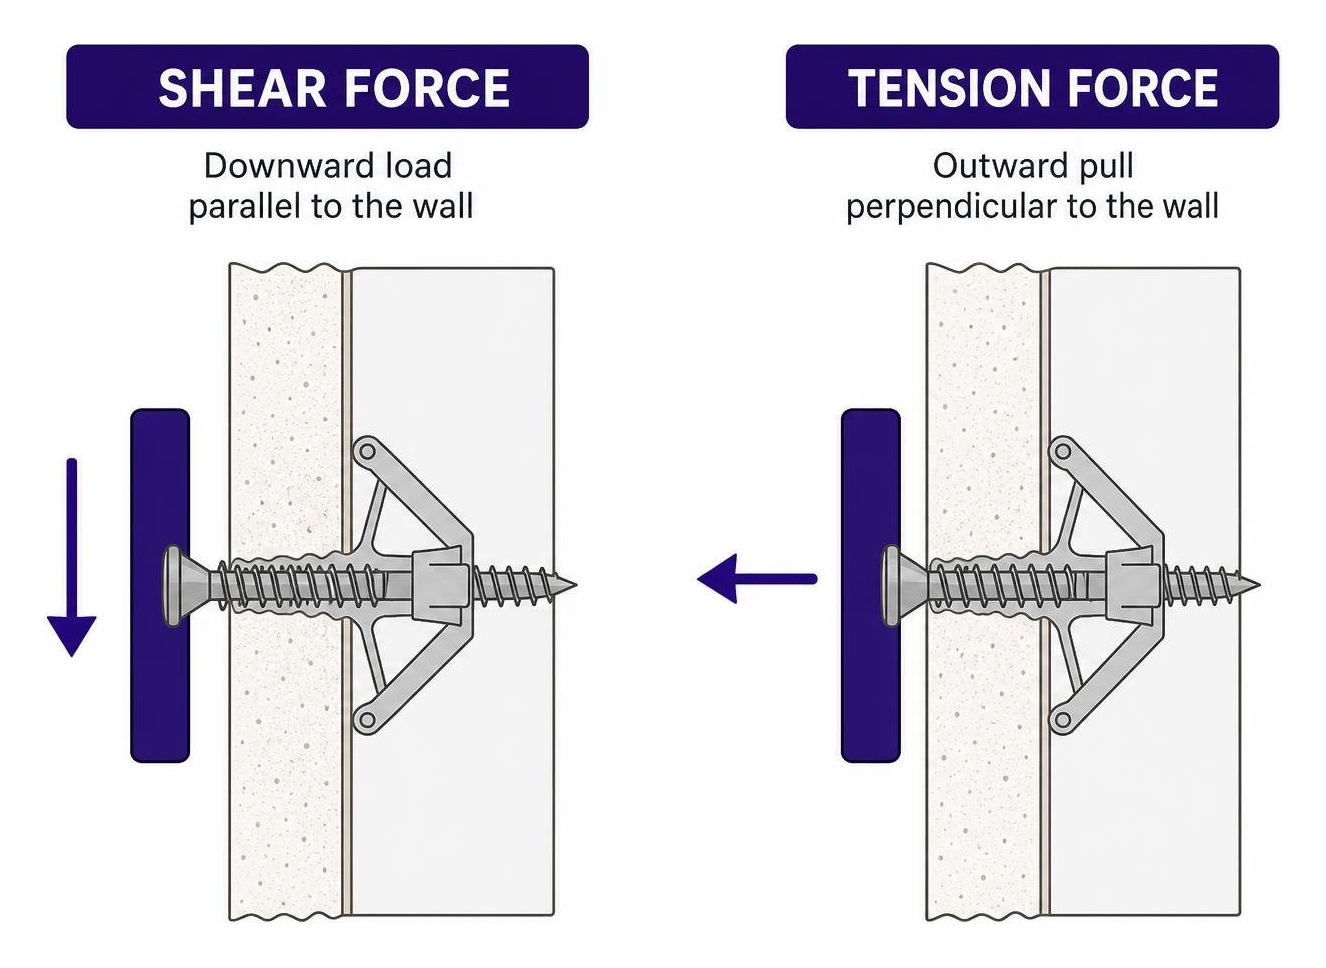
When you hang an object, two distinct physical forces act on the fastener:
- Shear force: Downward vertical load pulling parallel to the wall face.
- Tension force: Outward horizontal pull acting perpendicular to the wall, trying to extract the fastener from the hole.
Cantilevered fixtures, such as deep floating shelves or extending TV wall mounts, convert vertical weight into extreme outward tension at the top mounting screws. This creates a specific mechanical failure mode: tension tear-out.
When outward tension exceeds the strength of the gypsum, the fastener fractures the core. The back of the drywall crumbles, and the anchor pops free, leaving a wide, ragged crater. With cyclic loads—like a toilet paper holder or curtain rod pulled daily—vibration causes hole wallowing. The fastener rocks inside the hole, pulverizes the gypsum edge, and loosens over time.
To avoid failure, read our breakdown explaining drywall anchor shear ratings and always apply a 25 percent safety factor. If an anchor is rated for 100 pounds ultimate capacity, limit your working load to 25 pounds.
Standard wall framing places vertical wood studs 16 or 24 inches apart on center. Always scan the wall first to map your framing and detect hidden electrical wiring or plumbing pipes running behind the wallboard before mounting hardware.
Step-by-Step Installation: How to Use Wall Anchors
Gather your basic tools before starting:
- Tape measure
- Pencil
- Electronic stud finder with live wire detection
- Drill and matching drill bits
- Hand screwdriver (Phillips or flathead)
- Torpedo level
- Safety glasses
Follow these basic preparation steps before you pick up a drill.
- Locate studs: Run your electronic stud finder horizontally across the mounting area. Mark the edges of any hidden framing.
- Mark your mounting points: Hold your mounting bracket against the wall. Level it with a torpedo level and mark the hole locations with a pencil.
- Verify clearance: Ensure no electrical outlets or plumbing fixtures align vertically with your drill marks.
Step-by-Step: How to Use Wall Anchors with a Drill
Follow these steps for standard expansion plugs, molly bolts, and toggle fasteners. For specialized hardware, see these reliable methods for inserting wall anchors.
- Size the drill bit: Check the anchor packaging for the specified pilot hole diameter. Match your drill bit diameter exactly. An oversized hole ruins the anchor’s grip, while an undersized hole crushes the plastic sleeve during insertion.
- Drill the pilot hole: Hold your drill at a strict 90-degree right angle to the wall. Drill through the drywall into the hollow cavity at moderate speed. Stop as soon as the bit breaks through the backside paper.
- Insert the anchor sleeve: Push the anchor into the pre-drilled hole. If it fits snugly, tap it gently with a rubber mallet until the wide collar sits completely flush against the front paper face.
- Fasten the fixture: Position your bracket over the anchor. Insert the supplied screw through the bracket hole and drive it into the anchor center using a manual screwdriver.
- Tighten to final torque: Turn the screw until you feel firm resistance and the bracket is clamped tight to the wall. Stop turning immediately. Overtightening strips the internal plastic threads or snaps the anchor collar off inside the wall.
Installing Anchors Without Power Tools
You can install self-drilling drywall anchors manually without a drill. Review our guide on inserting drywall anchors without a drill for quick installations.
- Punch a starter dimple: Press a manual Phillips screwdriver firmly into your pencil mark to indent the surface paper.
- Drive the anchor: Place the sharp point of a self-drilling zinc or nylon anchor into the dimple. Apply firm inward pressure and turn clockwise by hand.
- Seat the head: Keep turning until the wide threaded body drives completely into the drywall and the outer flange rests flat against the wall face.
- Drive the screw: Thread the mounting screw into the center hub through your fixture, tightening until snug.
Selecting Fasteners by Weight: Types and Load Capacities
Select your anchor based on fixture weight and drywall thickness (standard residential walls use 1/2-inch or 5/8-inch gypsum board). Never guess fastener strength. Review how to select the right drywall anchor for your load and read our step-by-step guide to drywall anchor types before purchasing hardware.
| Anchor Type | Required Hole Size | Safe Working Shear Load (1/2″ Drywall) | Safe Working Shear Load (5/8″ Drywall) | Best Applications |
|---|---|---|---|---|
| Plastic Expansion Plug | 3/16″ – 1/4″ | 5 – 10 lb | 10 – 15 lb | Small picture frames, smoke alarms |
| Self-Drilling Zinc Anchor | No drill (point drive) | 12 – 18 lb | 15 – 20 lb | Wall clocks, canvas prints, lightweight mirrors |
| Hollow-Wall Molly Bolt | 5/16″ – 3/8″ | 20 – 25 lb | 25 – 30 lb | Sconces, light shelving, bathroom caddies |
| Steel Toggle Bolt | 3/8″ – 1/2″ | 25 – 65 lb | 35 – 75 lb | Heavy mirrors, hanging plants, hanging fixtures |
| Snaptoggle Heavy Toggle | 1/2″ | 50 – 60 lb | 60 – 70 lb | Medium shelving units, soundbars |
| GHOSTUD GS1 | 1-inch (hole saw) | Up to 250 lb | Up to 250 lb | Dynamic daily-use: towel bars, curtain rods |
| GHOSTUD GS2 | 2-inch (hole saw) | Up to 1,000 lb shear | Up to 1,000 lb shear | Heavy static loads: TVs, cabinets, deep shelving |
Mounting something heavy where there’s no stud? GHOSTUD® spreads the load across the drywall with a wide backplate instead of relying on the gypsum core. GS1 holds up to 250 lb shear, GS2 up to 1,000 lb. Made in the USA from recycled structural plastic. Shop GHOSTUD® from $16.99 →
Lightweight and Medium-Duty Fasteners
- Plastic Expansion Sleeves: Basic ribbed sleeves (rated for 20 to 25 pounds total capacity; 5 to 10 pounds safe working load) expand outward when a screw enters. They are suitable for lightweight frames under 5 pounds. They provide almost zero resistance against outward tension.
- Self-Drilling Anchors: Coarse exterior threads (rated for 50 to 75 pounds total capacity; 12 to 18 pounds safe working load) bite directly into the gypsum core without pre-drilling. They hold light wall decor well but can strip out if overtightened.
- Hollow-Wall Molly Bolts: Slotted metal sleeves (rated up to 95 pounds total capacity; 20 to 25 pounds safe working load) expand collapsible legs flat against the back face of the drywall when tightened. They offer rigid holding strength for medium-duty fixtures.
- Standard Toggle Bolts: Spring-loaded metal wings (rated for 100 to 265 pounds total capacity; 25 to 65 pounds safe working load) fold flat to pass through a drilled hole, then snap open inside the wall cavity. While strong, their thin metal wings concentrate weight on a narrow line of drywall. Cyclic loading or downward movement can crush the gypsum core over time and loosen the assembly.
How to Use Wall Anchors for Heavy Loads and Fixtures
For heavy static loads or fixtures subjected to continuous daily pulling, standard commodity anchors often pull through or wallow out the gypsum core.
For high-capacity installations without studs, we manufacture heavy-duty studless mounting hardware:
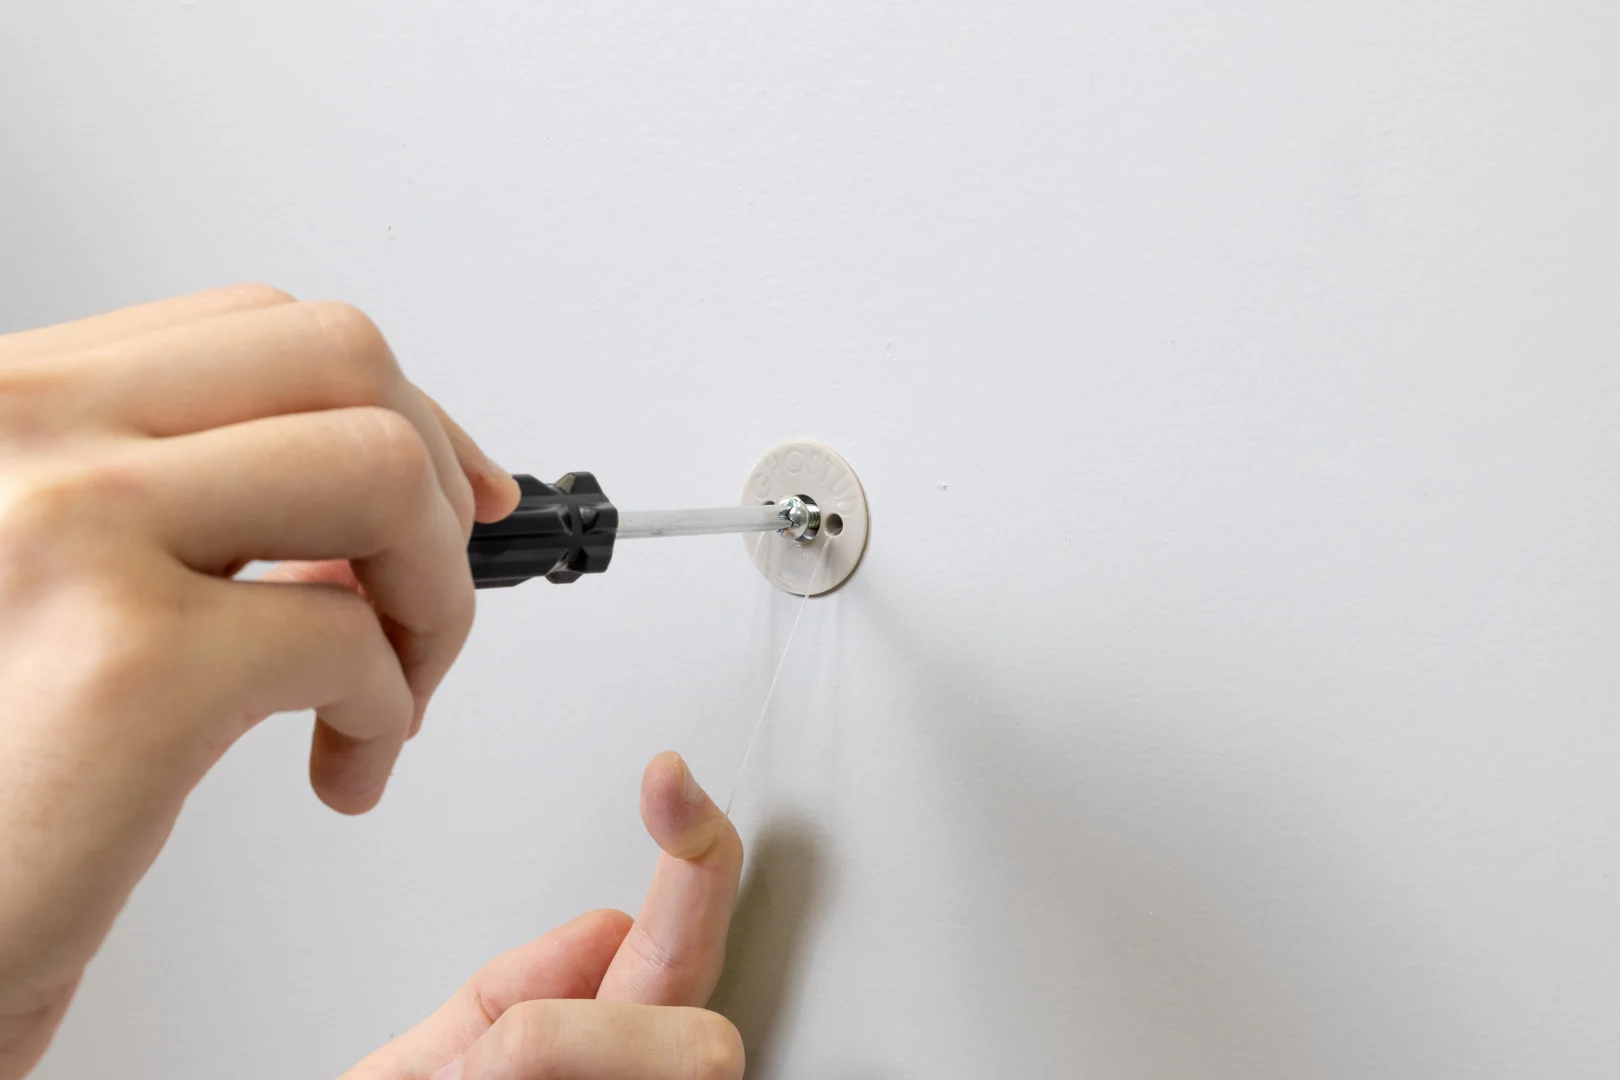
- GHOSTUD GS1: Installs using a 1-inch hole saw. Rated up to 250 lb in 1/2 in or 5/8 in drywall. It is engineered for dynamic, daily-use fixtures that experience constant physical pulling, such as towel bars, toilet paper holders, curtain rods, picture frames, and light shelving.
- GHOSTUD GS2: Installs using a 2-inch hole saw. Rated up to 1,000 lb shear in 1/2 in or 5/8 in drywall. Designed for heavy static loads like large televisions, wall cabinets, deep shelving, heavy mirrors, and static wall displays.
Both models install quickly with a hole saw, are made from 100% recycled material in the USA, and distribute stress across a broad internal backing plate rather than concentrating force on a thin hole edge. You can find them directly at ghostud.com in 2-packs and 20-packs.
Our ratings represent structural shear capacity in standard drywall. When mounting cantilevered loads like articulating TV brackets, outward leverage multiplies pulling force. Always distribute extreme cantilever loads across multiple anchor points.
Edge Cases, Removal, and When to Avoid Drywall Anchors
Wall anchors are engineered specifically for hollow drywall, but they have clear limitations.
When NOT to use GHOSTUD anchors:
- When a wood stud is accessible: Always drive a lag screw directly into solid wood framing whenever your mounting bracket aligns with a stud. Fastening directly into structural timber provides the safest connection.
- Non-drywall wall types: GHOSTUD is for 1/2-inch or 5/8-inch drywall only. It is not suitable for plaster and lath, solid concrete, masonry, brick, exterior stucco, tile over cement backer board, or commercial steel studs. If you need to mount items on brick surfaces, use hardened masonry sleeve anchors or tapcons, or review alternative techniques to hang pictures on a brick wall.
- Prohibited safety applications: Never use hollow-wall anchors for bathroom grab bars, stair handrails, safety rails, ADA installations, aging-in-place supports, fall-prevention equipment, or any fixture intended to support human body weight.
- Lightweight items under 5 pounds: Small picture frames and art prints do not justify cutting large holes. Use standard commodity plastic expansion plugs or basic picture hooks instead.
How to remove old wall anchors:
- Back out the screw: Turn the center screw counterclockwise and remove it completely from the anchor body.
- Extract plastic expansion anchors: Grip the outer collar with needle-nose pliers and pull straight out. If the collar resists, push a slightly oversized screw halfway into the plastic hub and pull the screw head with pliers.
- Clear flush or stuck anchors: For hollow-wall molly bolts or stubborn anchors, take a wide utility knife and slice off the outer plastic face collar. Place a Phillips screwdriver against the exposed opening and tap the driver handle with a hammer to knock the back sleeve into the open wall cavity.
- Patch the hole: Clean away loose paper frays with a utility knife. Press spackle or joint compound into the crater with a putty knife. Let it dry for 4 hours, sand the patch smooth, and apply matching paint.
Frequently Asked Questions About Drywall Anchors
How much weight can drywall hold without a stud?
Raw 1/2-inch drywall without an anchor holds virtually no weight; a standard screw strips out under less than 5 pounds of outward tension. Standard plastic expansion anchors hold 5 to 10 pounds of working shear load. Heavy-duty toggle systems safely support 25 to 65 pounds. Our GS2 anchor supports up to 1,000 lb shear in 1/2 in or 5/8 in drywall without framing. For specific load calculations, review our drywall anchor FAQ.
Can wall anchors be used in ceilings?
Standard drywall anchors should not be used in drywall ceilings for heavy loads. Ceiling installations convert all downward gravitational weight into pure tension pull-out force. Gravity constantly pulls the fastener down, leading to sudden gypsum core failure. Light fixtures under 2 pounds can use toggle bolts in ceiling board, but anything heavier must be secured directly into overhead ceiling joists.
How do I remove a wall anchor without damaging the wall?
Back the screw out three turns, tap the screw head gently inward with a hammer to break the rear expansion grip, and pull the screw out. If the anchor cannot be extracted without tearing the surface paper, slice off the exposed front collar with a sharp utility knife and tap the remaining sleeve into the wall cavity. Then, patch the dimple with spackle.
Conclusion
Hanging items securely on drywall comes down to three factors: knowing your wall material, matching your fastener type to your load requirements, and never exceeding safe working load limits.
Take your next physical action at the wall right now: pick up your electronic stud finder, scan your target wall space, and mark your stud locations. If you hit a solid wood stud, fasten directly into framing. If you are mounting on hollow 1/2-inch or 5/8-inch drywall, choose the correct fastener class for your project and review our complete step-by-step anchor installation guides before making your first cut.
Mount it once, mount it right. Compare GS1 and GS2 →