
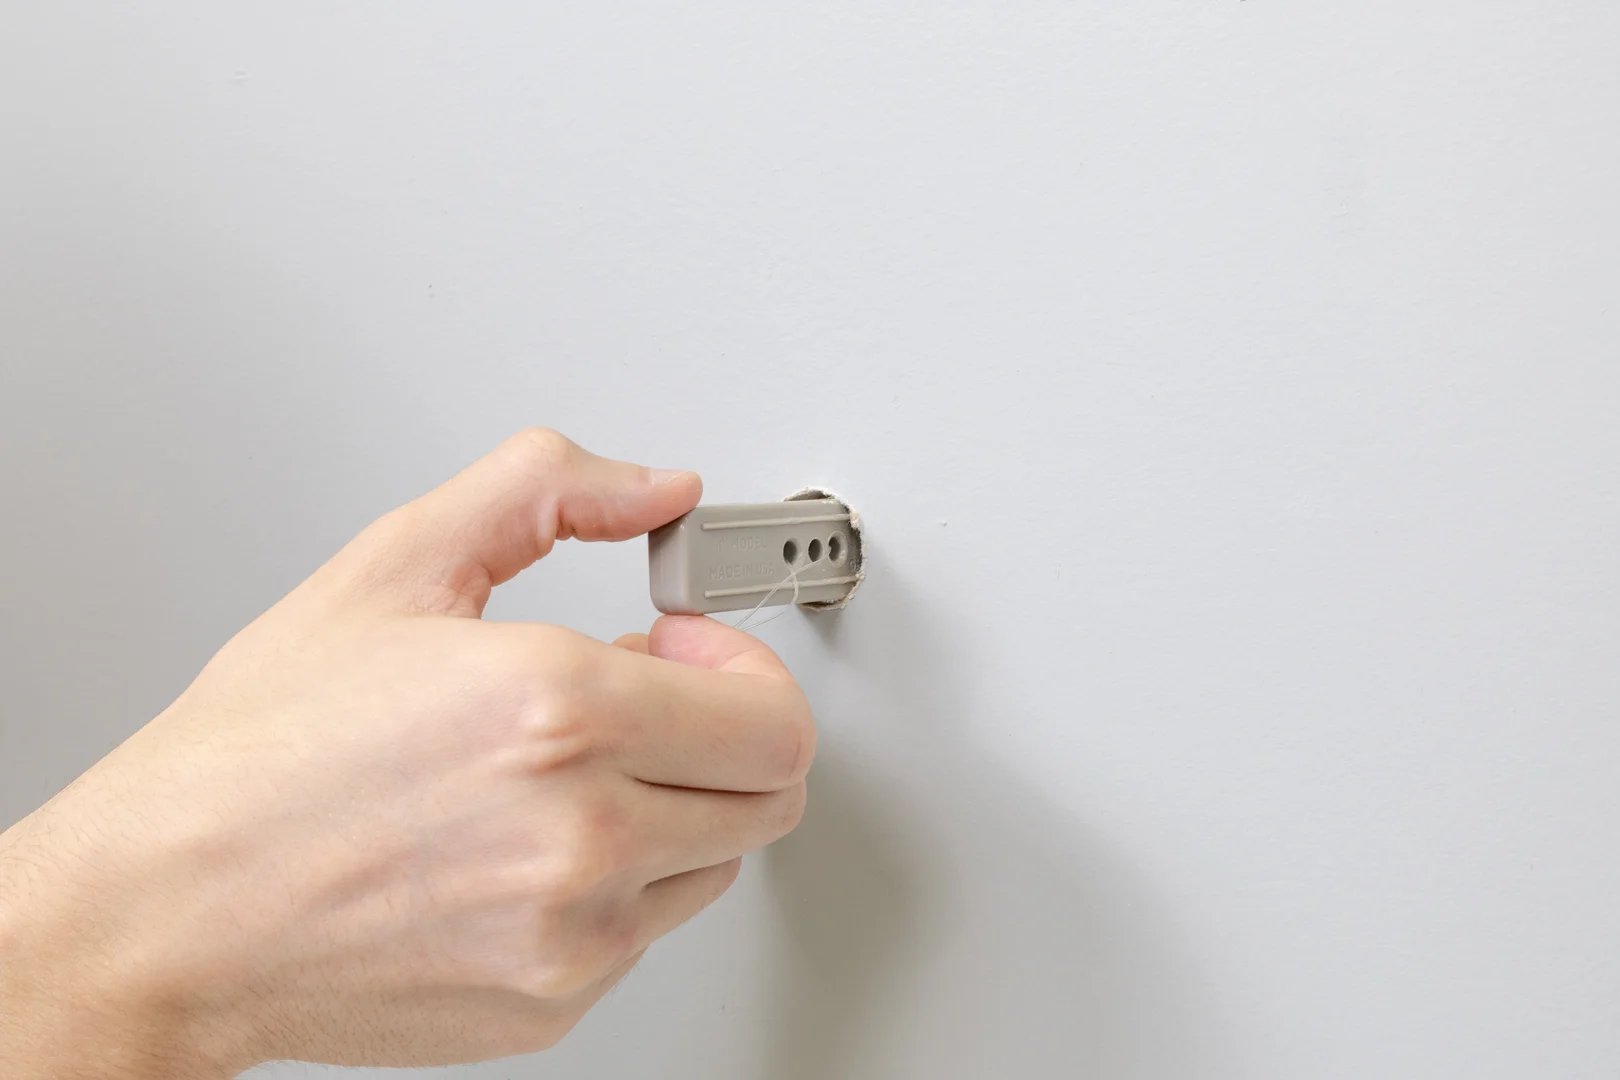
How to Put an Anchor in Drywall
Mark the mounting spot and check for a stud, wires, and pipes. Follow the anchor’s instructions: Drill the specified hole for an expansion or toggle anchor, or drive a self-drilling anchor without a pilot hole. Seat the anchor flush, add the fixture and matching screw, and tighten only until snug. If a stud is in the right place, fasten to it instead.
Drywall anchors are for 1/2-inch or 5/8-inch drywall only. Do not use them in plaster, lath, concrete, masonry, brick, stucco, tile over backer board, or metal studs; choose a fastener made for that surface.
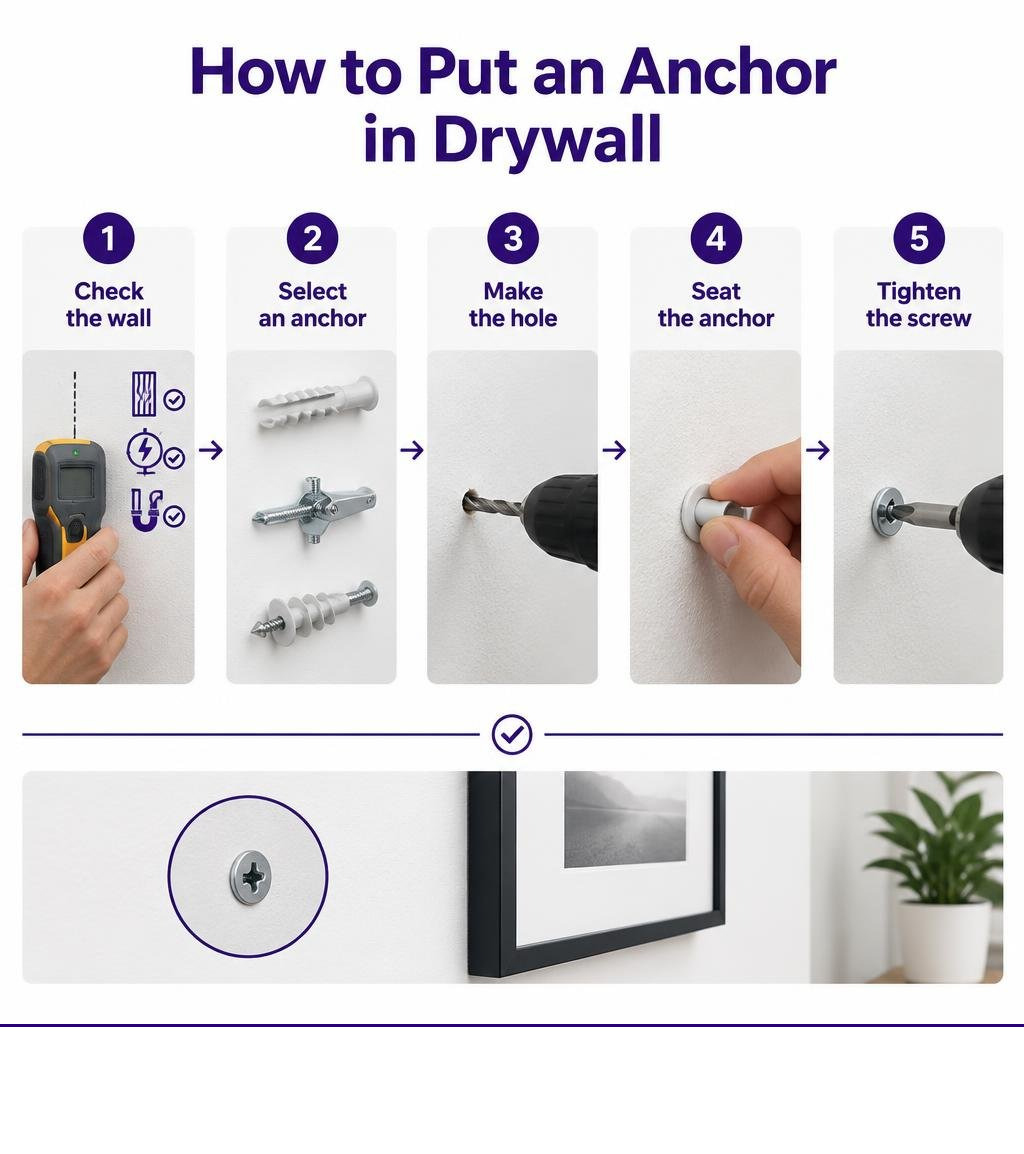
How to put an anchor in drywall vocabulary:
Why Drywall Needs Anchors: Shear Forces and Gypsum Mechanics
Standard interior walls rely on gypsum boards. In the United States, residential drywall panels are commonly manufactured in 1/2-inch or 5/8-inch thicknesses (with 1/4-inch, 3/8-inch, 3/4-inch, and 1-inch variants used in specialized construction). Gypsum provides fire resistance and sound dampening, but it lacks structural fibrous density.
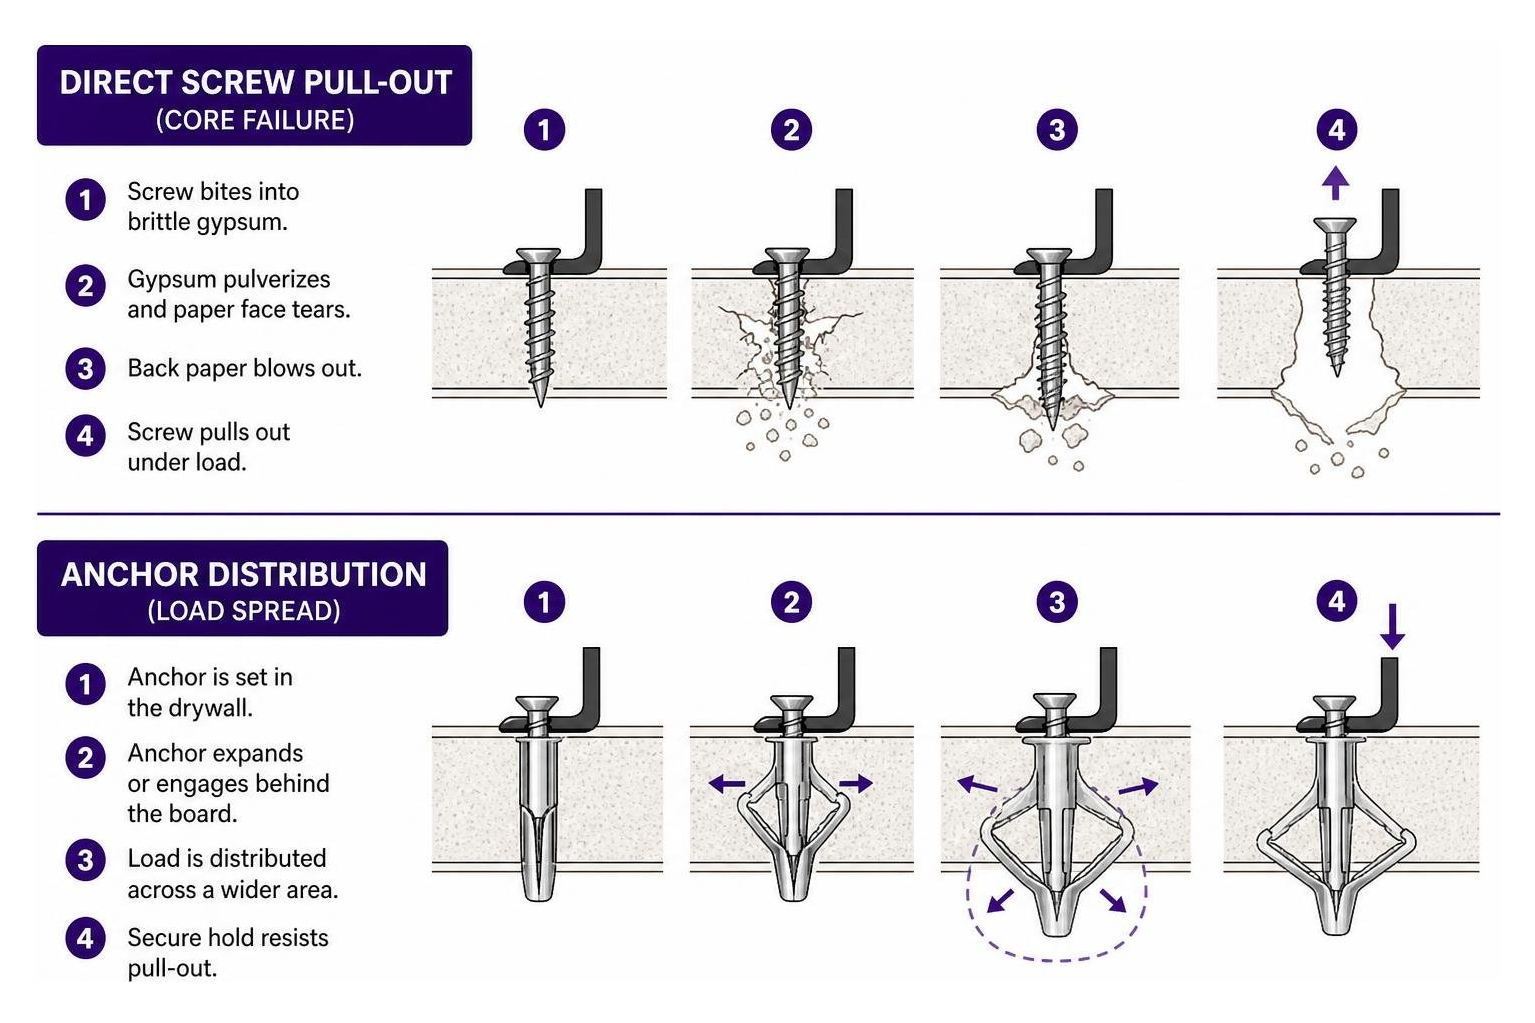
When you drive a standard wood or drywall screw directly into hollow drywall without hitting a stud, the screw threads bite only into brittle gypsum and thin paper facing. The moment you hang a piece of decor, downward gravity creates a vertical shear force, while the top of the bracket exerts outward tensile stress (pull-out force). Bare drywall cannot support these combined loads. The weight causes point stress that immediately pulverizes the chalky gypsum core, causing the screw to sag, tear through the paper, and pull out entirely.
Using dedicated fasteners creates a stable mounting point. Match the fastener to your wall assembly.
Understanding Gypsum Core Limitations
Drywall consists of calcium sulfate dihydrate compressed between two layers of heavy paper. Gypsum panel cores have high compressive strength under broad surface contact, but zero resistance against localized rotational or pull-out force.
When an overloaded screw fails, it experiences classic core pulverization:
- The metal threads mill the dry gypsum into loose white dust.
- The front paper face tears away from the core around the screw head.
- The back paper face blows out outward, forming a hollow conical crater.
Before choosing hollow-wall hardware, verify whether framing exists behind your target location by evaluating studs versus hollow drywall anchors.
How Drywall Anchors Distribute Load Weight
Drywall anchors prevent pull-out failure by distributing dynamic and static loads over a broader surface area of the gypsum panel. Instead of relying on a tiny 1/8-inch screw thread, an anchor expands, clamps, or threads deeply into the board.
Hollow wall anchors function through three primary mechanical principles:
- Friction and Expansion: Plastic expansion plugs spread outward inside the pilot hole as the screw drives forward, wedging tightly against the gypsum tunnel.
- Broad Thread Engagement: Self-drilling anchors use deep, wide external threads to grab a large surface area of the gypsum without pre-drilling.
- Mechanical Clamping: Toggle bolts, molly bolts, and heavy-duty load-spreading anchors pass through the panel and clamp flat against the rear paper face. This transfers the vertical shear load across inches of solid wall board rather than a single puncture point.
Step-by-Step Guide on How to Put a Anchor in Drywall
Installing anchors correctly requires clean alignment, proper pilot sizing, and torque control.
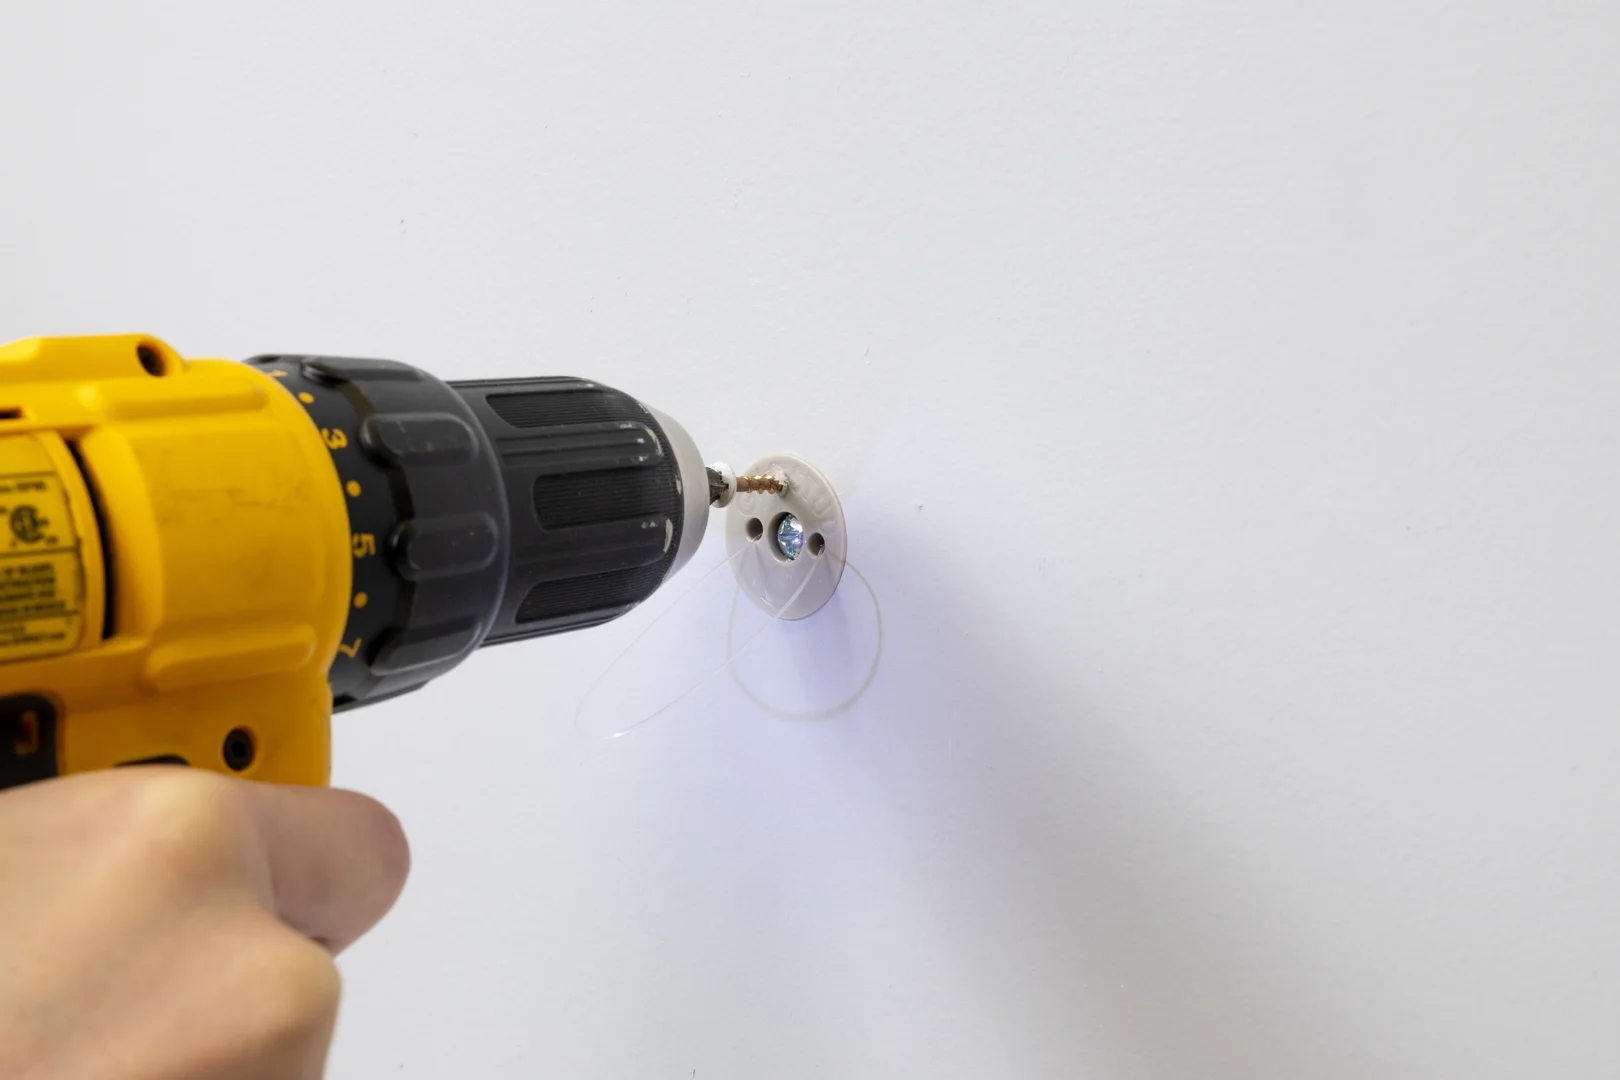
Review our detailed step-by-step drywall anchor guide for variations across specialty hardware.
Tools and Materials Needed
Gather these items before starting your installation:
- Electronic stud finder
- Cordless drill or variable-speed drill driver
- #2 Phillips manual screwdriver
- High-speed steel drill bits (sized to match anchor package specs)
- Bubble torpedo level
- Pencil and painter’s tape
- Safety glasses
- Selected wall anchors and matching machine or sheet metal screws
Preparing the Wall and Marking Anchor Placement
- Scan for framing: Run your electronic stud finder across the intended mounting zone. Standard residential wood studs sit on 16-inch or 24-inch centers. If your layout aligns directly over a stud, skip hollow-wall anchors and drive structural wood screws directly into the framing.
- Check for hazards: Check above and below your marked spots for light switches, outlets, or plumbing fixtures to avoid hidden electrical conduits or water lines inside the stud bay.
- Mark and level: Place painter’s tape on the wall, set your fixture or bracket against it, and verify horizontal level using your torpedo level. Mark the screw centers clearly with a pencil.
- Follow instructions: Follow the anchor packaging to confirm the required clearance behind the wall cavity.
How to Put a Anchor in Drywall Using Self-Drilling Fasteners
Self-drilling anchors (available in nylon and zinc) feature an integrated drill-point tip that cuts its own path through drywall. Zinc self-drilling drywall anchors can support up to 50 lbs in vertical shear applications on standard wallboard. They eliminate pre-drilling, reducing installation time by up to 50% compared to traditional plugs.
If you don’t have power tools available, read about installing drywall anchors without a power drill.
Follow these steps for self-drilling fasteners:
- Position the tip: Place the sharp point of the self-drilling anchor directly on your pencil mark.
- Engage the drywall: Apply firm, straight inward pressure with a #2 Phillips manual screwdriver. Turn clockwise. Do not use an impact driver or high-speed drill, as over-spinning pulverizes the core and destroys holding power.
- Drive to flush: Continue turning clockwise until the wide outer collar sits perfectly flush with the wall paper face. Stop immediately once flush. Over-tightening will countersink the collar and crush the paper backing.
- Mount the fixture: Align your bracket over the center hole. Drive the provided screw through the fixture into the anchor body using your screwdriver until the bracket sits snug against the wall.
How to Put a Anchor in Drywall with Expansion and Toggle Systems
For standard expansion plugs, molly bolts, and spring toggle bolts, follow these steps:
- Drill the pilot hole: Select a drill bit matching the exact diameter marked on the anchor packaging. Keep the drill bit strictly perpendicular (90 degrees) to the wall surface to prevent an oval, oversized hole.
- Insert expansion or molly sleeves:
- Plastic Expansion Anchors: Push the plastic sleeve into the hole. If snug, tap it gently with the handle of a screwdriver until the flange is flush with the wall.
- Molly Bolts: Push the metal sleeve into the hole until the anti-rotation prongs bite into the front drywall paper.
- Install spring toggles:
- Thread the machine screw through your fixture bracket first.
- Thread the spring-wing toggle onto the screw tip with the wing points facing the screw head.
- Squeeze the spring wings flat with your fingers and push the entire assembly through the drilled hole until the wings spring open inside the wall cavity.
- Pull outward on the bracket to hold tension on the wings against the back of the drywall while tightening the screw with a manual screwdriver.
Selecting the Best Anchor by Weight Capacity
Choosing an anchor requires matching the weight and dynamic profile of your decor to your wall construction. See our guide on choosing anchors based on shear ratings for detailed calculations.
| Anchor Class | Typical Hole Size | Drywall Thickness | Rated Shear Capacity | Best Applications |
|---|---|---|---|---|
| Plastic Expansion Plug | 3/16 in to 1/4 in | 1/2 in or 5/8 in | 5 to 15 lbs | Small picture frames, smoke detectors, wall clocks |
| Self-Drilling Zinc Anchor | No pre-drill (self-tapping) | 1/2 in or 5/8 in | Up to 50 lbs | Medium mirrors, light wall sconces, small framed art |
| Hollow-Wall Molly Bolt | 5/16 in to 3/8 in | 1/2 in or 5/8 in | 25 to 50 lbs | Fixed wall clocks, coat hooks, decorative shelving |
| Spring Toggle Bolt | 3/8 in to 3/4 in | 1/2 in or 5/8 in | 50 to 100 lbs | Floating shelf brackets, hanging plants, ceiling fixtures |
| GHOSTUD GS1 | 1-inch hole saw | 1/2 in or 5/8 in | Up to 250 lbs | Towel bars, toilet paper holders, curtain rods, picture frames, light shelving |
| GHOSTUD GS2 | 2-inch hole saw | 1/2 in or 5/8 in | Up to 1,000 lbs shear | Flat-screen TVs, wall cabinets, large mirrors, heavy static loads |
Mounting something heavy where there’s no stud? GHOSTUD® spreads the load across the drywall with a wide backplate instead of relying on the gypsum core. GS1 holds up to 250 lb shear, GS2 up to 1,000 lb. Made in the USA from recycled structural plastic. Shop GHOSTUD® from $16.99 →
Lightweight to Medium-Duty Wall Anchors
- Plastic Expansion Plugs (5–15 lbs): Simple plastic sleeves are sufficient for stationary decor weighing under 5 lbs, such as basic artwork or light calendar boards. Avoid using these for fixtures that experience pulling or daily handling.
- Threaded Zinc Anchors (Up to 50 lbs): Excellent for quick installations on items between 10 and 30 lbs. Zinc options resist shear stress better than nylon versions and bite cleanly into gypsum.
- Hollow-Wall Molly Bolts (25–50 lbs): Metal expansion sleeves collapse outward on the back side of the board as you tighten the screw. They create solid mechanical holding, but they cannot be removed from inside the wall cavity once set.
- Spring Toggle Bolts (50–100 lbs): Toggle wings provide solid rear-clamping force. However, repetitive cyclic loading (such as tugging on a curtain or towel rod) can cause the narrow metal wings to wallow out the gypsum hole over time.
Heavy-Duty Mounting Solutions for Hollow Walls
When mounting heavy hardware without an accessible wood stud, standard drywall fasteners fail under heavy static loads or continuous dynamic movement.
For high-capacity installations in standard 1/2-inch or 5/8-inch drywall, GHOSTUD manufactures patented, load-distributed anchors made from 100% recycled plastic in the USA:
- GS1 High-Capacity Anchor: Requires a 1-inch hole saw for installation. Rated up to 250 lb in 1/2-inch or 5/8-inch drywall. Specifically engineered for dynamic, daily-use fixtures such as towel bars, toilet paper holders, curtain rods, picture frames, and light shelving.
- GS2 Heavy-Duty Anchor: Requires a 2-inch hole saw for installation. Rated up to 1,000 lb shear in 1/2-inch or 5/8-inch drywall. Designed for heavy static mounting including flat-panel TVs, upper cabinets, heavy shelving, and oversized mirrors.
Both models install using standard hole saws and are sold in 2-packs and 20-packs. Note the trade-offs: GHOSTUD anchors require cutting a clean 1-inch or 2-inch circular hole in the wall, represent a higher hardware cost per point than standard plugs, and are intended as permanent wall anchor installations.
When Not to Use Hollow Wall Anchors and Common Pitfalls
Structural and Prohibited Applications
Hollow wall anchors have specific structural limitations:
- Accessible Studs: Never use drywall anchors as a substitute for fastening directly into a wall stud when wood framing is accessible and correctly positioned for your layout. Structural wood framing always provides the strongest connection.
- Prohibited Safety Applications: Do not use drywall anchors—including GHOSTUD products—for grab bars, handrails, safety rails, ADA installations, aging-in-place hardware, fall-prevention equipment, or any fixture intended to support human body weight.
- Anti-Tip Restraints: Do not use hollow drywall anchors for child-safety furniture anti-tip restraints.
- Incompatible Wall Surfaces: GHOSTUD anchors are designed and rated strictly for 1/2-inch or 5/8-inch drywall. They are not suitable for plaster, lath, concrete, masonry, brick, stucco, tile over backer board, or metal studs. If you have these surfaces, select masonry anchors, concrete sleeve bolts, or dedicated tile-mounting systems instead.
Repairing Damaged or Stripped Anchor Holes
If an anchor spins freely or tears out, do not reinstall another standard anchor in the same damaged hole. The surrounding gypsum core is pulverized.
To repair the location:
- Back out the screw and extract the loose anchor using needle-nose pliers.
- Clear loose drywall dust from the opening.
- For small stripped holes (under 1/2 inch), patch the area using fiberglass mesh tape and setting-type joint compound. Sand smooth once cured, apply primer, and paint.
- Relocate your new mounting anchor at least 2 inches away from the repaired hole in fresh, intact drywall.
Frequently Asked Questions About Drywall Anchors
Do I need a pilot hole for self-drilling drywall anchors?
No. Self-drilling drywall anchors feature a sharp drill-point tip engineered to cut into gypsum without pre-drilling. Driving a pilot hole can reduce their thread bite. Position the tip directly on your pencil mark and drive it slowly with a manual screwdriver.
Can I use standard drywall anchors in plaster or masonry walls?
No. Plaster over wood lath is brittle and prone to cracking under expanding fasteners, while solid masonry stops standard plastic or zinc threads immediately. Use masonry screw anchors (such as Tapcons) or lead expansion shields for brick, block, and concrete. For historic plaster and lath, use toggle bolts that open fully behind the wood lath strips.
How do I remove a drywall anchor without damaging the wall?
For plastic expansion plugs or self-drilling anchors, back out the central screw completely. Thread the screw back into the anchor collar by hand about two turns. Grip the screw head with pliers and pull the anchor straight out. Alternatively, for stubborn plastic plugs, place a wide Phillips screwdriver tip over the collar, tap it gently with a hammer to push the anchor just below the paper surface, and apply joint compound over the top.
Conclusion
Hanging decor safely comes down to understanding your wall structure, respecting gypsum limits, and matching hardware to your load. Always check for studs first, drill clean holes when required, and tighten fasteners by hand to prevent drywall blowouts.
Visit our drywall anchor guides for hardware walkthroughs and mounting specifications.
Now, take your tape measure, mark your points, check for framing, and mount your hardware with confidence.
Mount it once, mount it right. Compare GS1 and GS2 →