
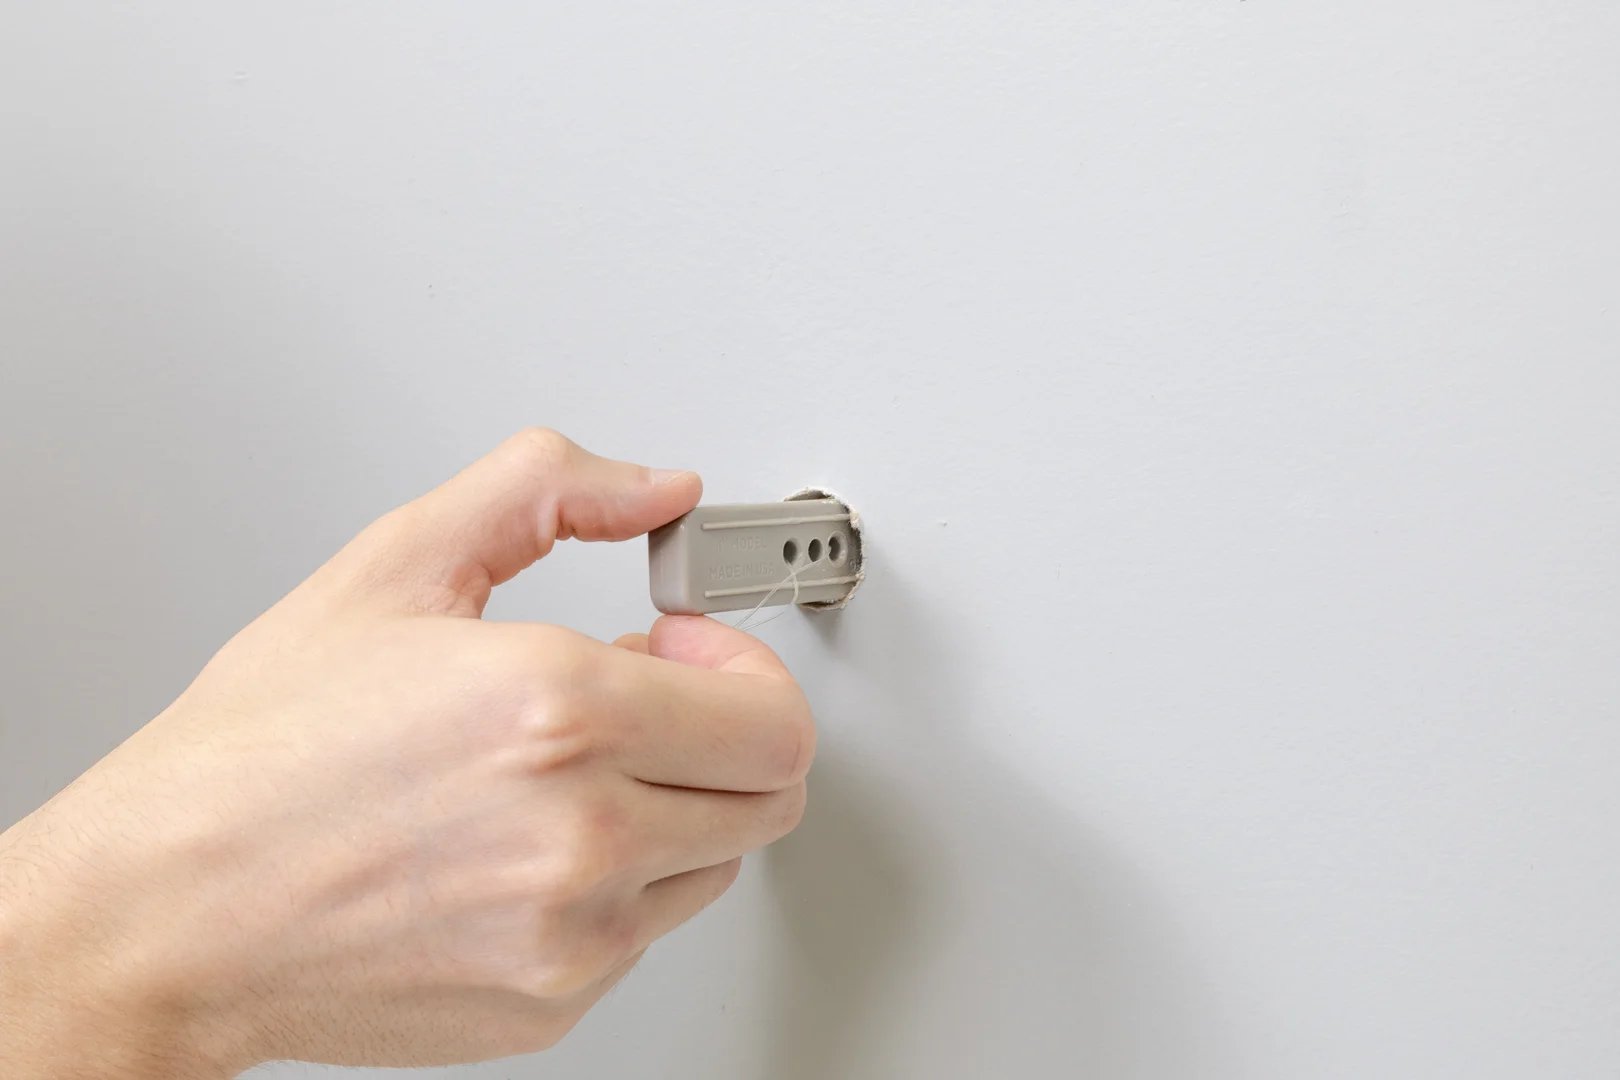
Why Shower Curtain Rods Fail and Pull Out of Drywall
Start by checking how the rod is held up. If a tension rod slips, clean and dry the wall and end caps, then reset the rod to the tension specified by its maker. If a wall-mounted bracket is loose, tighten its screws. If the screws or anchors have pulled out, remove the bracket and choose a shower curtain rod anchor suited to the wall. Don’t put a new anchor into crumbling drywall or assume a drywall anchor will work in tile.
I’m Trevor Jones, owner of a drywall anchor company, where I work on anchors for mounting jobs, including curtain rods. I’ll show you how to spot the cause of a loose rod before you make a hole you don’t need.
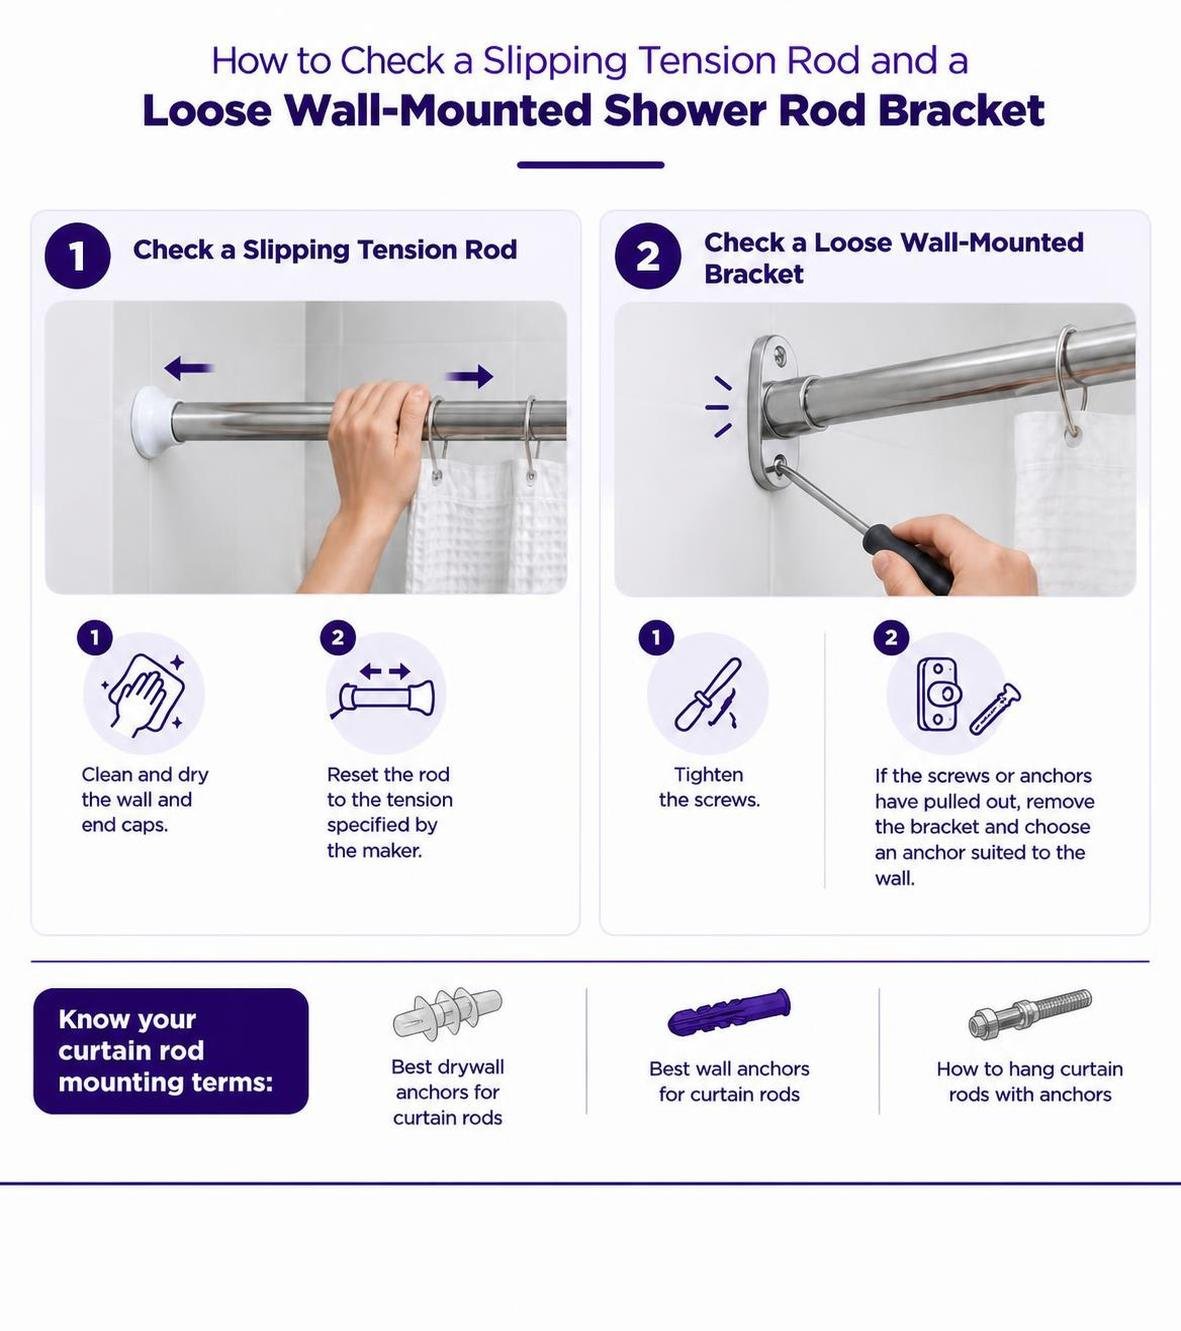
Know your curtain rod mounting terms:
- best drywall anchors for curtain rods
- best wall anchors for curtain rods
- how to hang curtain rods with anchors
Shower curtain rods face two primary forces: downward shear from static weight and dynamic pull-out torque from daily use. Standard straight shower rods hold roughly 2 to 5 lbs of fabric and metal rings. However, whenever someone draws the curtain, steps on the hem, or yanks the liner, that static load converts into dynamic leverage against the mounting points.
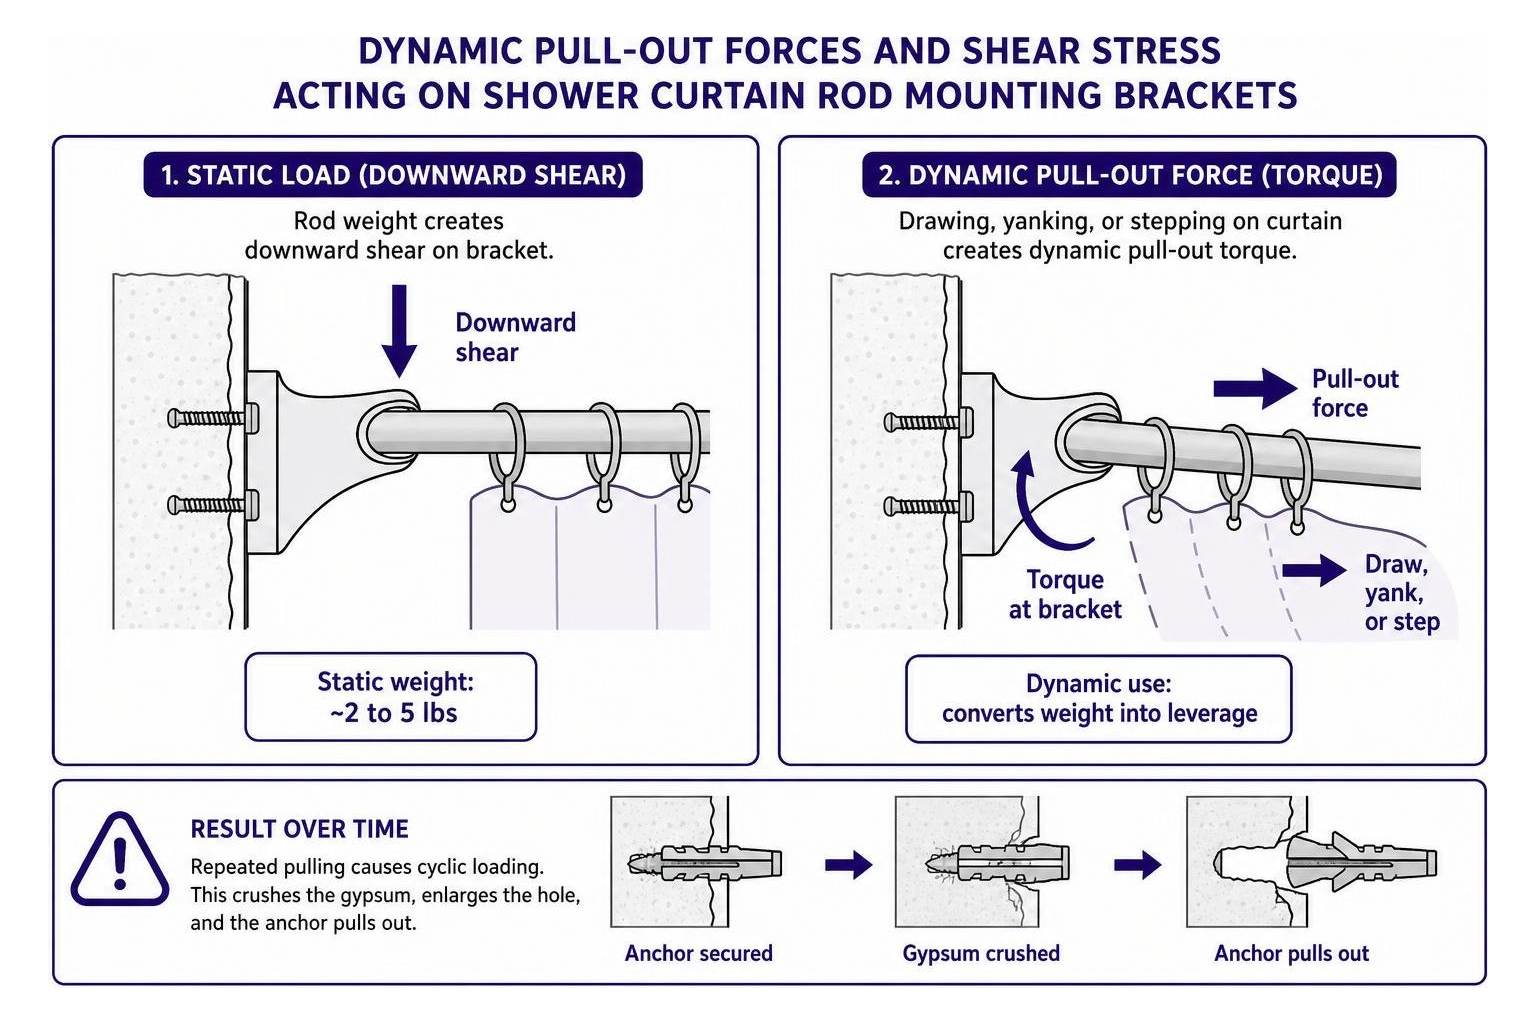
Drywall consists of a brittle gypsum plaster core sandwiched between two paper facings. When you mount a fixture using standard conical plastic expansion sleeves, the screw relies strictly on outward friction against that gypsum core. Over time, repeated pulling creates cyclic loading. This cyclic movement crushes the chalky gypsum inside the wall cavity, enlarging the hole until the anchor spins freely and pulls straight out.
Environmental conditions accelerate this failure. High humidity from daily showers softens the drywall paper facing and degrades the gypsum’s structural integrity. When users make common beginner mistakes with wall fasteners, such as selecting low-friction sleeves or failing to account for drywall anchor shear ratings, the fasteners inevitably pull free under minimal force.
Tension Rod Slipping vs Wall-Mounted Bracket Pull-Out
Tension rods and wall-mounted brackets fail through entirely different mechanical pathways:
- Tension Rod Slipping: Spring-loaded rods depend entirely on internal spring preload and surface friction between rubber end caps and the wall. Over time, internal springs lose tension, and rubber pads oxidize or collect soap scum. When friction drops below the downward force of the curtain, the rod slides down the wall.
- Wall-Mounted Bracket Pull-Out: Permanent rods use metal flanges screwed into the wall. Curved rods, in particular, project outward 6 to 9 inches past the tub centerline to provide interior room. This curved geometry acts as a physical lever arm. Every downward tug on the curtain multiplies the outward pulling force on the top mounting screw. Without solid backing, this rotational torque tears standard anchors straight through the drywall face. Following proven guidelines on how to secure curtain rods properly prevents these failures.
How to Secure and Fix a Loose Shower Curtain Rod Step-by-Step
Fixing a failing shower rod bracket requires basic hand tools and proper mechanical anchors. Follow these steps to restore a solid mount.

Required Tools and Materials
- Safety glasses and dust mask
- Stud finder
- Cordless drill and drill bit set (or hole saw depending on anchor type)
- Bubble level or laser level
- Phillips-head screwdriver
- Tape measure and pencil
- Replacement wall anchors suited to your wall type
If you are dealing with broken hardware or torn brackets, reference field-tested steps for fixing a damaged shower rod bracket before proceeding.
Step 1: Remove the Loose Bracket and Inspect the Hole
- Loosen the set screw on the underside of the decorative flange cover using a precision screwdriver.
- Slide the flange cover along the rod to expose the mounting plate.
- Remove the existing screws holding the mounting plate to the wall.
- Take down the rod assembly and set it aside.
- Inspect the mounting hole. If a plastic sleeve pulled out, check whether the surrounding gypsum core is solid or blown out into a wide crater. Clean loose drywall crumbs from the opening before inserting wall anchors properly.
Step 2: Enlarge or Clear the Mounting Hole
If the drywall around the old screw hole is crushed or enlarged beyond its original size, a standard replacement screw will not bite.
- If you are installing an expandable toggle or mechanical hollow-wall anchor, drill out the damaged hole to the exact diameter required by the anchor manufacturer (typically 3/8-inch or 1/2-inch).
- Clean all drywall dust from inside and around the hole using a shop vacuum or damp rag.
- If working on budget repairs without power equipment, learn the basics of installing anchors without a drill to prevent further paper tearing.
Step 3: Insert the Wall Anchor and Secure the Mounting Flange
- Insert the chosen wall anchor into the prepared hole, ensuring the mounting face sits completely flush against the drywall surface.
- Align the shower rod bracket over the anchor holes.
- Verify that the bracket is level by setting a small torpedo level across the top edges of both opposing brackets.
- Drive the mounting screws through the bracket into the anchors until snug. Refer to our step-by-step anchor installation guide to avoid over-torquing, which can strip hollow-wall fasteners.
- Remount the rod into the sockets and tighten all bracket set screws securely.
Selecting the Right Wall Anchor for Every Wall Type
Different wall substrates require dedicated mounting hardware. Using the wrong fastener causes immediate joint failure or cracked wall surfaces.
| Wall Material | Recommended Mounting Solution | Typical Load Capacity Range | Limitations & Notes |
|---|---|---|---|
| Drywall (1/2″ or 5/8″) | Heavy-duty hollow wall anchors / Toggle bolts | 50 to 250+ lbs | Fails if gypsum core is crushed; match anchor to wall thickness |
| Wood Stud behind Drywall | #8 or #10 Stainless steel wood screws | 100 to 300+ lbs | Requires precise stud location; no hollow anchor needed |
| Ceramic / Porcelain Tile | Diamond-drilled hole with masonry/tile anchor | 30 to 75 lbs | Must use masonry bits; do not use standard drywall anchors |
| Fiberglass Shower Surround | Factory-installed wood blocking / Surface adhesive mounts | 15 to 40 lbs | Never use expanding drywall anchors in thin fiberglass |
Review our comprehensive curtain rod mounting guide to match bracket styles with wall construction. For more background on anchor selection, see our guides on drywall anchoring. GHOSTUD anchors are engineered exclusively for 1/2-inch or 5/8-inch drywall installations. They are not suitable for tile, fiberglass, concrete, plaster, or masonry backer boards.
Choosing a Drywall Anchor for the Load
Standard plastic expansion sleeves hold 10 to 20 lbs of pure static downward shear in solid 1/2-inch drywall. However, they provide near-zero resistance to dynamic cantilever pull-out forces. For permanent straight rods, threaded self-drilling zinc anchors offer superior hold for loads up to 40 lbs.
For curved shower rods, dual-rod setups, or households with children, select hollow-wall fasteners specifically built for dynamic loads. Follow our guide on choosing anchors for heavy loads to calculate total hardware stress. Always distinguish between shear ratings (downward parallel force) and pull-out ratings (outward perpendicular tension).
Upgrading to a Heavy-Duty Wall Anchor for Damaged Drywall
When a bracket rips a large, jagged hole in 1/2-inch or 5/8-inch drywall, standard retail anchors will not seat properly. In these situations, install the GHOSTUD GS1.
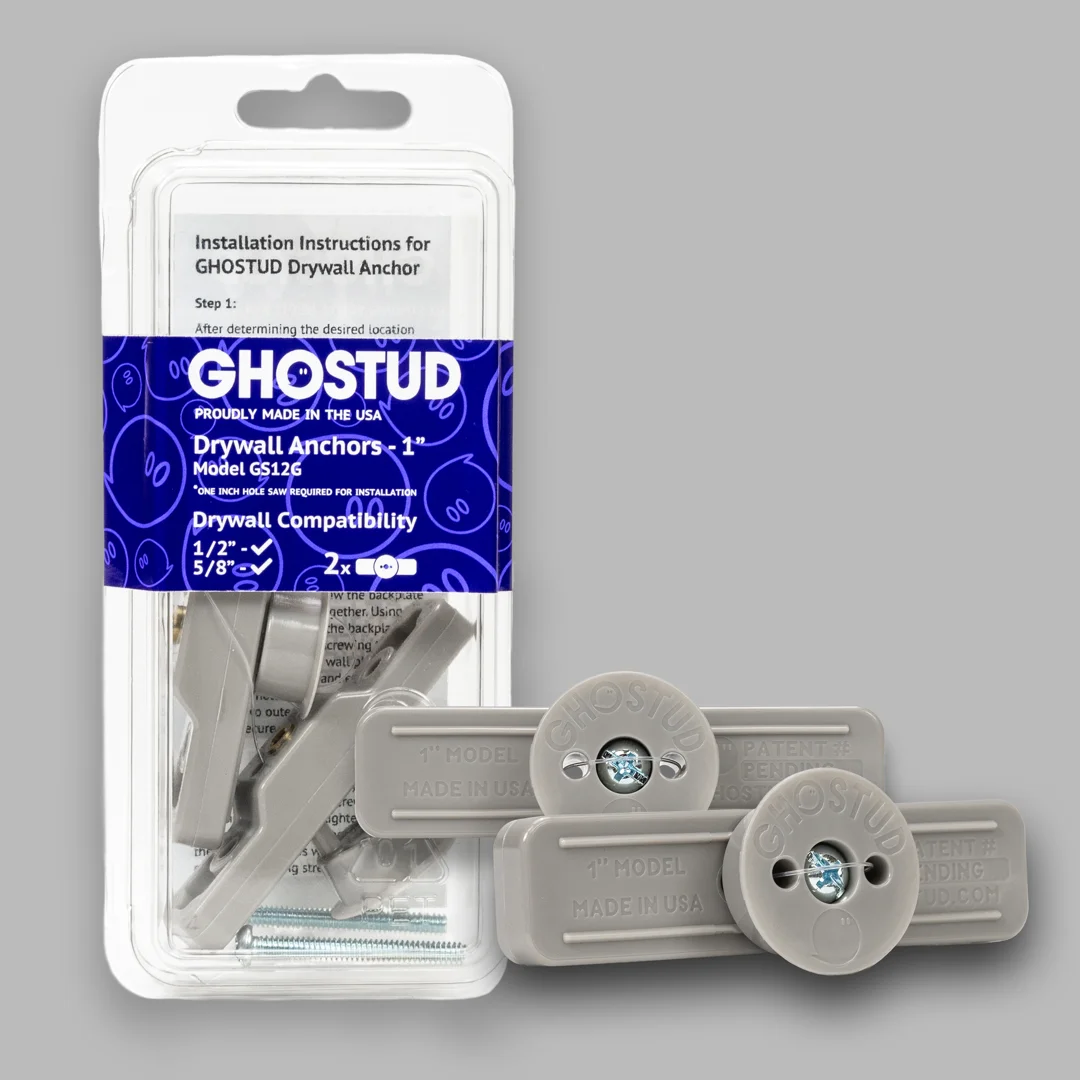
The GS1 drywall anchor requires a 1-inch hole saw for installation and provides a load rating of up to 250 lbs in 1/2-inch or 5/8-inch drywall. Manufactured in the USA from 100% recycled material, the GS1 distributes clamping force over a broad surface area behind the wall. This design eliminates the point-load stress that wallows out drywall holes under daily pulling.
Trade-offs to consider: The GS1 requires cutting a clean 1-inch hole with a hole saw, represents a higher initial cost per anchor than commodity plastic plugs, and creates a permanent mounting location. If a wood stud is present directly behind your bracket location, do not use the GS1—fasten your bracket directly into the wood stud with #8 or #10 stainless steel screws.
Anchoring into Tile, Fiberglass, and Sloped Walls
When mounting outside standard drywall surfaces, use surface-specific hardware:
- Ceramic and Porcelain Tile: Drill mounting points using a carbide-tipped or diamond core drill bit at low speed with water lubrication to prevent tile cracking. Insert dedicated plastic masonry expansion plugs or specialized tile anchors into the solid backer board behind the tile.
- Fiberglass Surrounds: Thin fiberglass panels flex under load. Mount brackets only where manufacturer-installed wood backing exists behind the fiberglass, or utilize heavy-duty mechanical adhesive mounts.
- Sloped Ceilings and Mansard Walls: In bathrooms with angled ceilings, standard horizontal flanges cannot seat flat. Use ball-and-socket brackets designed for sloped wall shower rod mounts to adjust mounting angles while keeping the rod level.
- Curved and Double Rods: Consult manufacturer-provided curved rod installation specifications to confirm clearance dimensions before drilling into any tiled surround.
Checks to Make Before Repairing a Loose Shower Curtain Rod
Perform these diagnostics before buying hardware or drilling into your wall:
- Verify the mounting type: Determine whether you have a spring-tension rod, a twist-lock tension rod, or a mechanical wall-flange mount.
- Inspect bracket set screws: Check if the bracket is actually loose from the wall or if the rod is simply wobbling inside a loose socket. Tighten the underside set screws first.
- Scan for hidden framing: Run a stud finder over the mounting location. If a stud sits directly behind the loose hole, use standard 2-inch wood screws directly into the framing rather than a hollow-wall anchor.
- Evaluate drywall core condition: Press firmly around the loose anchor. If the drywall feels spongy, soft, or water-damaged from shower splash, cut out and replace the compromised drywall section before mounting new hardware.
Frequently Asked Questions About Shower Curtain Rod Mounting
How do you fix a shower rod bracket that ripped out of drywall?
Remove the loose bracket and clean away all crumbled drywall gypsum. If the hole is blown out, do not fill it with spackle and re-screw into the patch—spackle has zero structural tensile strength. Instead, enlarge the hole cleanly using a hole saw or drill bit to accommodate a mechanical toggle bolt or a high-capacity anchor like the GHOSTUD GS1 (rated up to 250 lbs in 1/2 in or 5/8 in drywall). Drive the mounting screws into the anchor’s solid internal backing plate.
What can I put on tension rod ends to stop them from falling?
Clean both the wall surface and rubber end caps with isopropyl alcohol to remove soap scum, hairspray residue, and body oils. For increased grip on slick ceramic tile, place thin squares of silicone grip material or textured rubber shelf liner between the end caps and the wall. Then, extend the tension rod 1 to 2 inches wider than the opening before compressing it into place to establish maximum spring preload.
Can you mount a shower curtain rod without drilling into tile?
Yes. Use a spring-loaded or twist-lock tension rod with non-marking rubber end pads, or install heavy-duty exterior-grade mounting adhesive brackets designed specifically for smooth, non-porous glazed tile. Do not attempt to use hollow drywall anchors or hole-cutting anchors on tile surfaces, as this will shatter the ceramic glaze.
Conclusion
Securing a loose shower curtain rod requires matching your fastener to the wall material and dynamic load. For slick tile installations where drilling is not an option, clean surfaces thoroughly and reset your tension hardware. For drywall installations where brackets have pulled loose under dynamic daily tugging, upgrade from weak plastic plugs to permanent, load-distributing mechanical anchors.
If you are mounting a straight or curved curtain rod into hollow 1/2-inch or 5/8-inch drywall, explore the GHOSTUD GS1 curtain rod anchor to provide up to 250 lbs of holding strength without relying on studs. Pick up your drill, verify your wall backing, and anchor your rod correctly.