
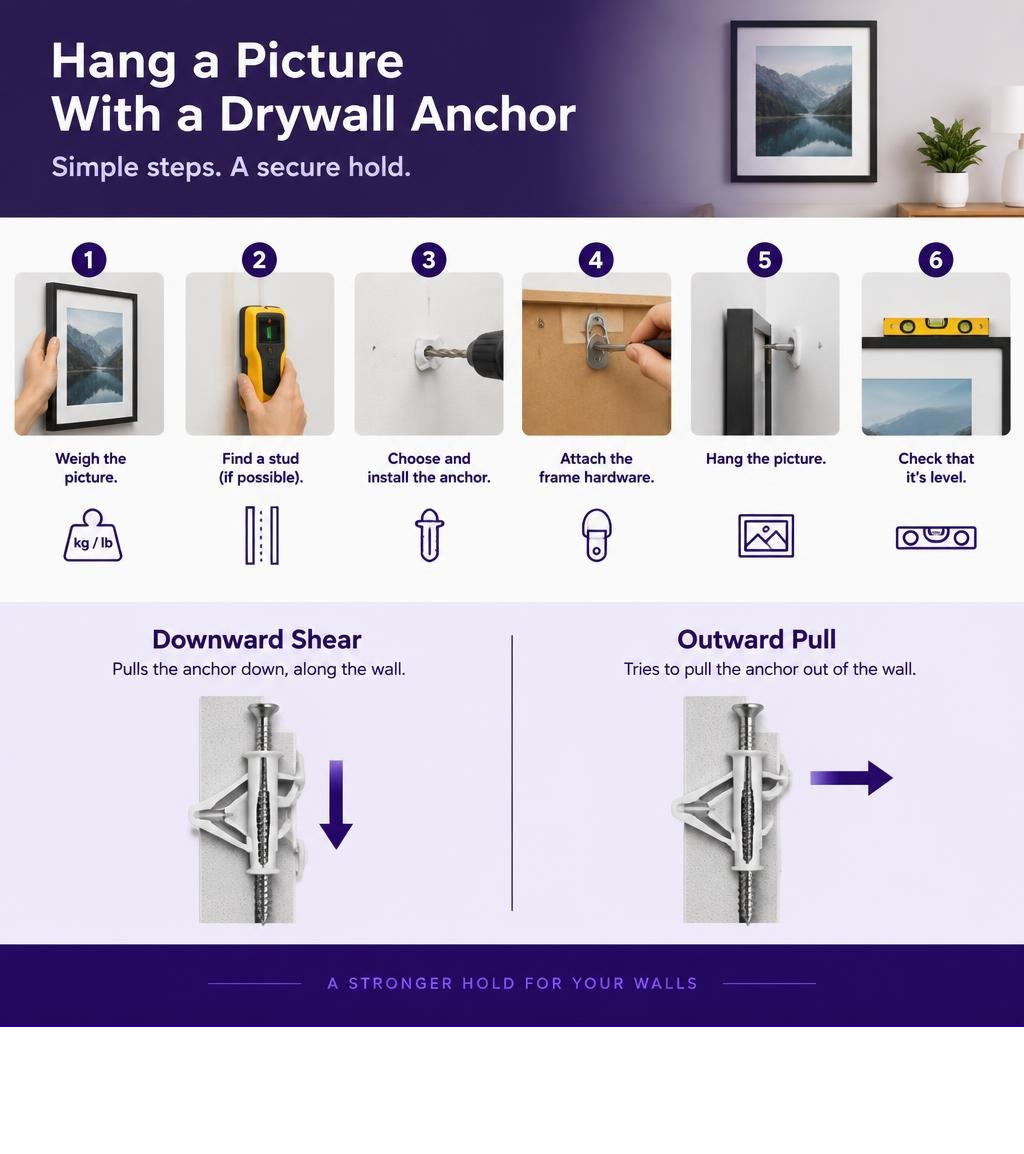
How to Hang a Picture With a Drywall Anchor
Weigh the framed picture first. Find a stud where you want to mount it; if one is properly located, fasten directly into the stud timber. If no stud is available, select a drywall anchor rated for the frame’s weight and wall thickness. Mark your location, install the fastener according to manufacturer directions, attach the mounting hardware, and verify level alignment.
Check your wall type before drilling. Drywall anchors are designed strictly for 1/2-inch or 5/8-inch drywall. For plaster, lath, concrete, masonry, brick, stucco, tile over backer board, or metal studs, use hardware engineered specifically for that substrate. If you are working with alternative surfaces or oversized wall decor, learn how to hang a heavy picture without damaging the wall or review techniques on how to hang a heavy picture on plasterboard and how to hang a heavy mirror on plasterboard.
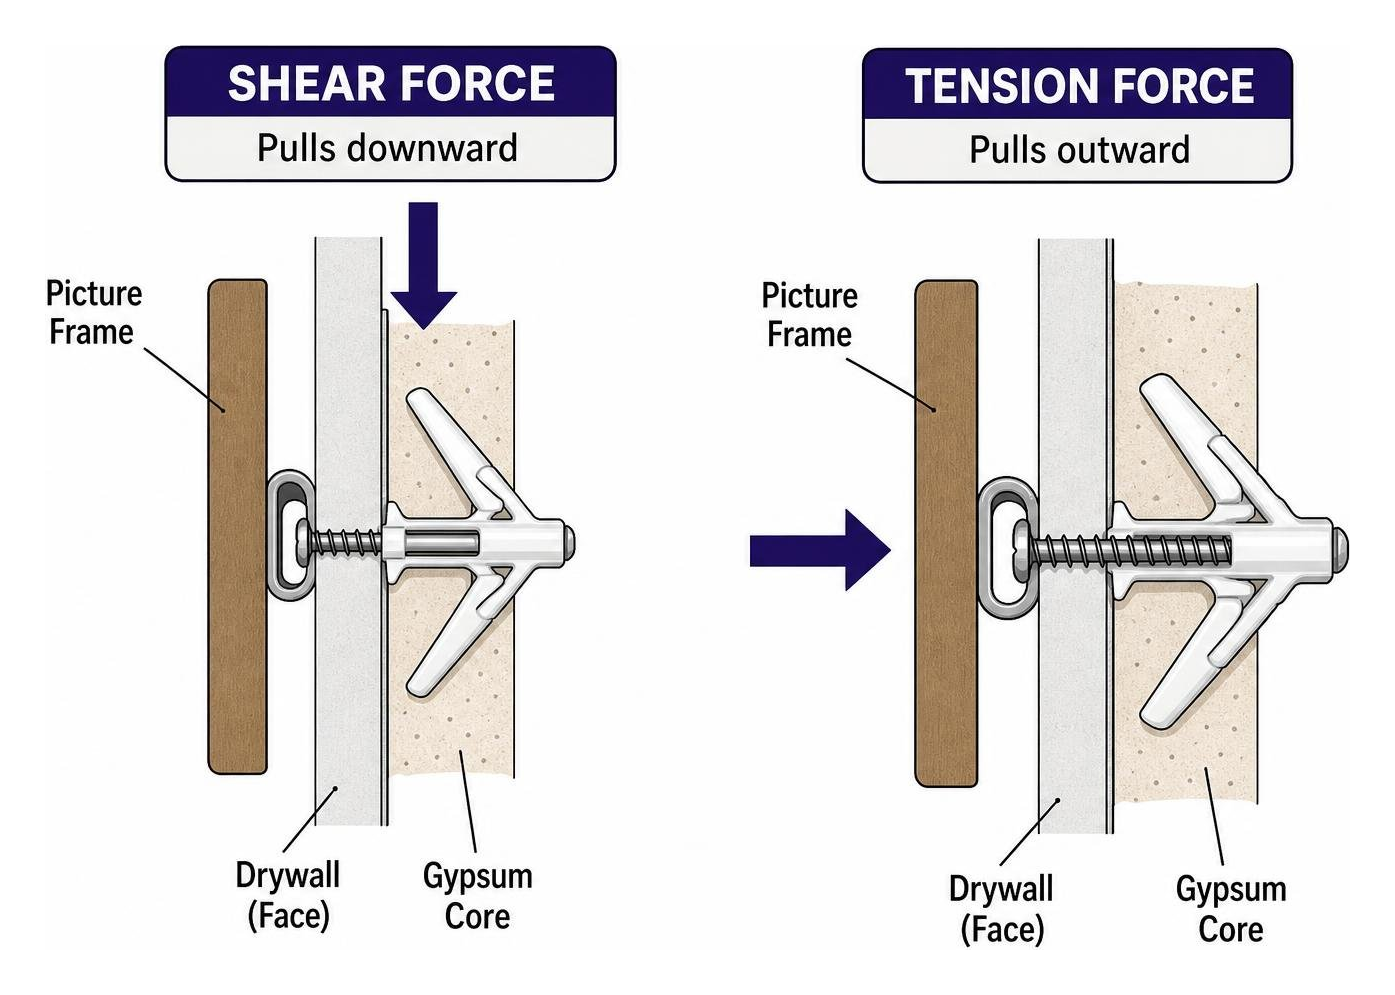
Drywall Anchor Hang Picture Physics: Shear, Pull-Out, and Gypsum Limits
Selecting the proper drywall anchor to hang a picture requires understanding two distinct physical forces: shear and tension. Shear force pulls straight down along the face of the drywall, parallel to the wall surface. Tension force pulls outward, perpendicular to the wall.
A picture frame hanging flush against the wall applies primarily downward shear load. However, long picture wire, thick mounting brackets, or forward-tilting frames create leverage that converts downward weight into outward tension.
Drywall consists of a compressed gypsum chalk core sandwiched between two structural paper faces. Gypsum has solid compressive strength under static downward loads, but very low tensile and shear strength. When a fastener exerts concentrated pressure on a small contact area, the gypsum core fractures.
Standard plastic sleeve anchors or basic screws cause core blowout when overloaded. The gypsum crumbles into powder inside the wall, leaving the fastener loose and widening the hole. Understanding these mechanics is essential when reviewing shear ratings explained for hollow-wall hardware.
To prevent wall failure, hardware must distribute downward weight across a broader surface area of the drywall backing. Standard 1/2-inch drywall spans most modern residential construction, while 5/8-inch drywall appears frequently in fire-rated walls and ceilings. Spreading the load behind these panels prevents localized gypsum fracture.
Step-by-Step Installation: How to Install Anchors for Wall Art
Follow these direct steps to mount artwork securely without damaging your walls.
Tools and Wall Preparation
Gather your tools before starting:
- Tape measure
- Torpedo level or bubble level
- Pencil
- Electronic stud finder
- Painter’s tape
- Cordless drill and appropriate drill bits
- Manual screwdriver
Prepare the wall space:
- Weigh the artwork: Step onto a standard scale with and without the frame to get the exact weight.
- Scan for utilities and framing: Run your stud finder across the intended mounting location. Check for hidden electrical wiring and plumbing lines before setting any hardware.
- Mark the position: Hold the frame at your desired height. Place a small piece of painter’s tape on the wall at the top center of the frame. Use a pencil to mark the exact hook location below that line. Check your alignment with a torpedo level. For a balanced display, position the center of the frame at a comfortable viewing height and confirm it is level.
- Control dust: Place a folded piece of painter’s tape beneath your pencil mark to catch falling drywall gypsum dust as you drill. If you are learning the fundamentals, review how to insert an anchor into wall spaces cleanly.
Drilling, Setting Fasteners, and Hanging the Frame
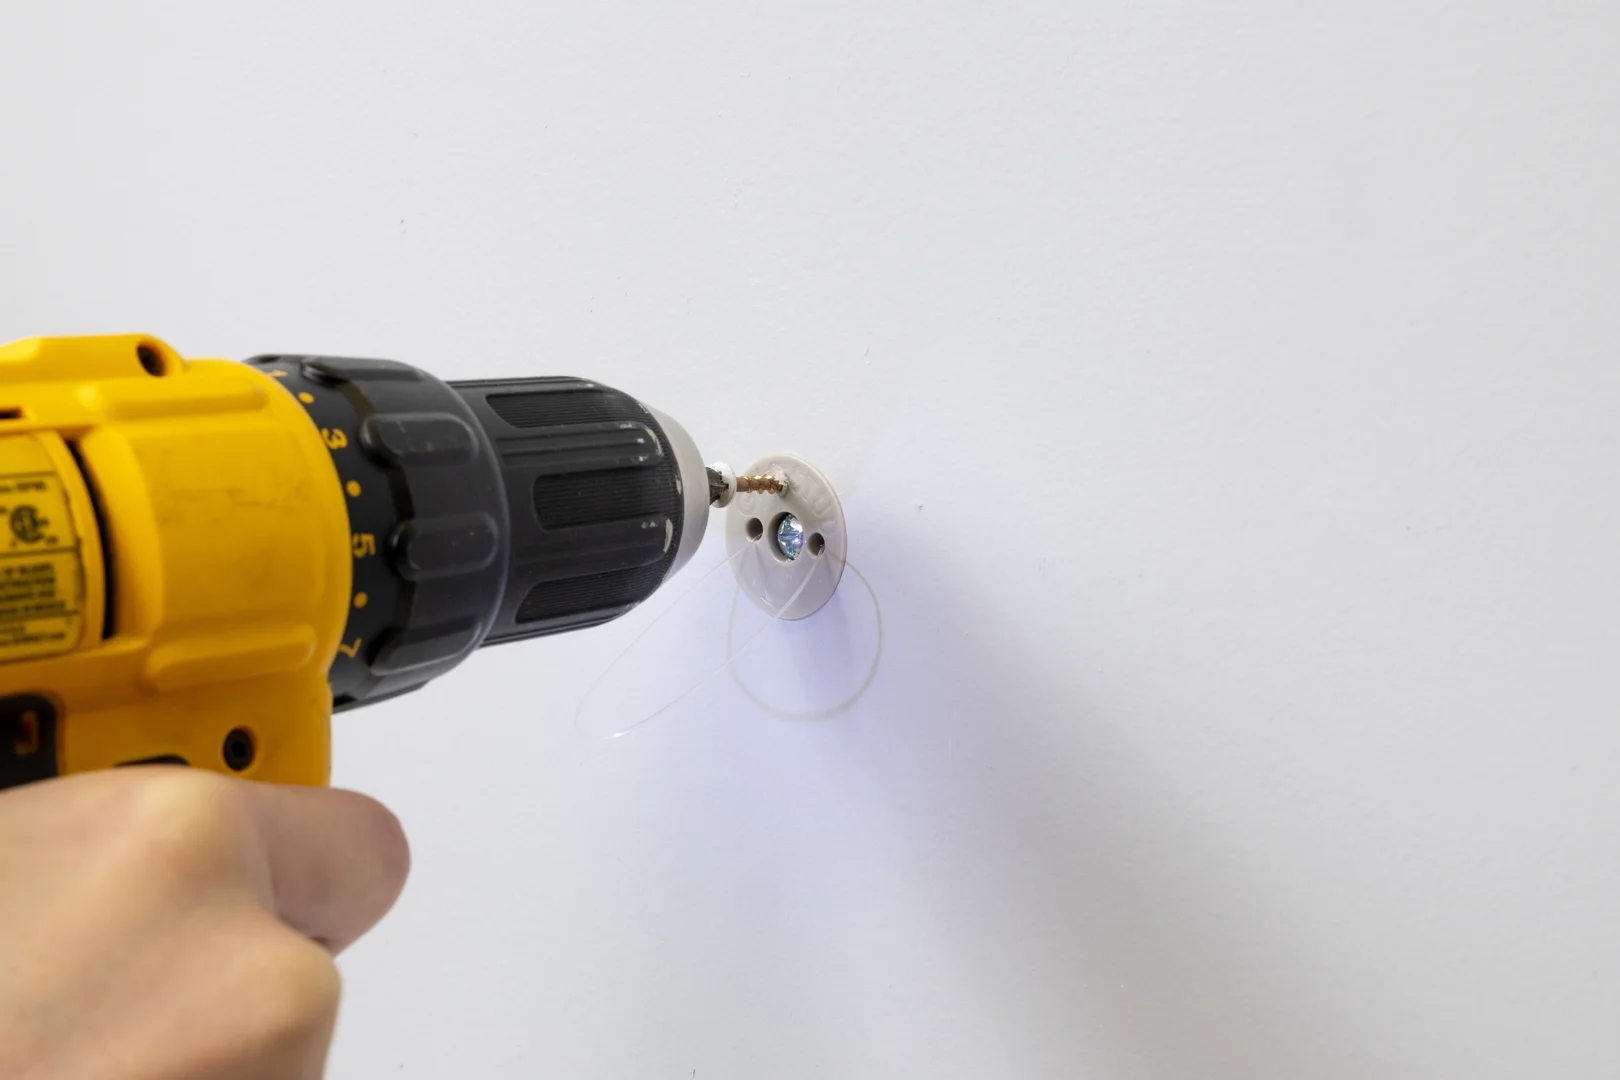
- Drill the hole: For standard expansion anchors, drill a pilot hole matching the anchor shank diameter. For high-capacity hardware such as the GHOSTUD GS1 drywall anchor that requires a larger opening, chuck a 1-inch hole saw into your drill and cut through the drywall panel at your pencil mark.
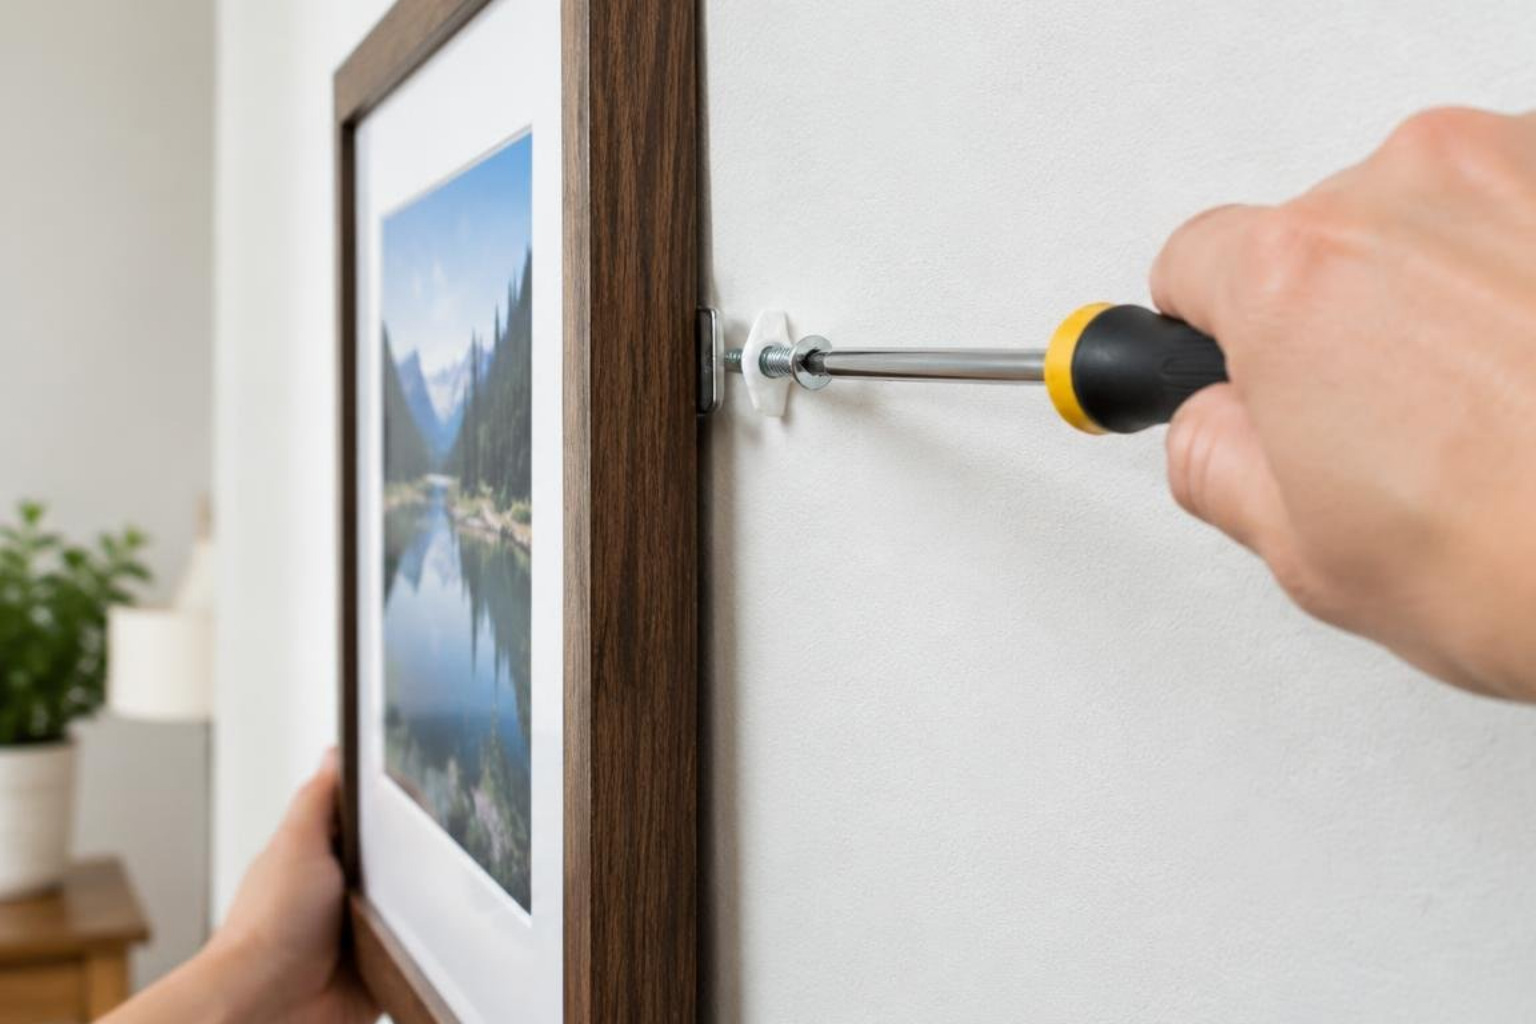
- Seat the anchor: Push or tap the anchor body into the pre-drilled opening until its collar sits completely flush against the drywall face.
- Drive the mounting screw: Thread the provided screw through your picture hook or bracket into the anchor center. Tighten with a manual screwdriver. Stop turning as soon as the screw seats firmly against the bracket. Do not overtighten, as excessive torque can strip plastic threads or crush the gypsum face.
- Hang and level: Align the frame’s D-rings or hanging wire onto the mounted hooks. Place your torpedo level across the top edge of the frame and adjust until centered.
Choosing Hardware by Frame Weight
Matching your fastener to the actual load prevents broken frames and damaged walls. Review this guide to drywall anchor types and our breakdown on selecting the right drywall anchor for your load to determine what your installation requires.
| Anchor Class | Typical Weight Range | Drywall Specification | Primary Application |
|---|---|---|---|
| Picture Nails / Hooks | 1 to 20 lb | 1/2 in or 5/8 in drywall | Small prints, light frames |
| Plastic Expansion Sleeves | 5 to 15 lb | 1/2 in or 5/8 in drywall | Small decorative pieces |
| Self-Drilling Screws | 15 to 30 lb | 1/2 in or 5/8 in drywall | Medium framed art |
When a Daily-Use Fixture Needs a Higher-Capacity Anchor
For small frames under 5 to 15 pounds, standard picture hooks or basic plastic expansion sleeves are entirely adequate. For dynamic, daily-use fixtures such as towel bars, curtain rods, and toilet paper holders, the GHOSTUD GS1 drywall anchor uses a 1-inch hole in 1/2-inch or 5/8-inch drywall and is rated up to 250 lb.
Heavy Static Loads Need a Different Solution
Large mirrors, TVs, cabinets, and heavy shelving are heavy static loads. When a stud is not present at the desired mounting location, a product designed for that load category is necessary; standard plastic plugs can tear out under sustained load.
GHOSTUD GS2 is intended for TVs, cabinets, shelving, mirrors, and other heavy static loads. It requires a 2-inch hole and is rated up to 1,000 lb shear in 1/2-inch or 5/8-inch drywall. That rating is for shear, not pull-out force; use a stud when one is accessible and properly located.
When Not to Rely on Drywall Fasteners: Studs and Alternative Walls
Hollow-wall anchors are designed strictly for empty stud cavities. Understanding when to use a drywall anchor vs stud is crucial for safe mounting.
- Accessible Wood Studs: If an accessible wood stud sits exactly where you want to place your hanging hardware, drive a coarse-threaded wood screw directly into the timber. A screw embedded into a structural stud provides the strongest possible support. Never use a hollow drywall anchor as a substitute when an accessible, properly located stud is available.
- Plaster and Lath: Older homes built before the mid-twentieth century typically feature plaster and wood lath walls. Gypsum drywall anchors will crack brittle plaster keys.
- Solid Masonry and Concrete: Solid brick, poured concrete, and cinder block walls require masonry drill bits and specialized masonry expansion anchors or concrete screws.
- Surface Limitations: GHOSTUD anchors are designed for 1/2-inch or 5/8-inch drywall only. They are not suitable for plaster, lath, concrete, masonry, brick, stucco, tile over backer board, or metal studs. Use hardware engineered specifically for those substrates.
Frequently Asked Questions About Drywall Anchors for Picture Hanging
Can I hang a heavy picture on drywall without hitting a stud?
Yes. You can hang heavy frames on drywall without a stud by using fasteners engineered to spread weight across the rear of the board. Ensure the fastener is rated for your frame’s total static weight in either 1/2-inch or 5/8-inch drywall panels.
How does a load-distributed drywall anchor support a picture?
A load-distributed anchor works by expanding or bracing against a broad surface area on the back face of the drywall sheet. Instead of concentrating downward shear load onto a small 1/4-inch hole that can crush the soft gypsum core, it transfers stress across several inches of solid wallboard.
How do I know what size drywall anchor to use for picture hanging?
Weigh the framed picture on a bathroom scale. For frames under 15 pounds, standard picture hooks or light-duty expansion anchors are sufficient. For large frames, heavy gallery pieces, or framed mirrors on hollow 1/2-inch or 5/8-inch drywall where no stud is present, install a heavy-duty anchor rated for the framed picture and drywall thickness.
Conclusion
Hanging pictures securely requires matching your frame’s weight to the proper hardware and verifying your wall material before drilling. For standard residential drywall, always check for studs first. When mounting locations do not align with framing, use rated hollow-wall anchors to protect your gypsum board from blowout.
For detailed mounting strategies across all hollow-wall projects, explore our guide to hanging heavy pictures and mirrors.
Take your tape measure, mark your target layout on the wall, and verify your frame weight before making your first pilot hole. Confirm whether the mounting point lands on a properly located wood stud. If it does not, check that the anchor matches both the frame’s total weight and the drywall thickness before drilling. Keep the frame close to the wall so its hardware carries mostly downward shear rather than extra outward pull. Recheck the level after the frame settles on its hardware.